If you are familiar with my blog, you know I have spent a lot of time working with golf balls. I recently had a request to describe the method I use to convert a ball into a bottle stopper. The ball can be carved or just left intact. If you have a “logo” ball from an event or favorite club, this method will work to add it to your bar-ware collection.
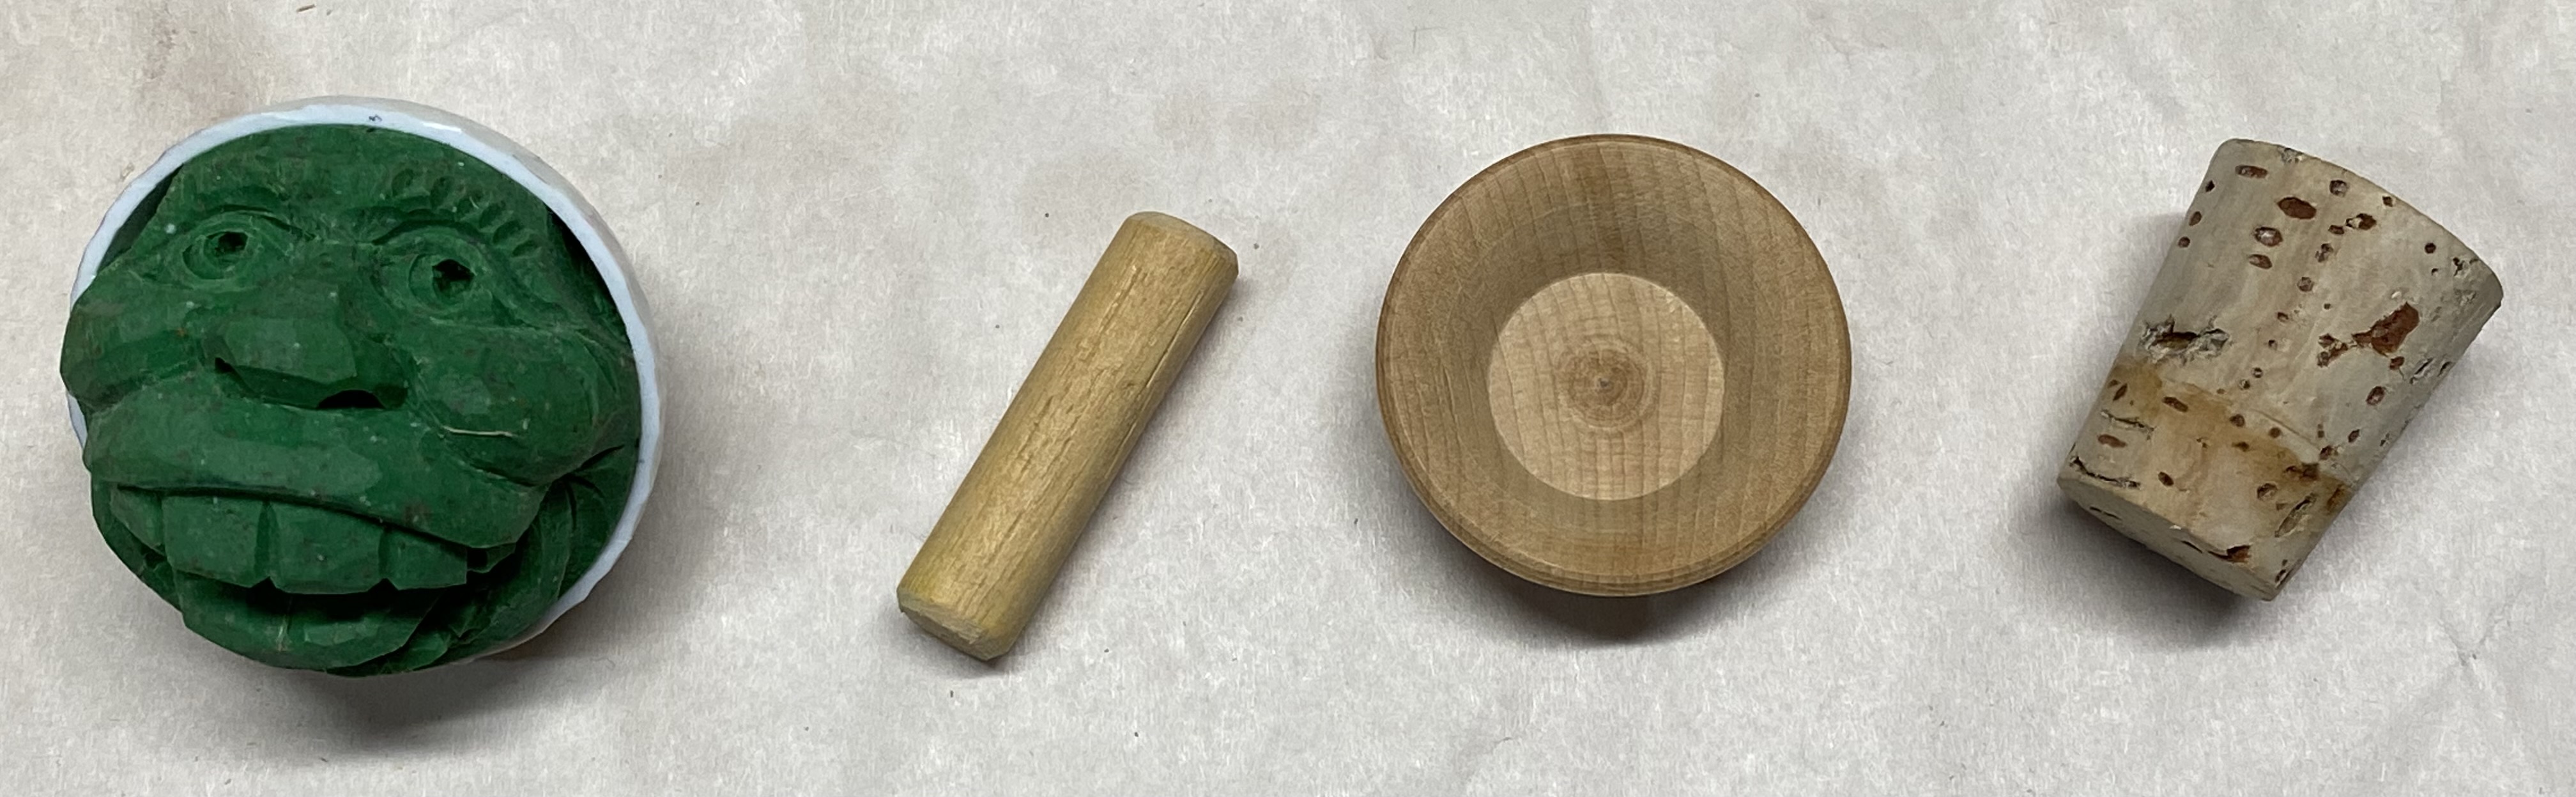
These are the parts we will use.
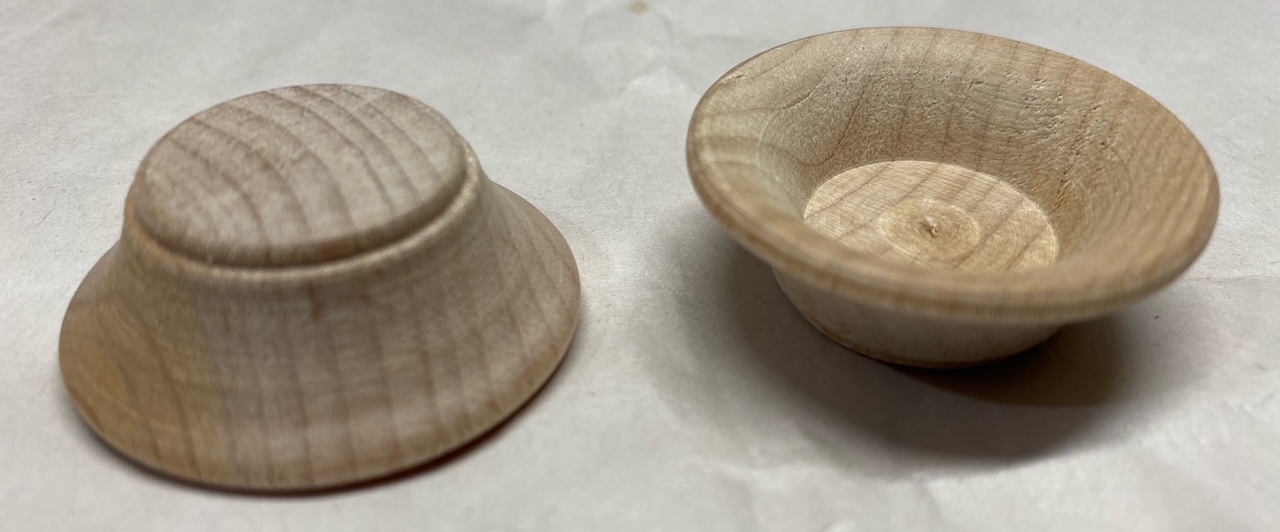
I found these small wooden saucers at a wood products company that is no longer in business. You can turn your own or find a substitute to make the transition from cork to ball. You may find someone online that sells these or something similar. You also have the option to skip this transition piece and put the cork against the ball.
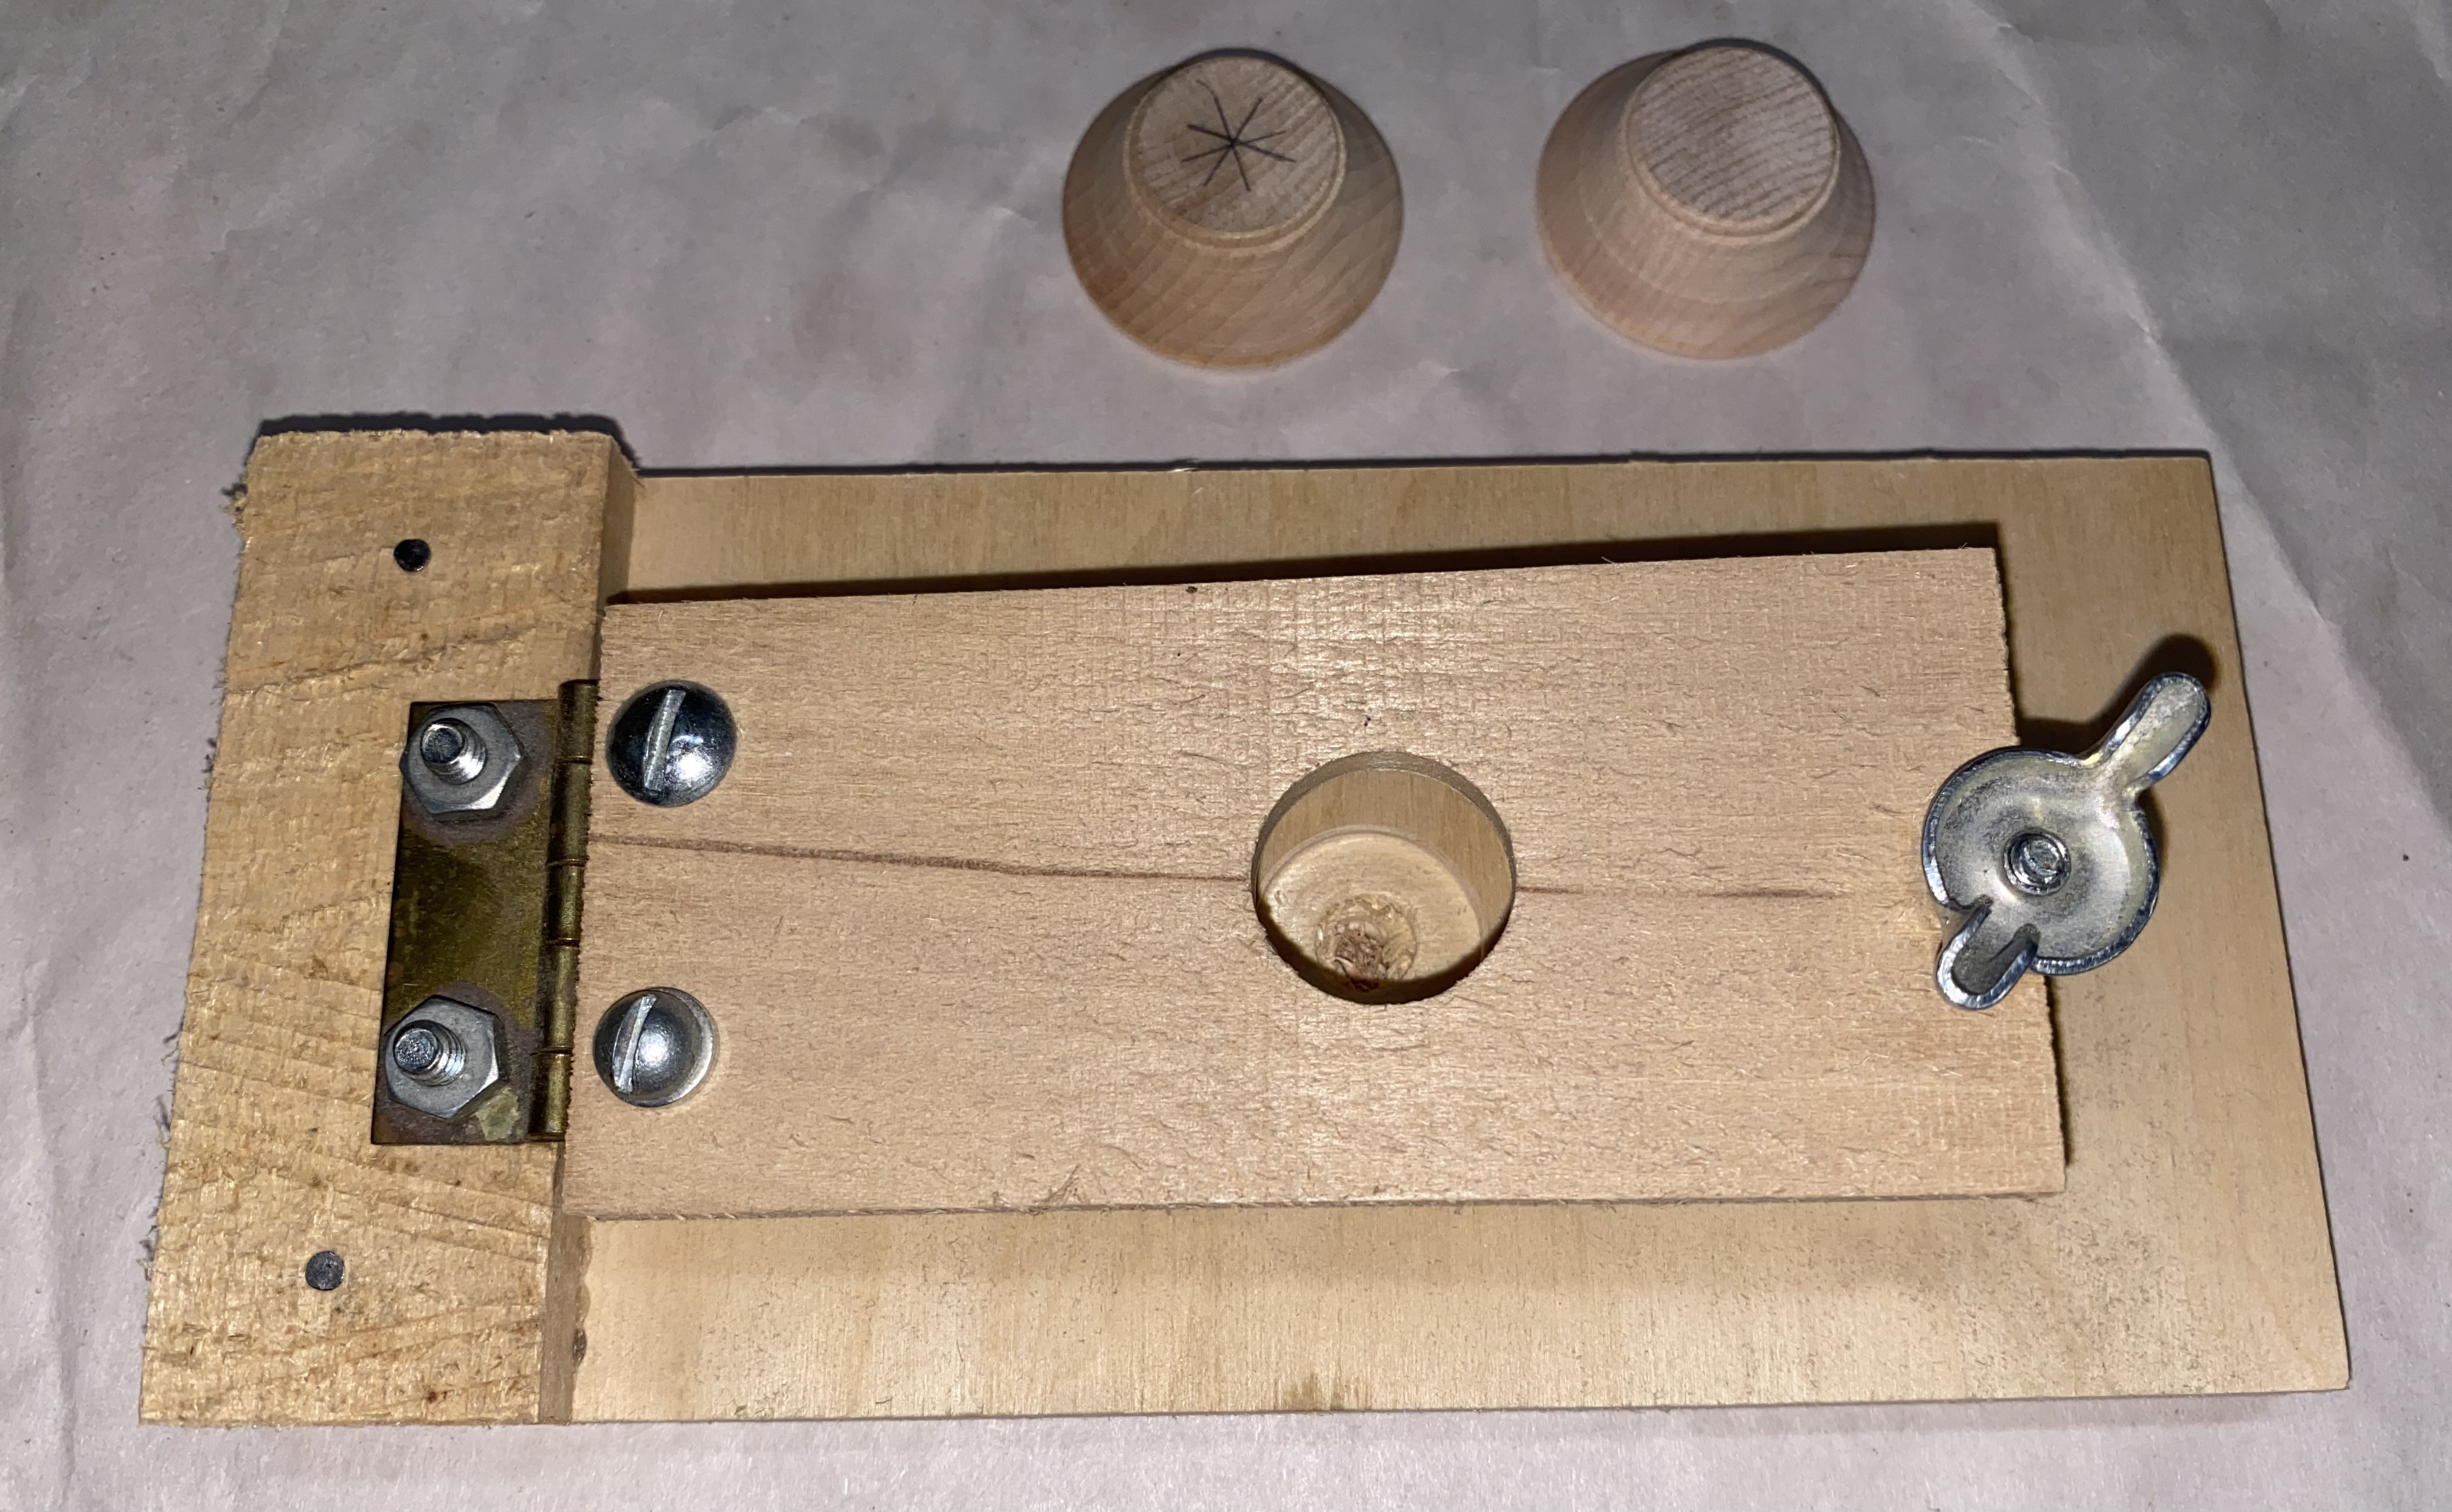
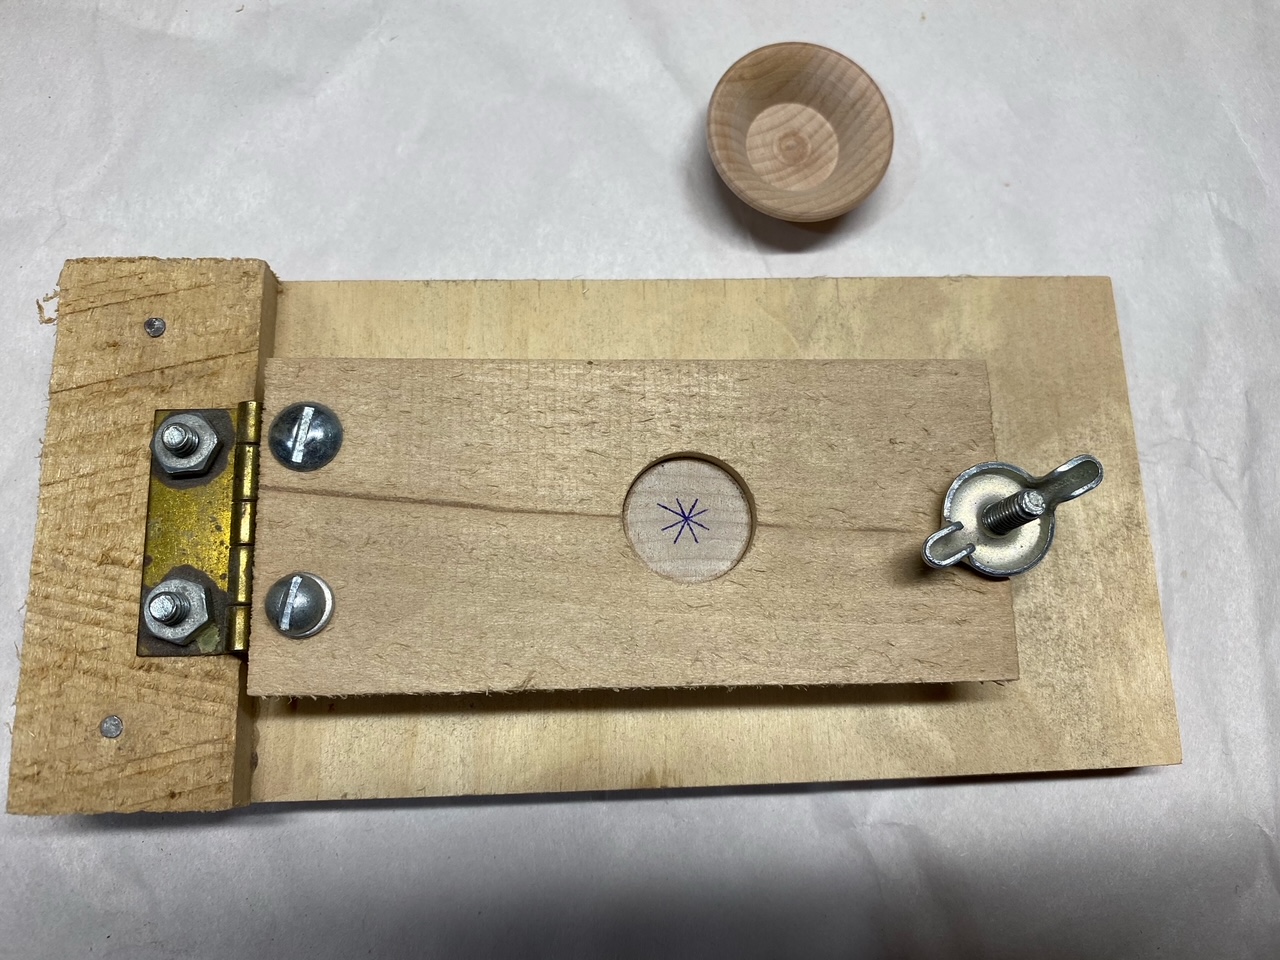
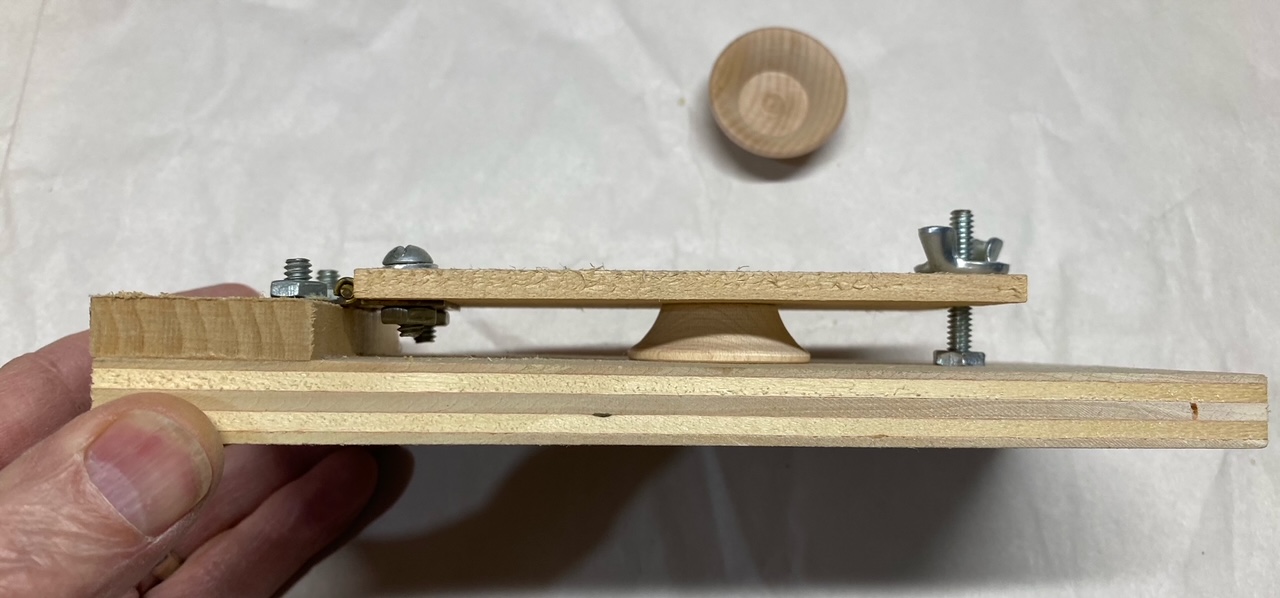
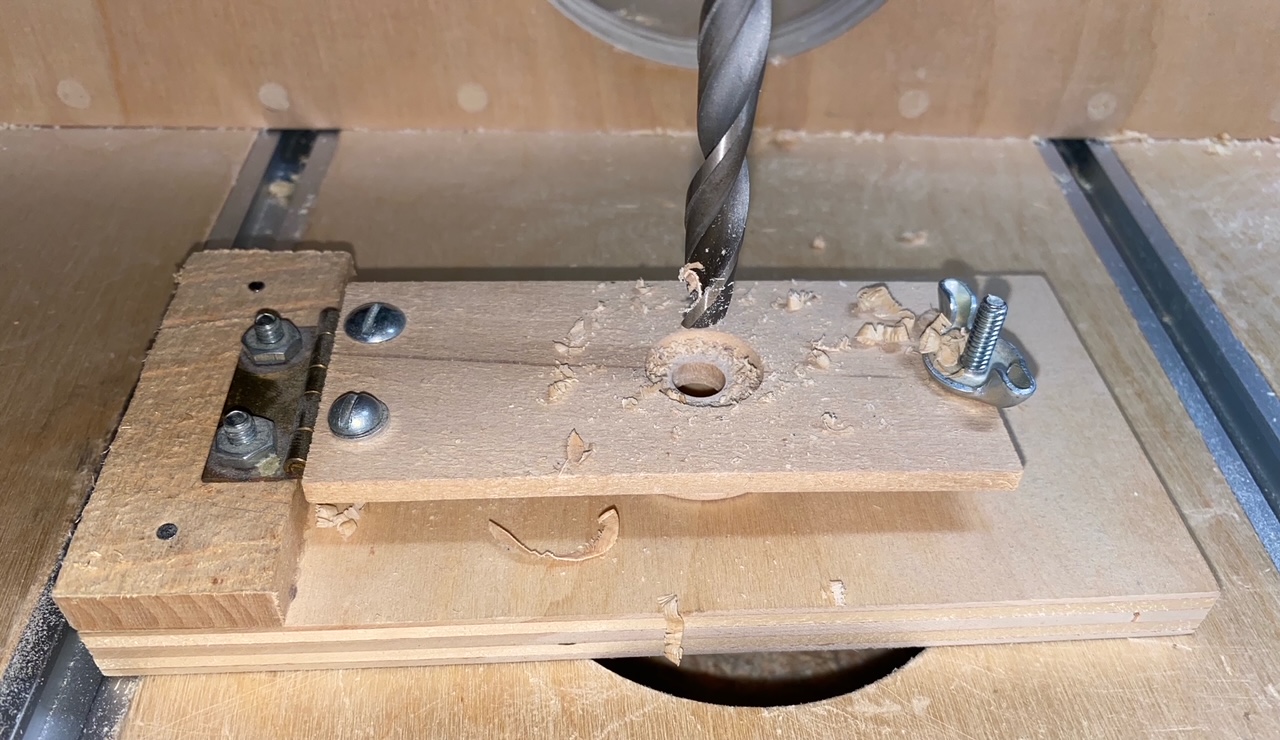
Because of the danger in hand-holding a small part when using a power tool, I made a more secure holding jig. Mark the center of the saucer. Place it into the jig and drill a 3/8 inch (6mm) hole through the saucer.
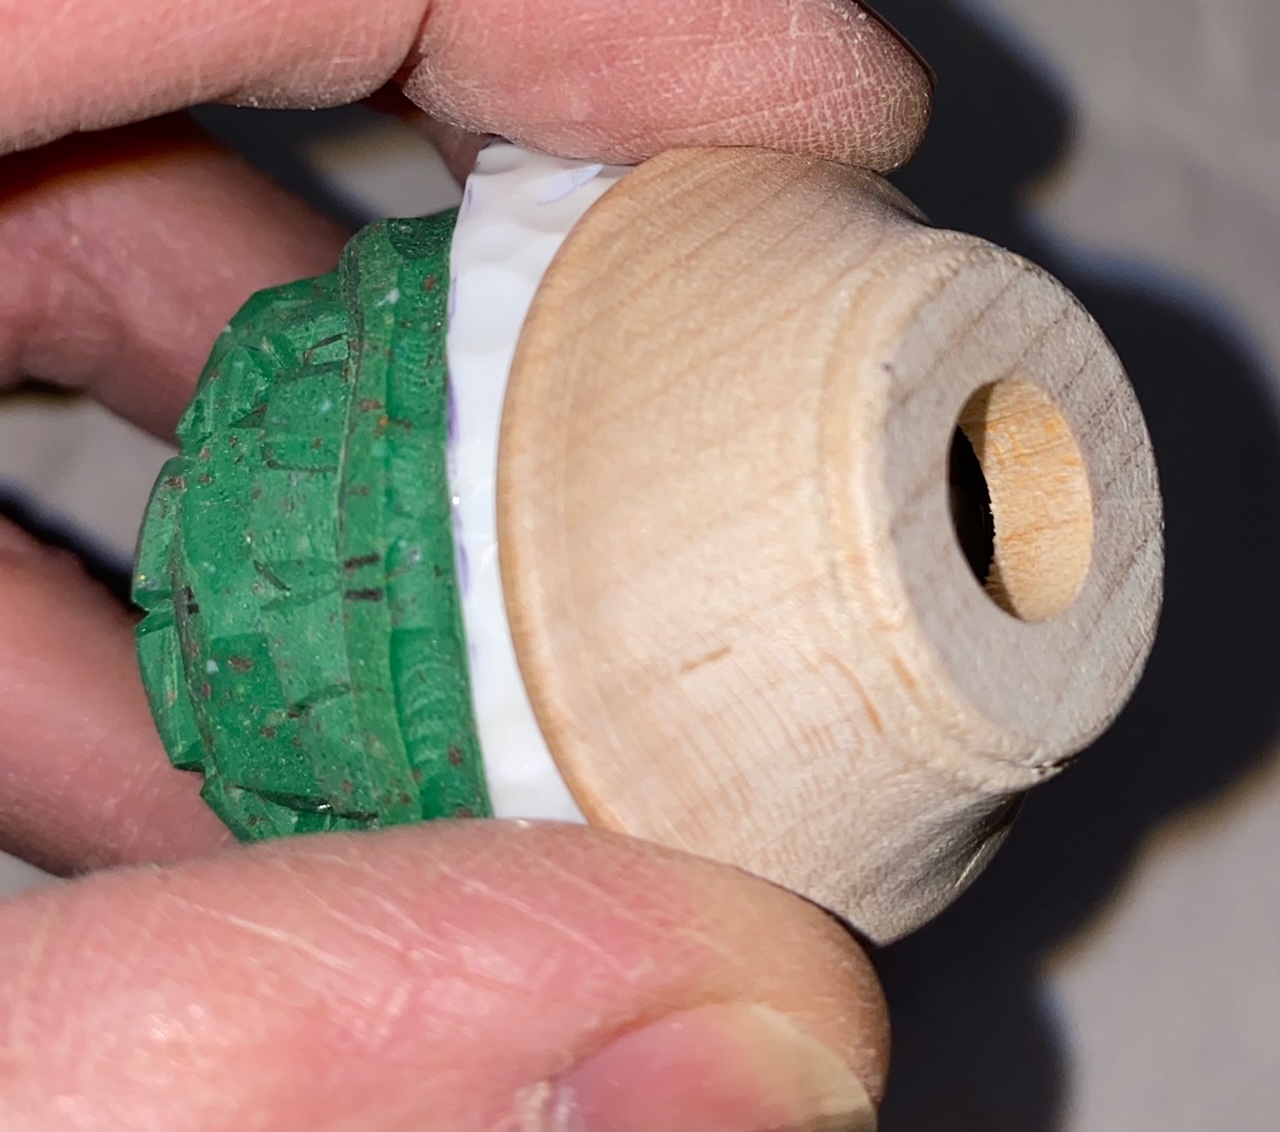
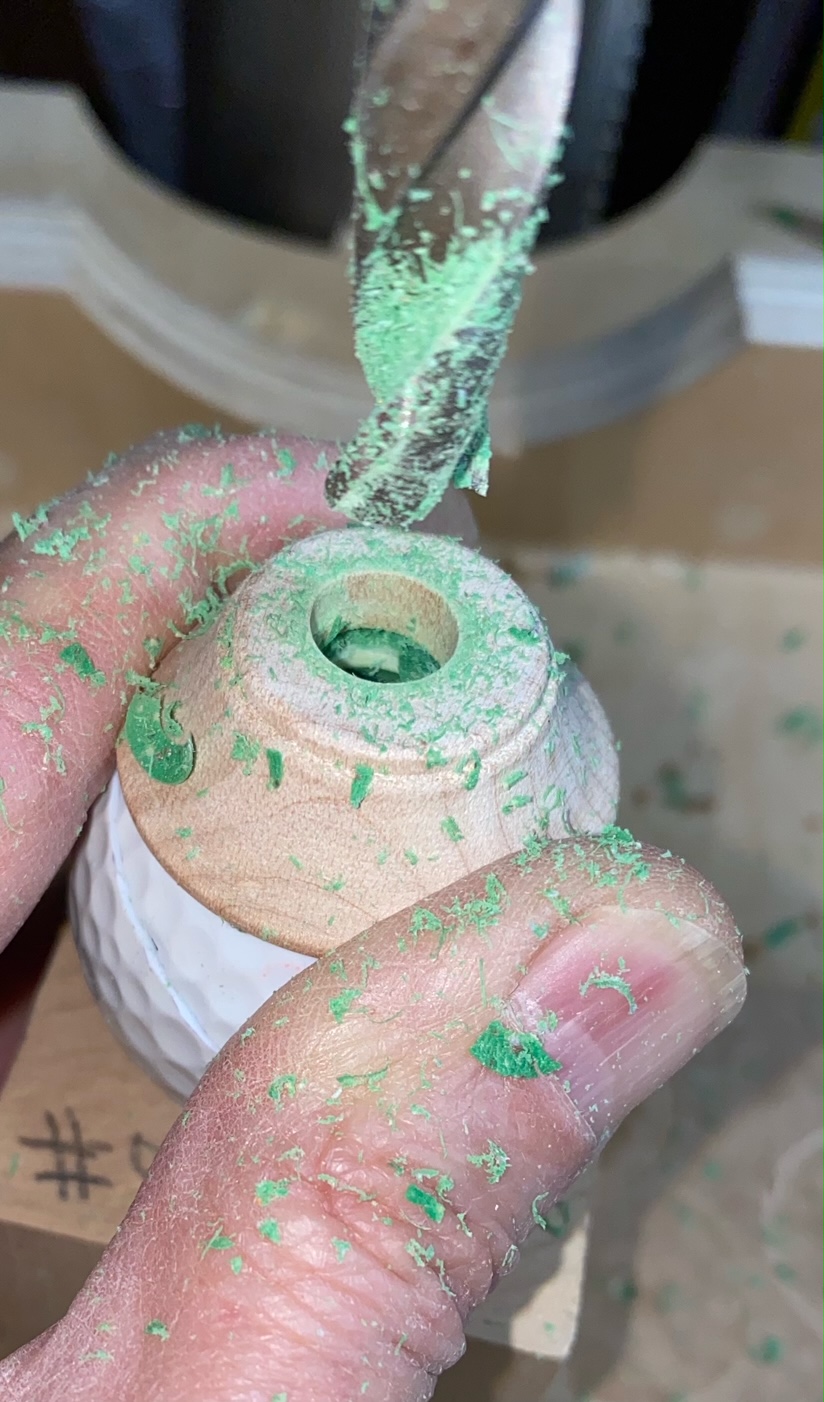
Place the saucer on the ball so the carving or logo is is positioned for the best angle for viewing.
If the cover is available for a carved ball, place it in it’s original location to provide better control when drilling. I rest the ball in the cork jig to stabilize it even further when drilling. More about the cork jig later. Position the ball and saucer so the drill bit follows the hole in the saucer.
The hole depth is your decision. The diameter of the dowel matches the 3/8″ (6mm) hole size.
Click here to see the process I use to prepare a number 8 cork.
Test fit all pieces. To add strength to the the joint, I like to scuff the ball surface where the saucer contacts the ball. Apply a finish to the saucer. When the finish is thoroughly dry, apply epoxy to the dowel as each component is added.
Follow the directions on the glue package and wait for the glue to fully cure before putting your stopper to use.
Sometimes you have an interest in creating your own knife. You may want to customize the handle shape and size or you have a special piece of wood that you think will make an especially attractive handle. Crafting a blade is a job requiring a special skill so, if you’re like me, you can purchase a blade that has already been shaped and tempered. That means it’s ready for you to add a handle. I am a big fan of Helvie knives and although they can make a knife perfectly suited for me, I have ordered blades without handles so I can add my own. I know the blade will be high quality and my efforts will produce a highly effective knife.
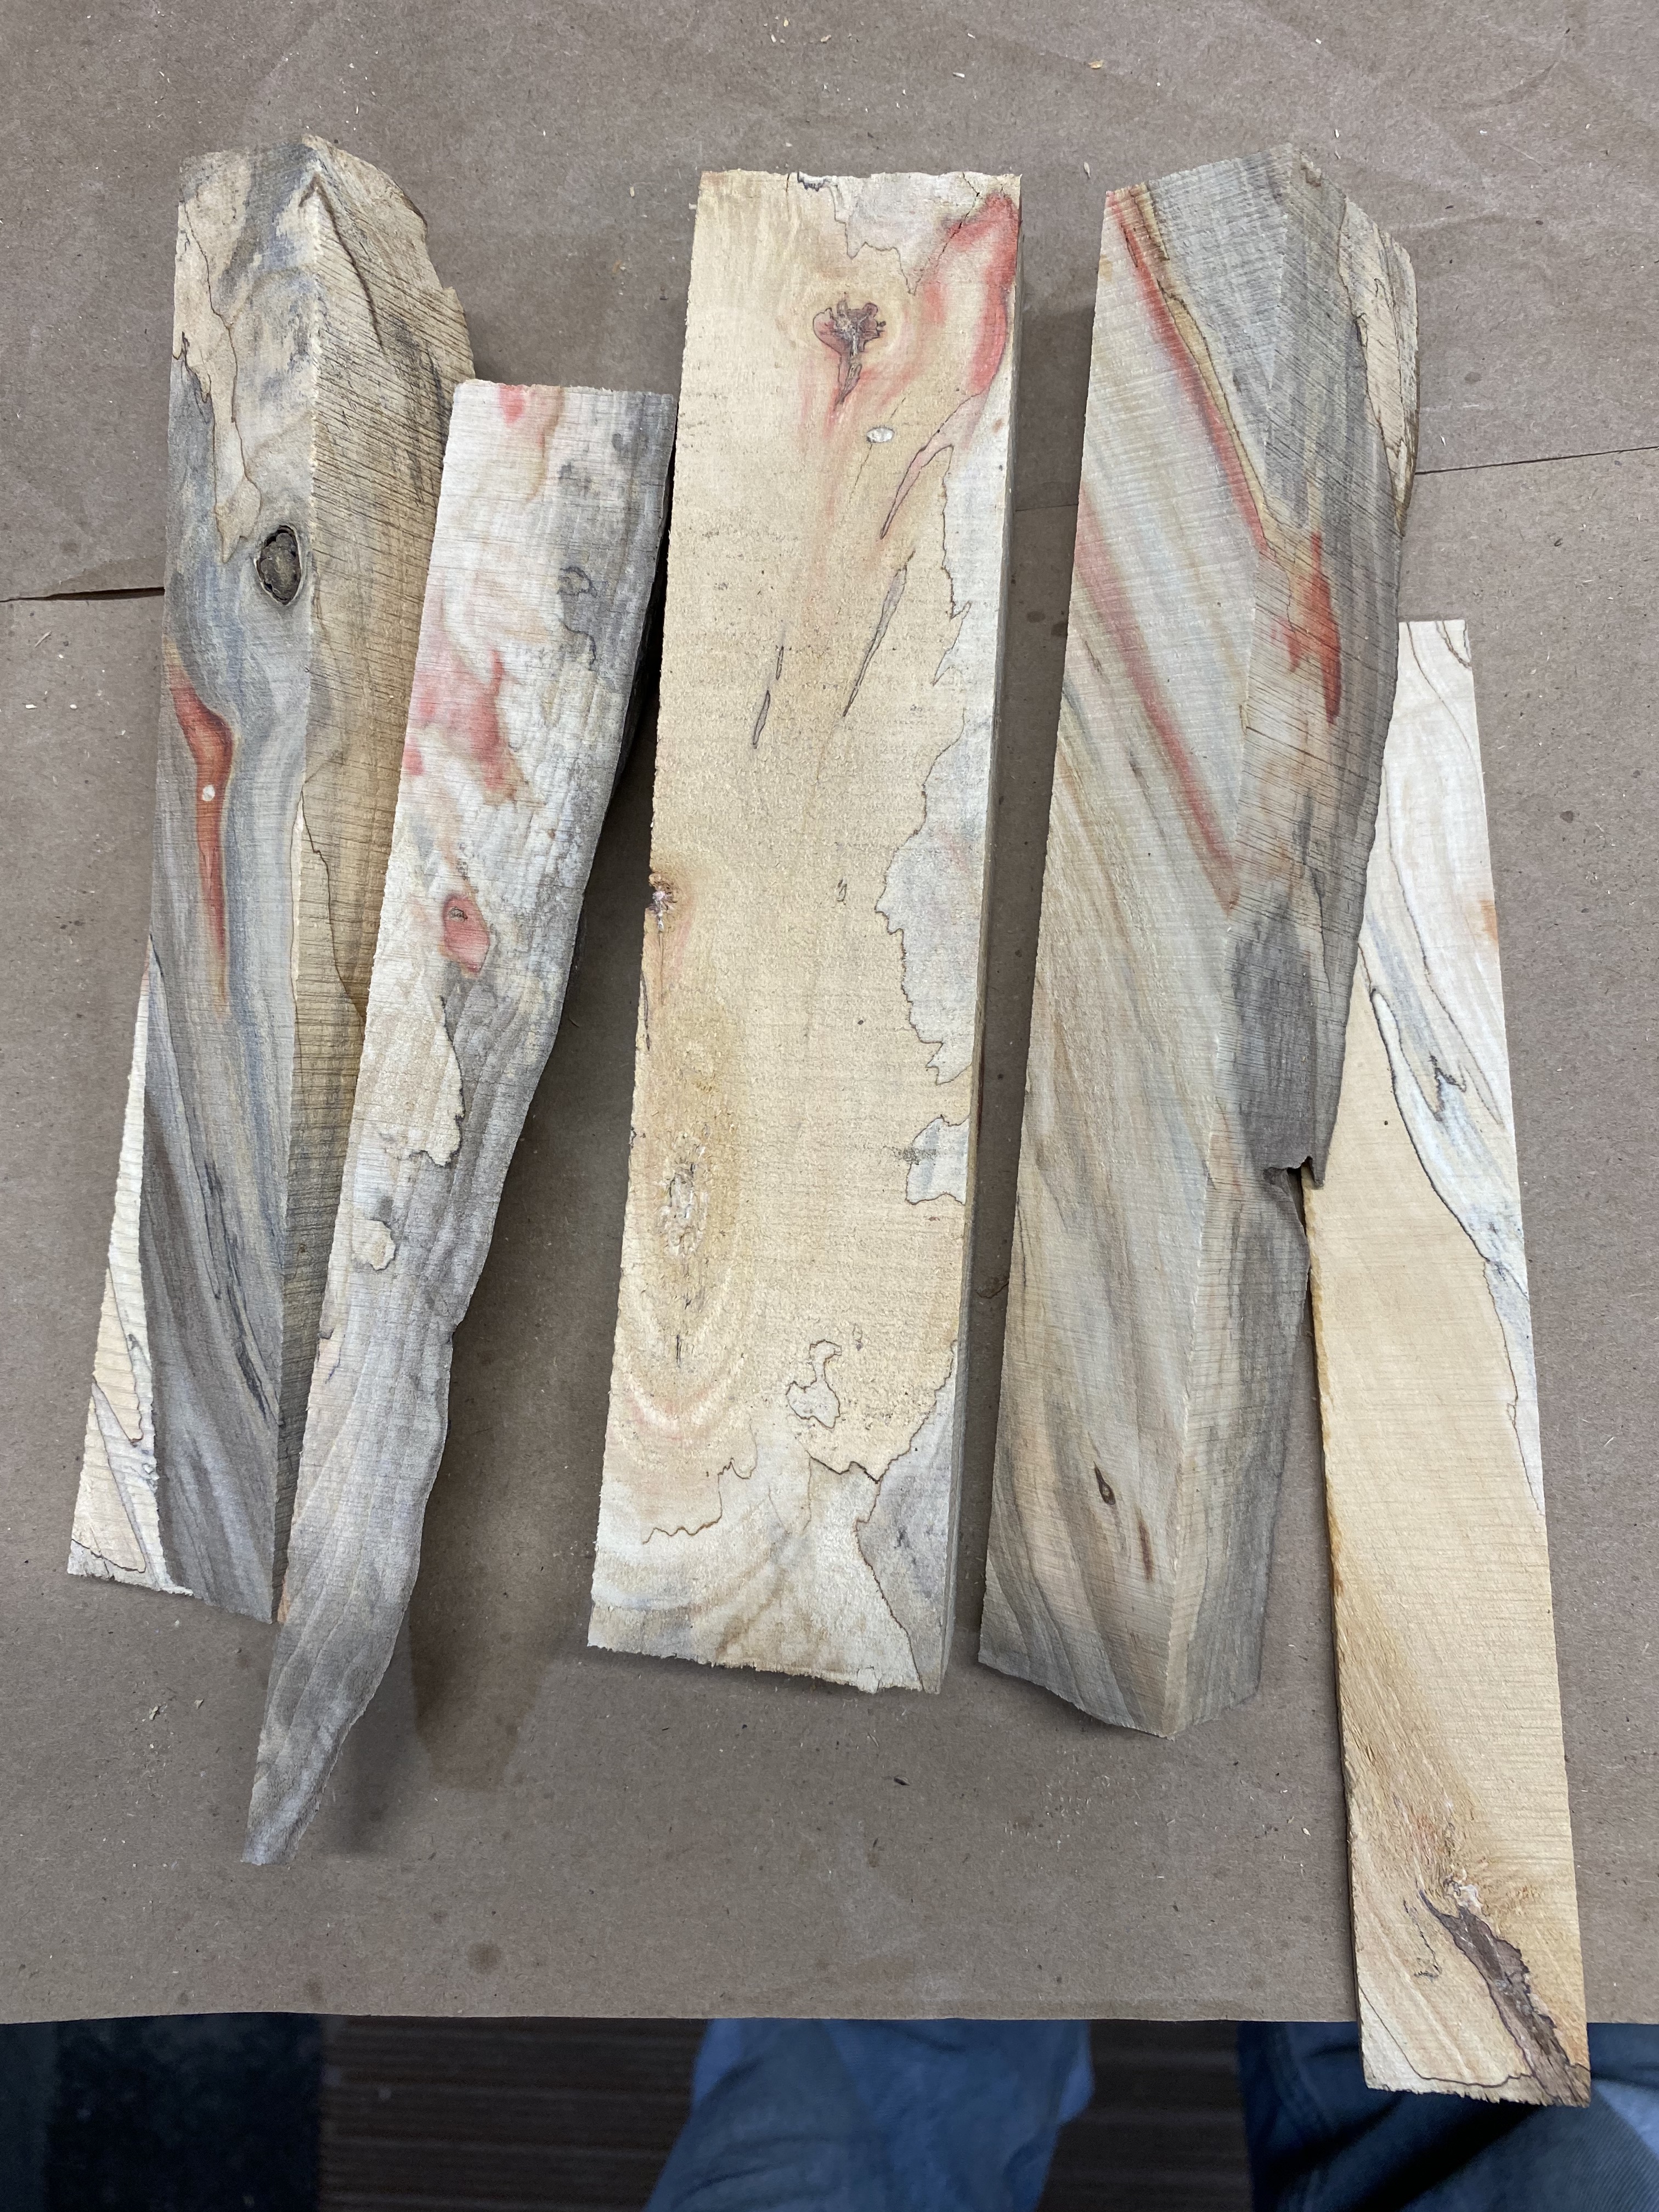
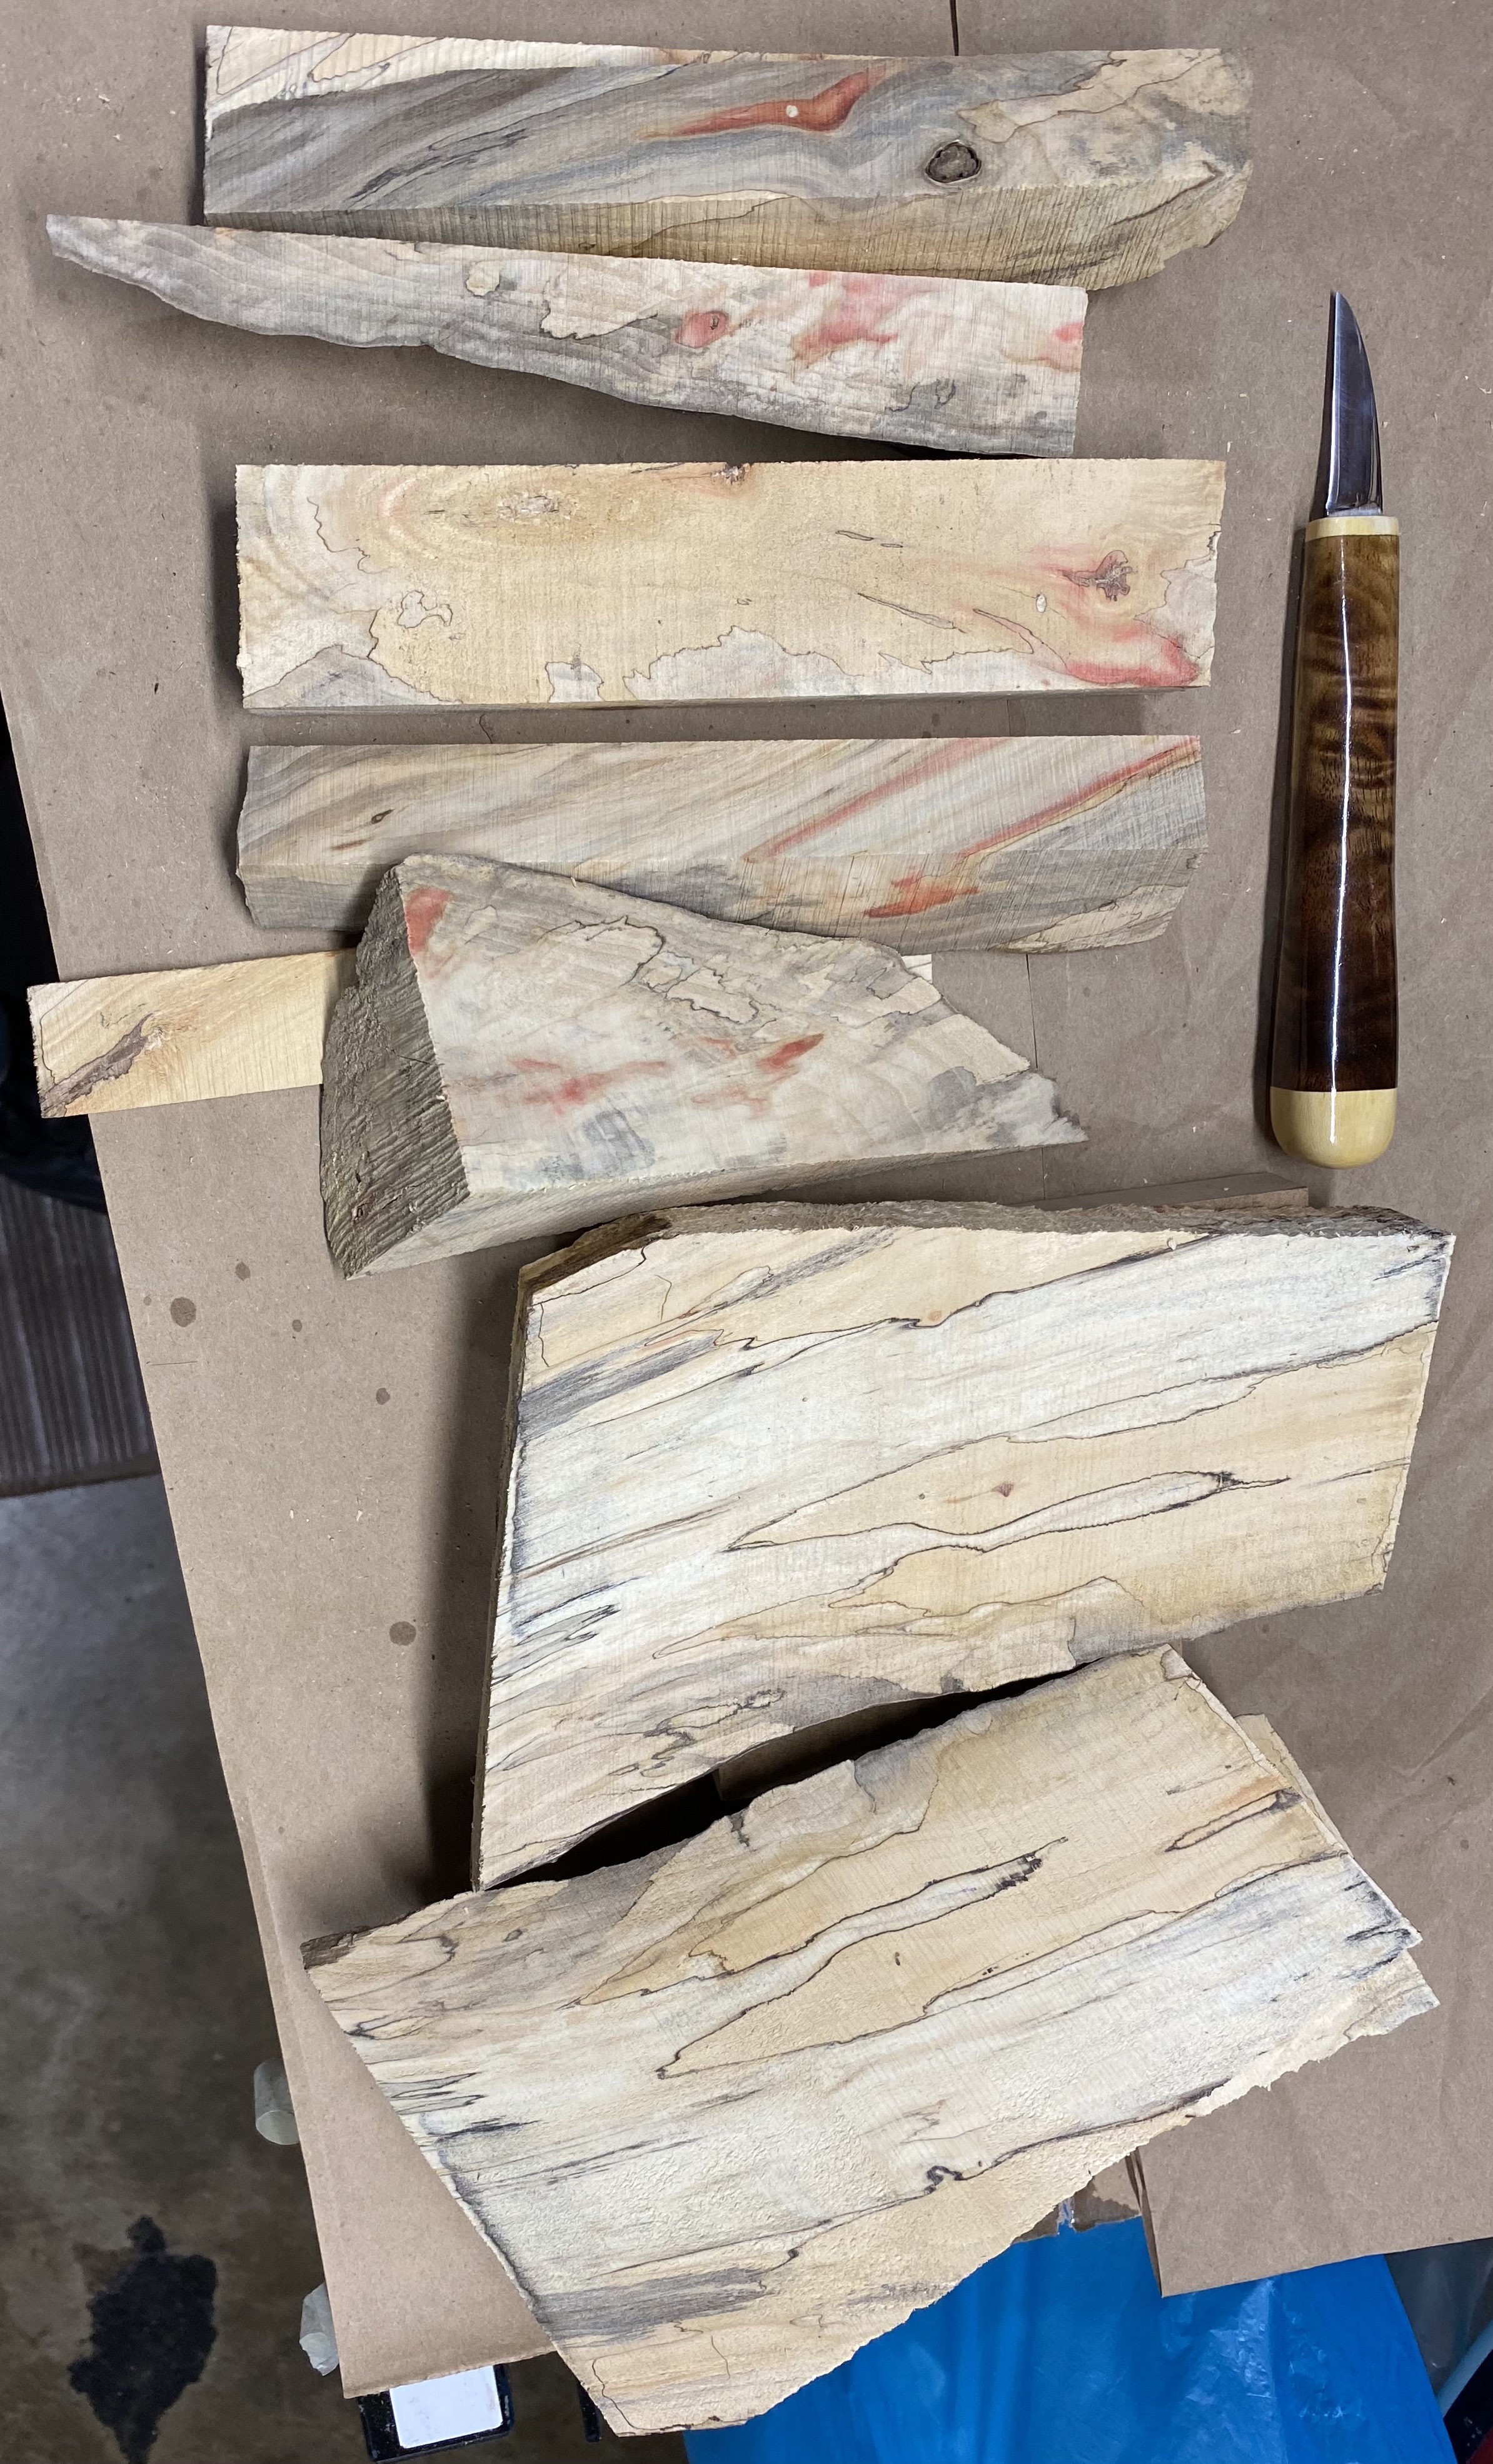
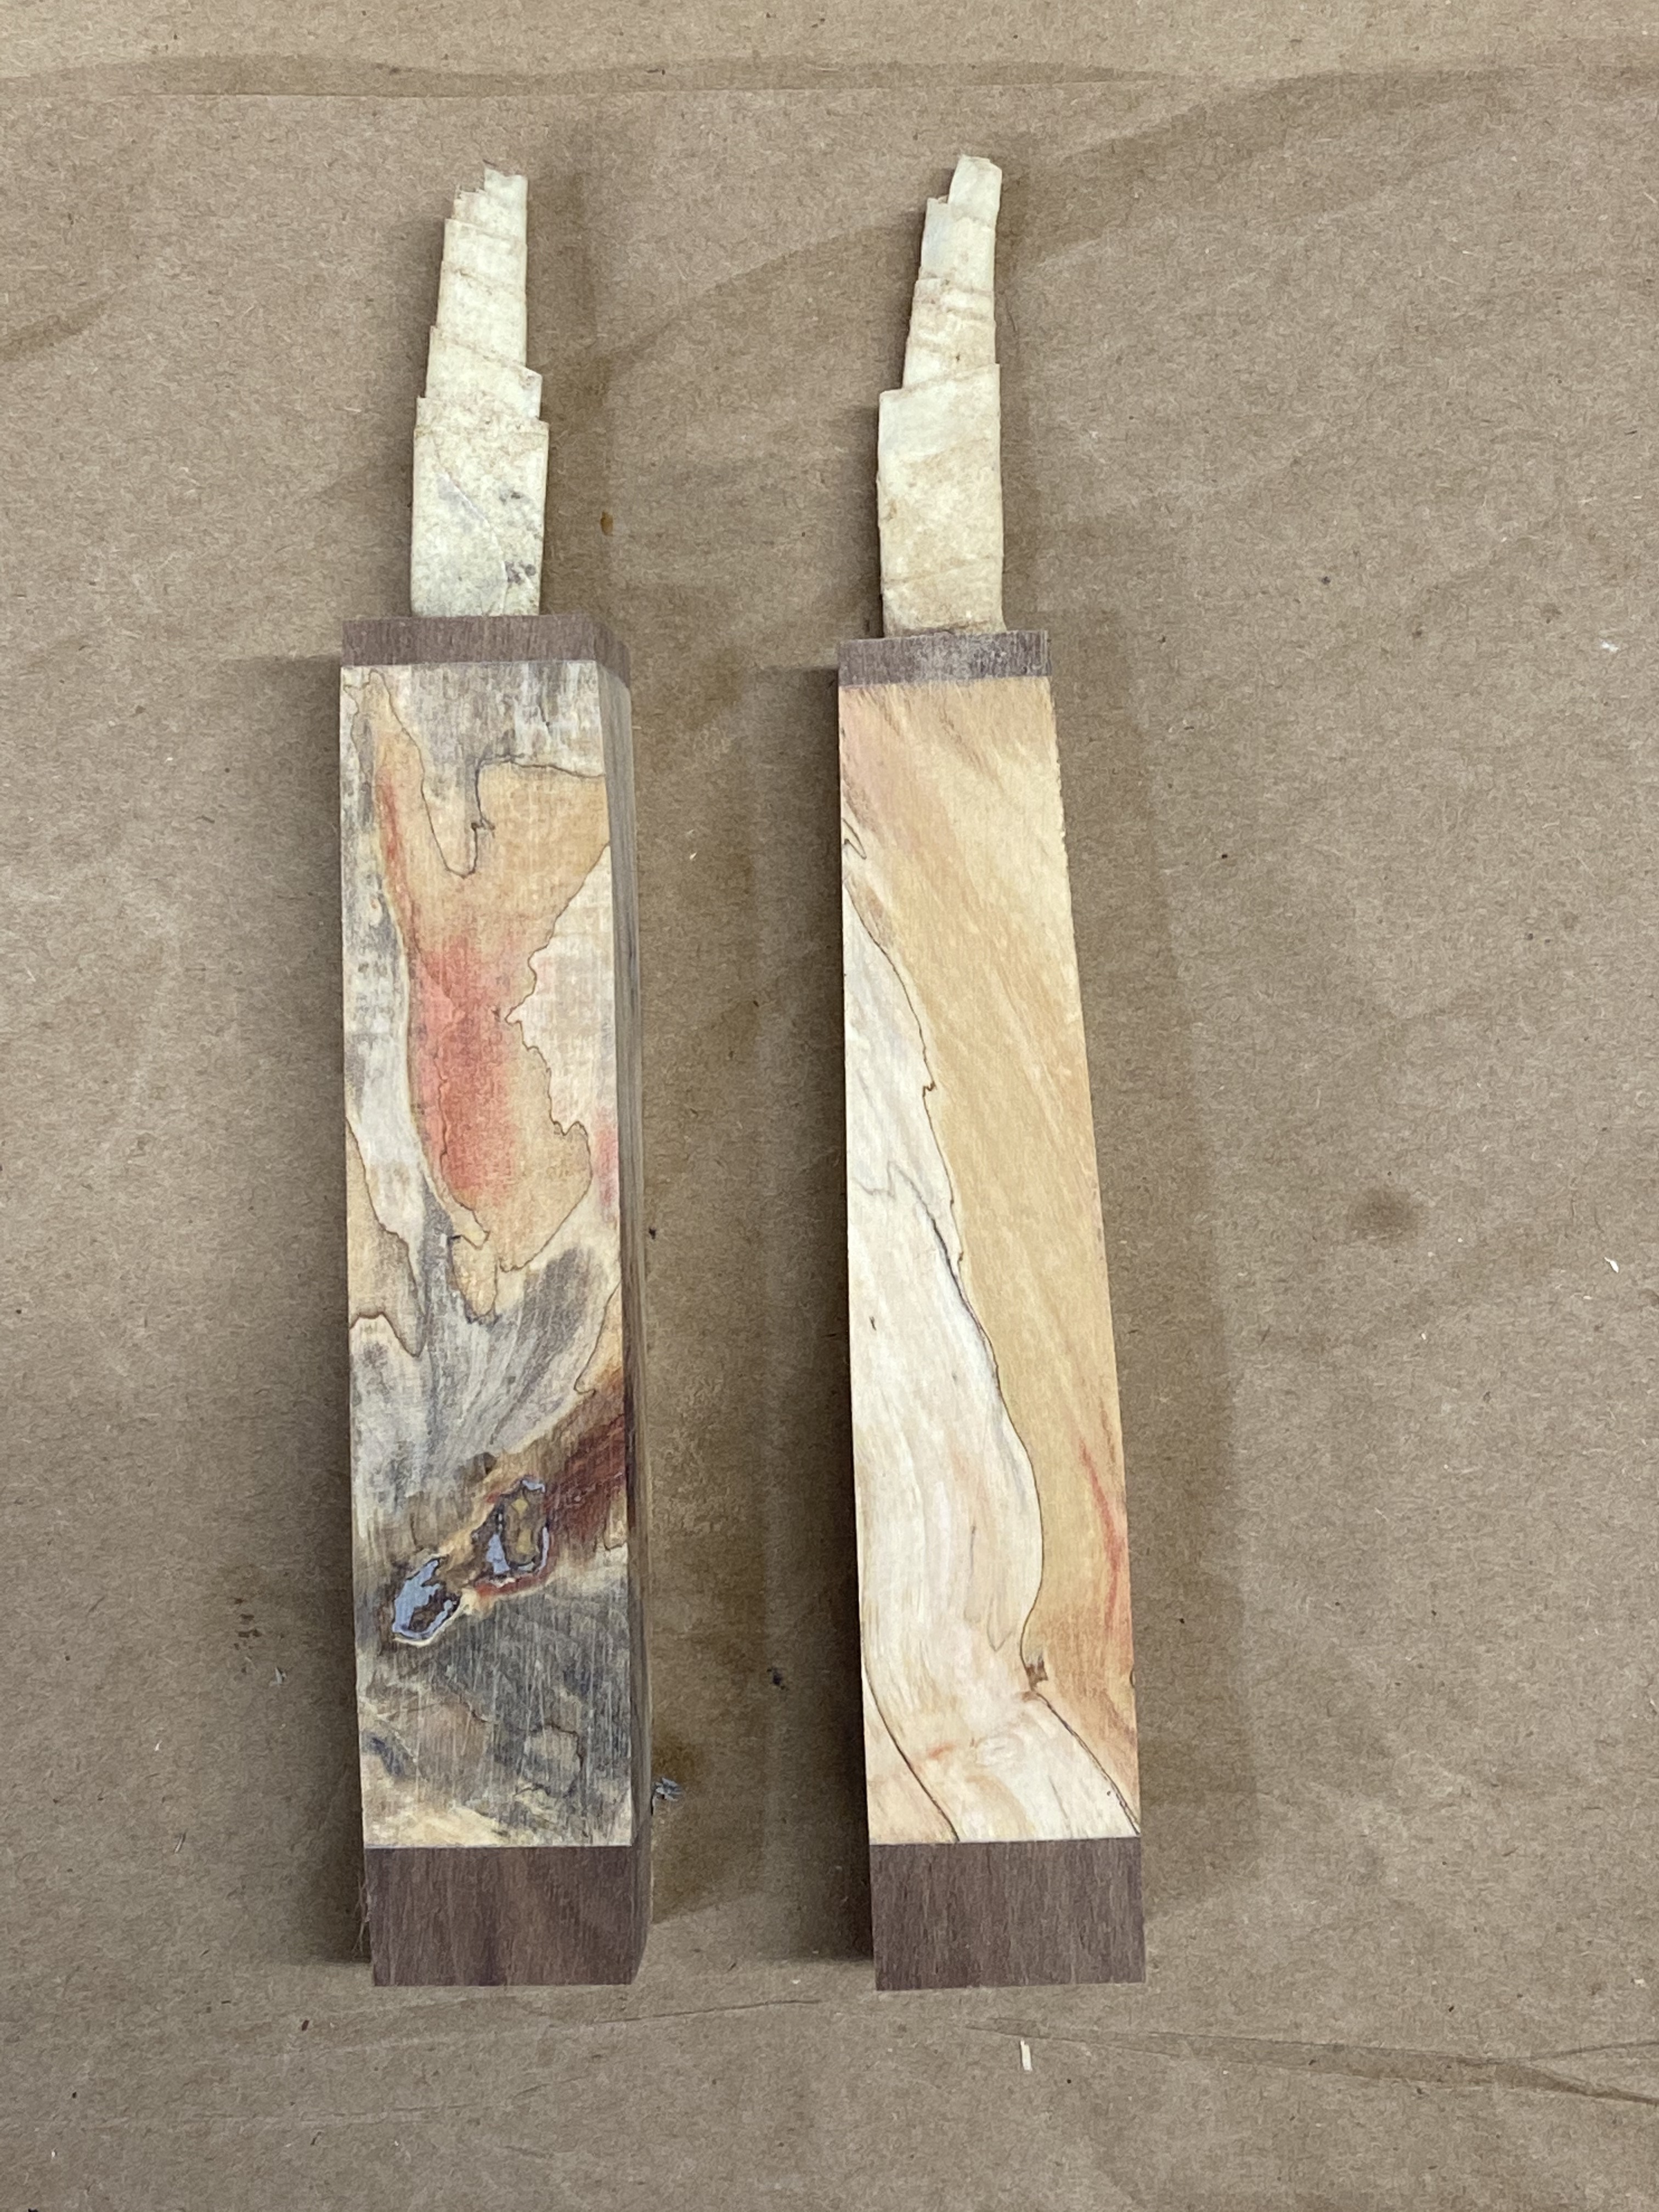
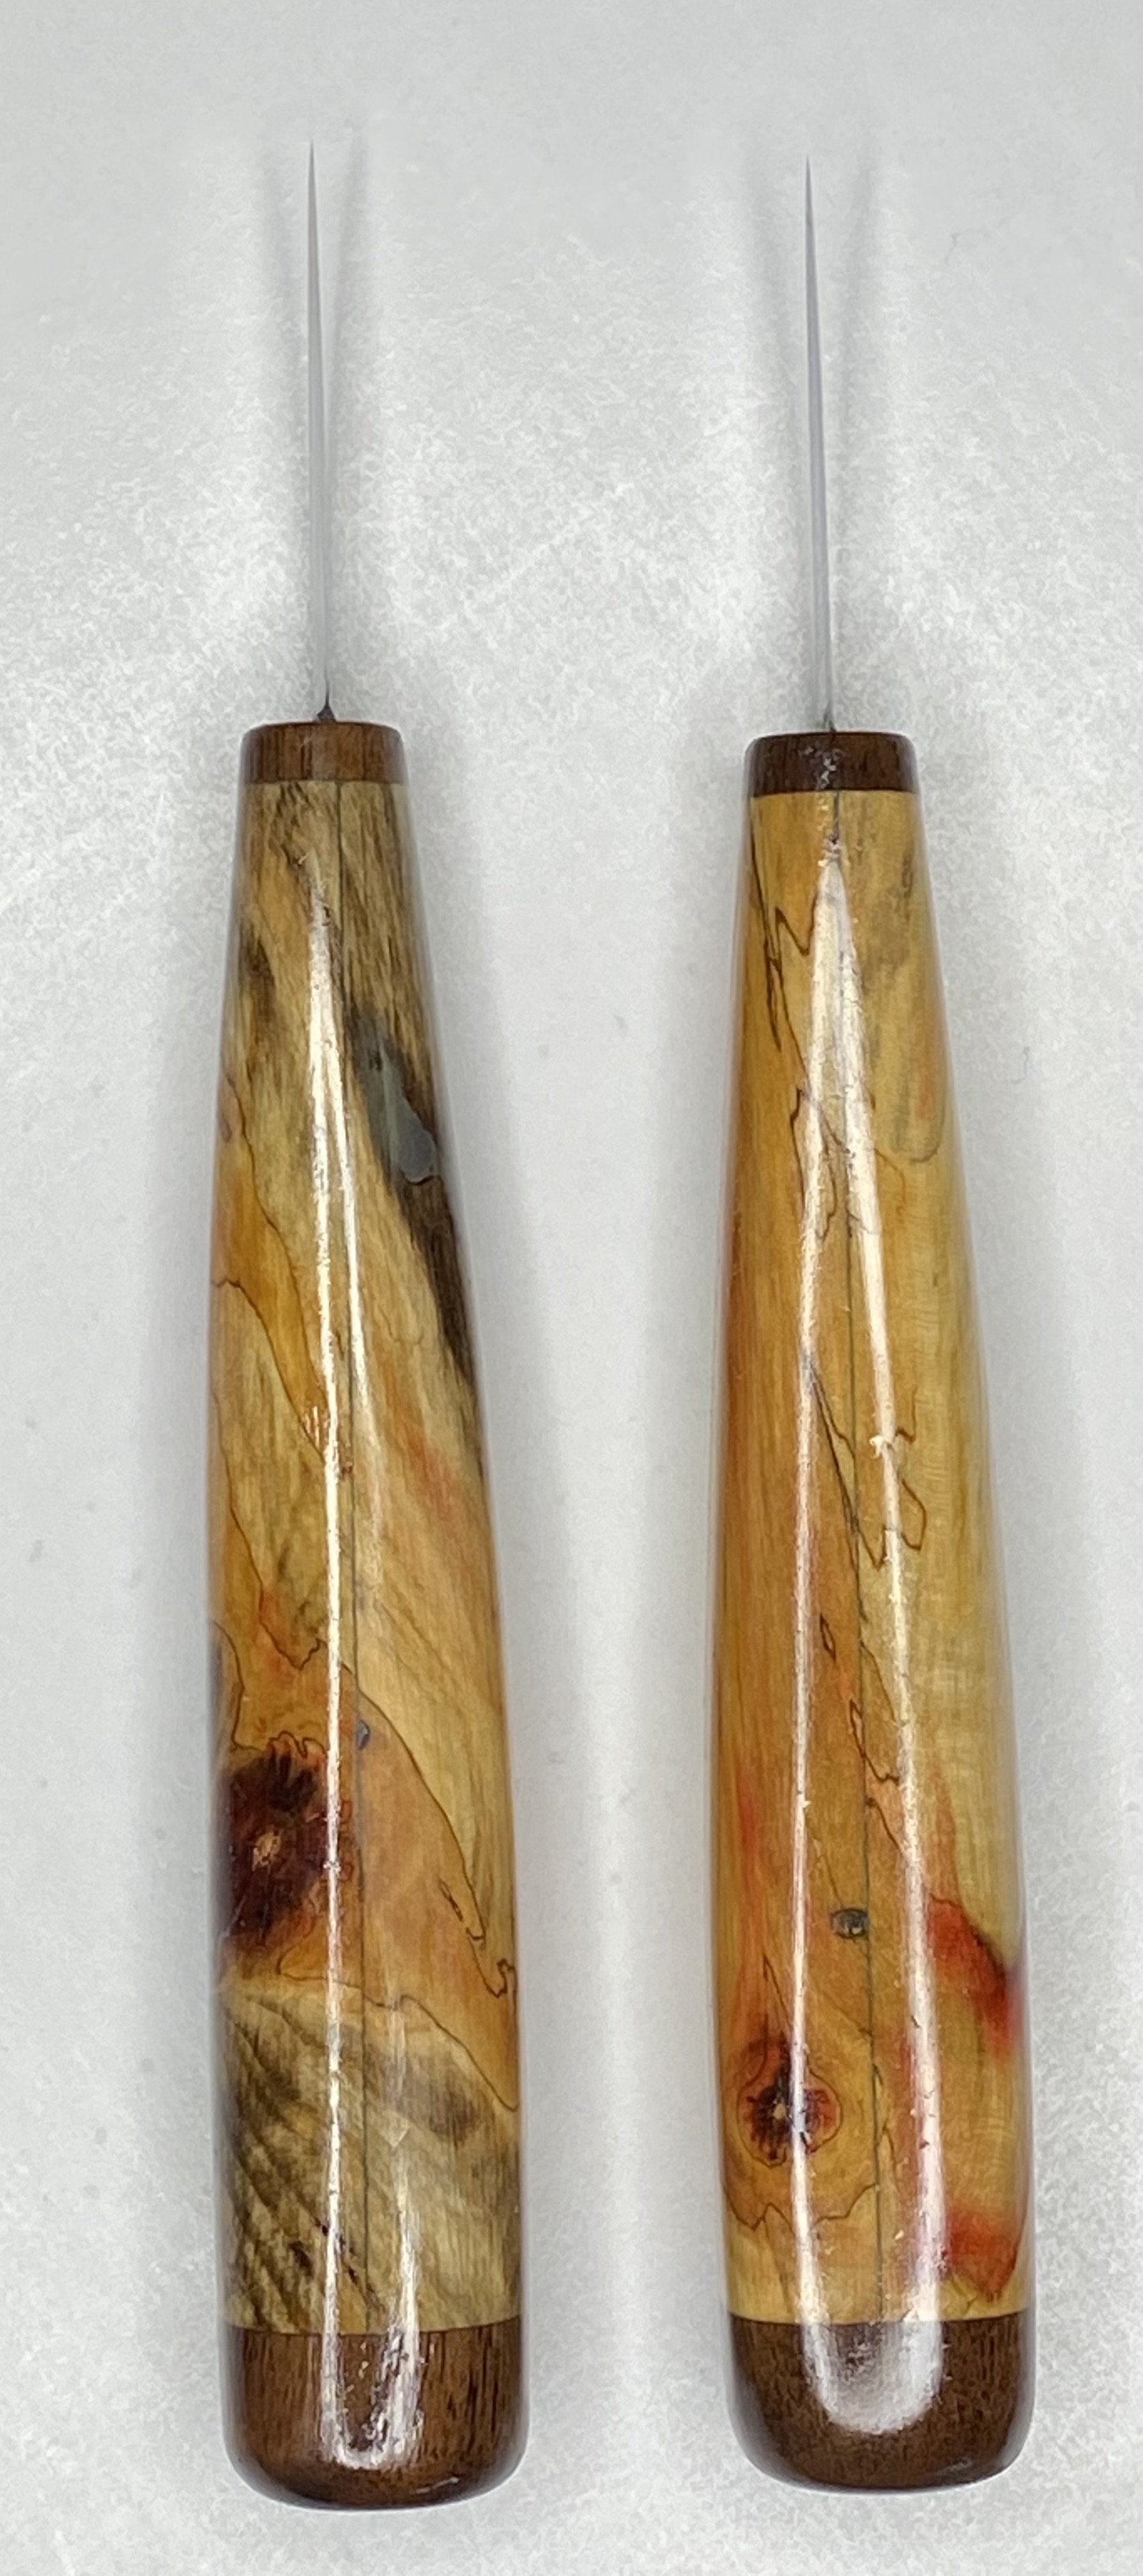
I will show the steps I took to prepare the wood for the handles and how I combine the wood and blades to create knives I am proud to own. My first attempt was with a special piece of Walnut. I selected and purchased a small piece that had been commercially prepared from an abnormal growth on the side of the tree. The grain pattern was unusually attractive. I capped the ends of the Walnut with small pieces of American Holly. This completed knife is shown in the pictures along side the latest selection of wood. The wood for this project was from a Box Elder tree. Box Elder is in the Maple family. It has a tendency to absorb minerals from the ground as well as bacteria. This can be seen in the grain patterns. I sliced the raw wood to expose the grain pattern and coloration that occurs naturally. The pictures show the pieces I selected with all four faces displayed. This includes the inside faces that will be glued together in the final product. I show the inside surfaces because they are as attractive as the outside surfaces.
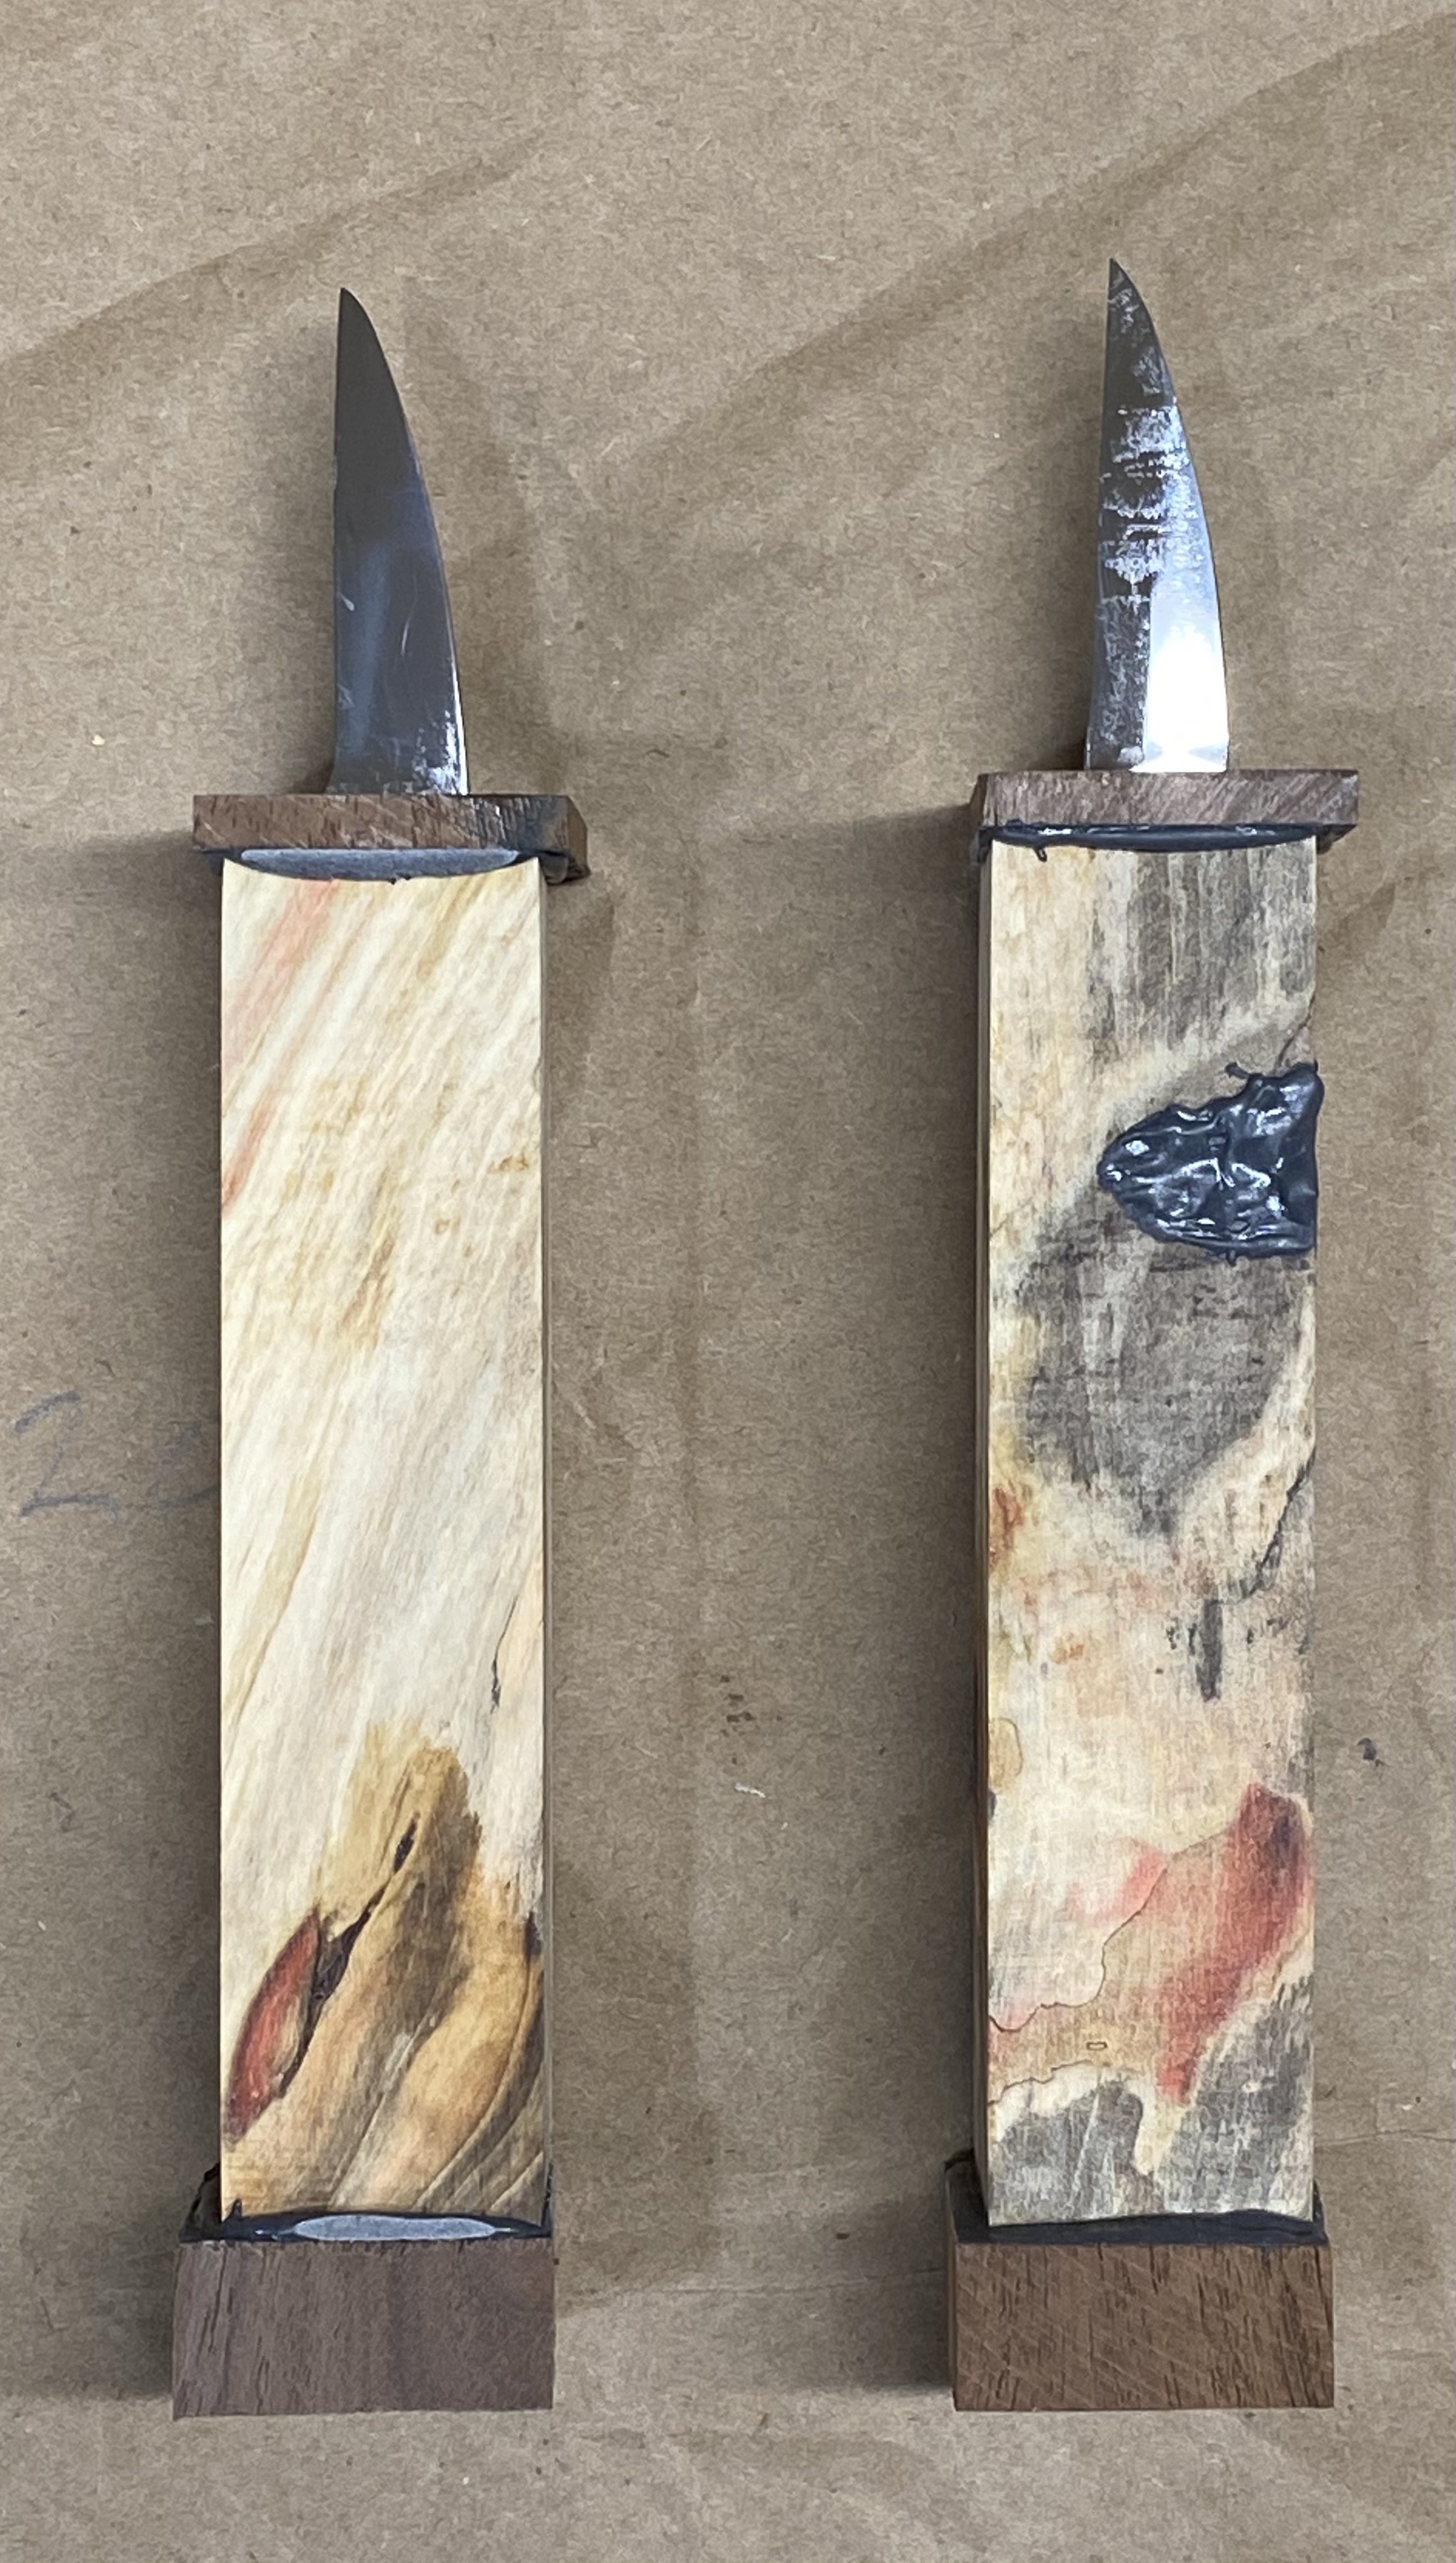
Part of the original raw tree.Pieces sliced to expose the grain.More exposed grain. My walnut knife is shown.These four pictures show the blanks I chose to create three handles. The completed knife shows the Walnut and Holly wood handle.This picture shows two of the blanks after dividing them to insert the blades. The grain patterns would have made excellent outside surfaces. Here we see the blades have been placed inside recessed openings in one side of each handle. The caps for the handle ends are made from Walnut. These are the blades shown with the Walnut caps for the end of the handle.This is one knife being clamped to allow the epoxy glue to bind the two handle parts around the blade. I use a two part epoxy from my local hardware store. I like the slow curing time so I don’t have to rush the process.These are the two knives with the blades in place and the end caps waiting to be attached.These are the two knives with clamps holding the end caps while the epoxy glue cures.These are the two knives before sanding the end caps to the dimensions of the handles.These are the two knives after sanding the end caps to match the main handle pieces. The knife on the right has been tapered on the sander to the general form before the corners are sanded to complete the handle shape.These are the completed knives with the finish applied. Views of three sides.
I use a product called True Oil as a final finish. I always use several coats and lightly sand between coats.
In July of 2020 I attended a carving class conducted by Dave Stetson of Scottsdale, Arizona. Dave is a founding member of the Caricature Carvers of America. I have taken three Zoom classes with Dave and have learned a lot. I recommend Dave’s classes either in person or on Zoom. Dave offers a wealth of information on design, including human anatomy, carving techniques and painting. He has been teaching for many years and is genuinely concerned for the student’s comprehension and learning experience.
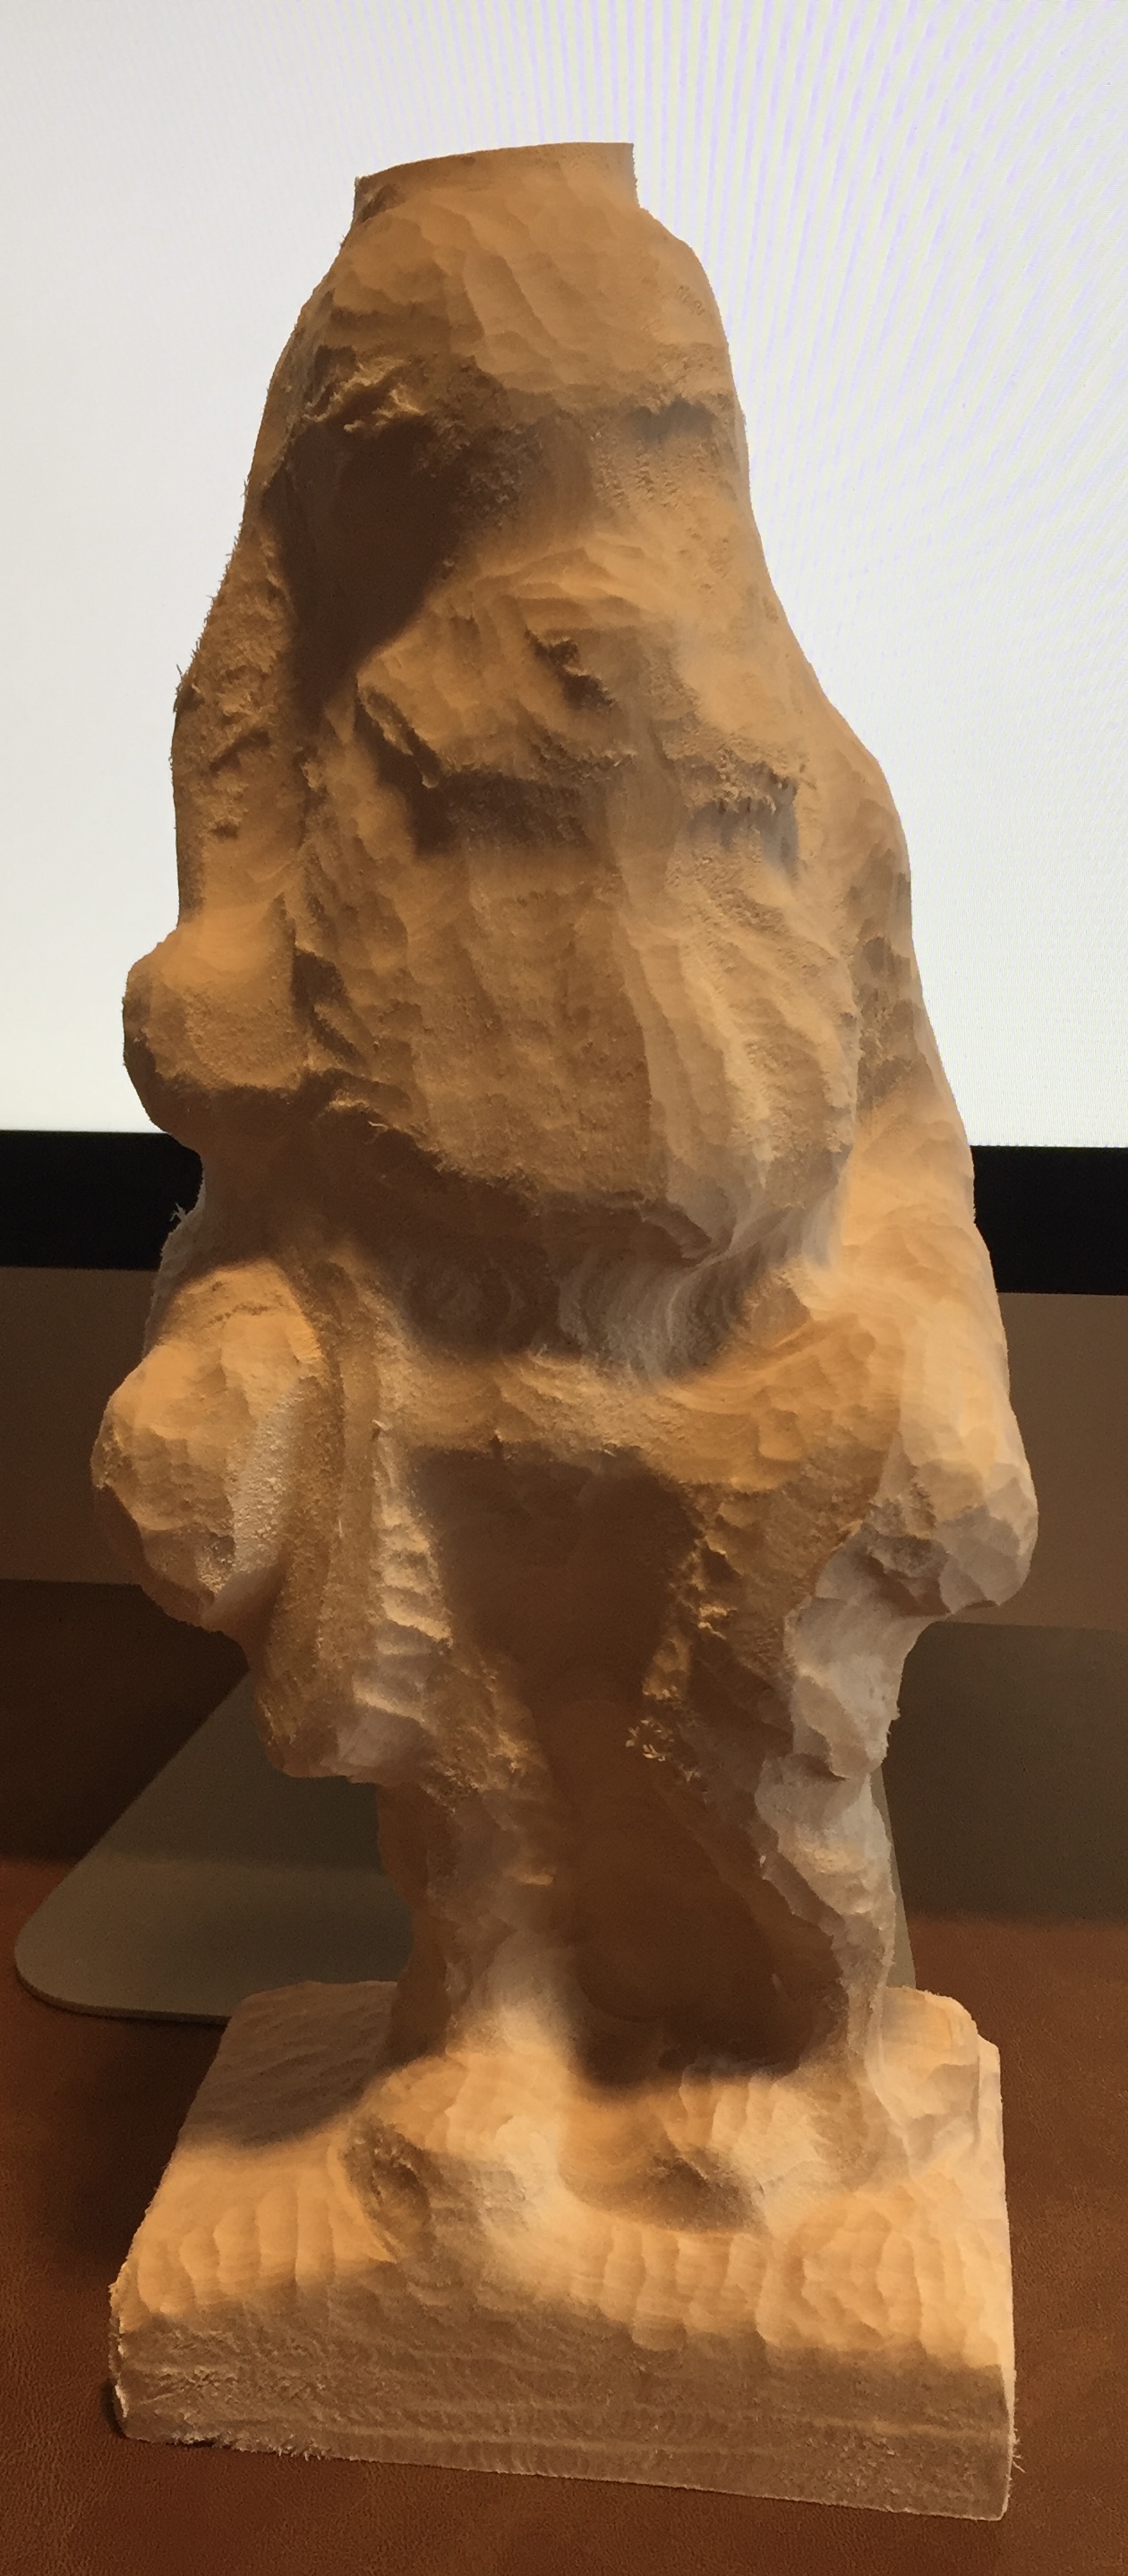
This class was based on a woodcarving roughout developed by Dave. Not all of Dave’s classes use roughouts. Depending on the subject, and the level of difficulty, a single block of basswood may be the only requirement. A roughout will reduce the amount of wood removal and therefore reduce the time required to complete the project. This class required 12 hours of instruction time. That time was divided into six two hour sessions. Painting the completed project was included. Because the class was held via Zoom, students could ask questions during the sessions. The other advantage for the student was each session is recorded and was available for review after the class. Dave also encouraged students to email pictures of problem areas so he could offer advice before the next session.
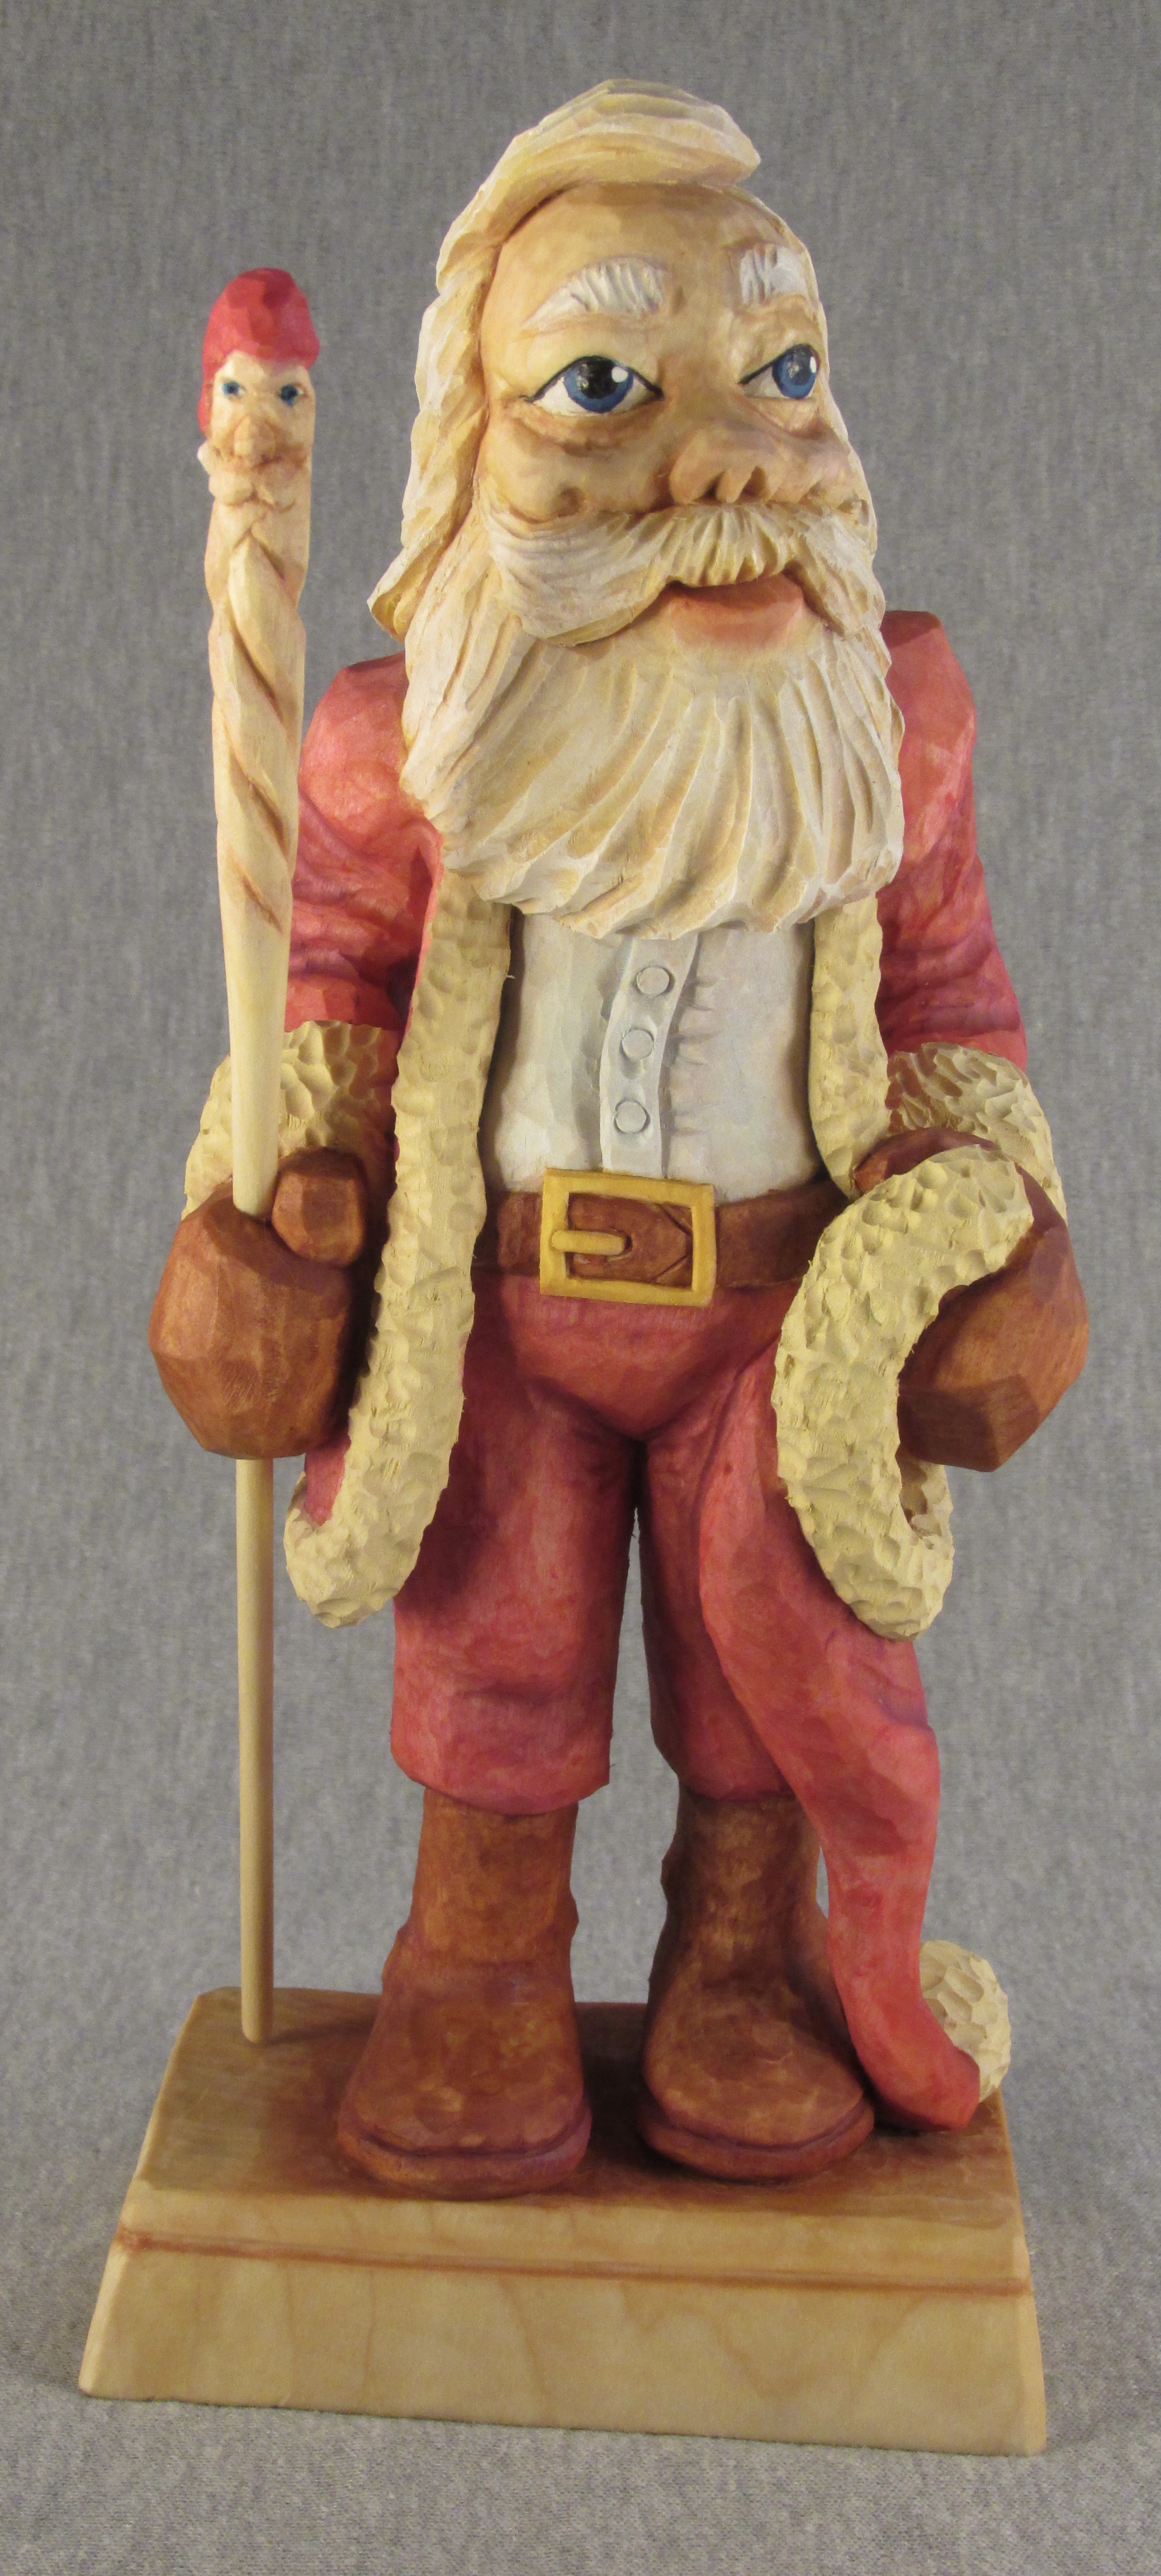
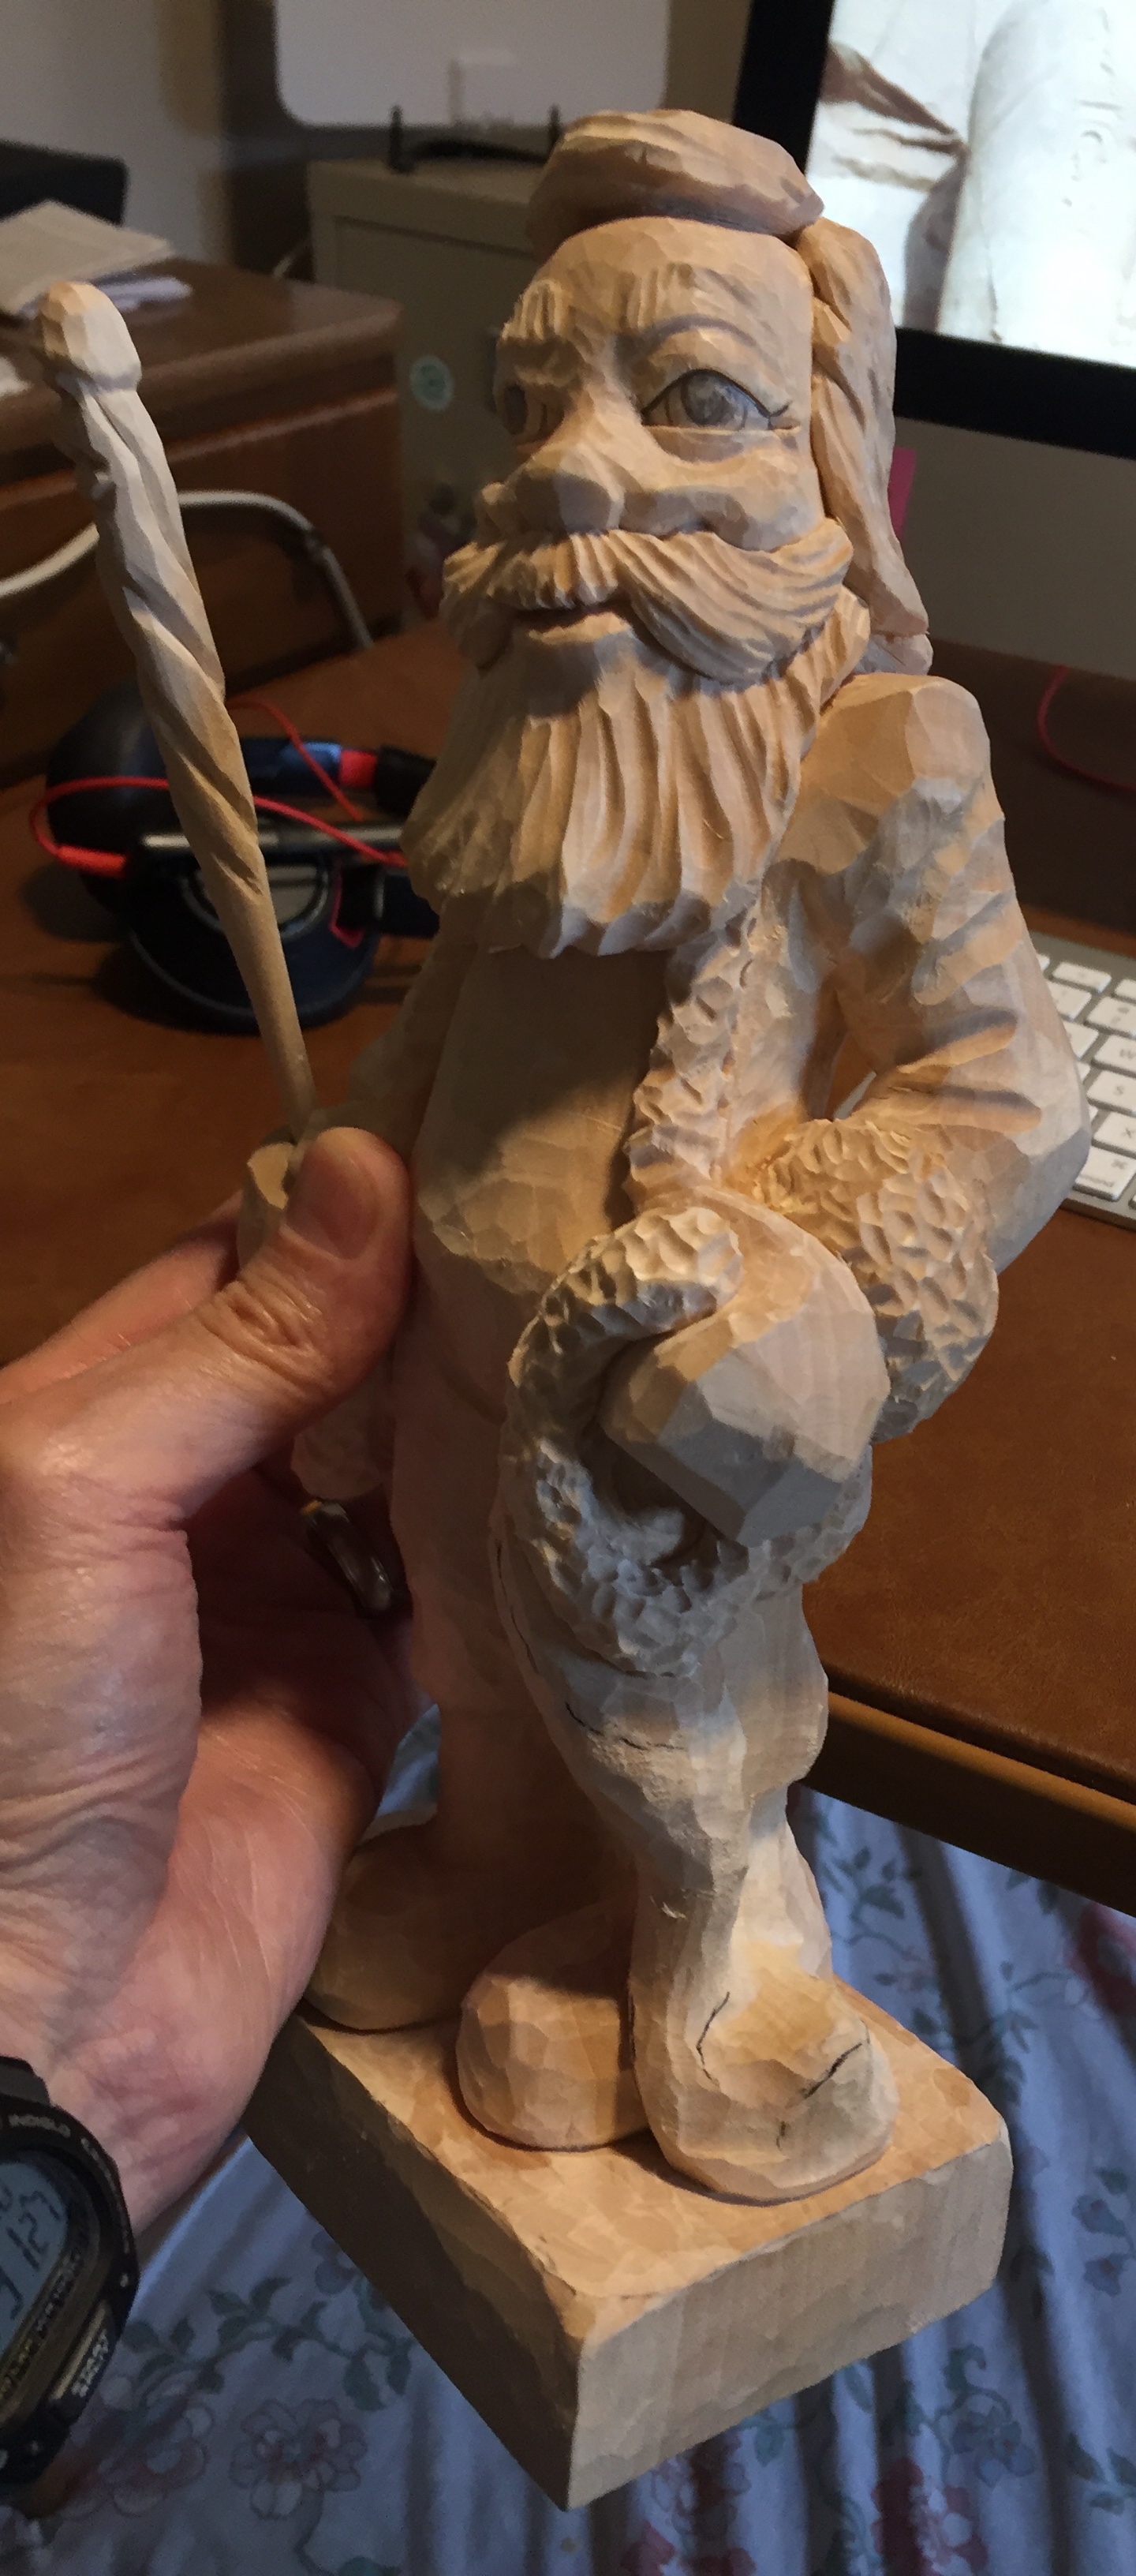
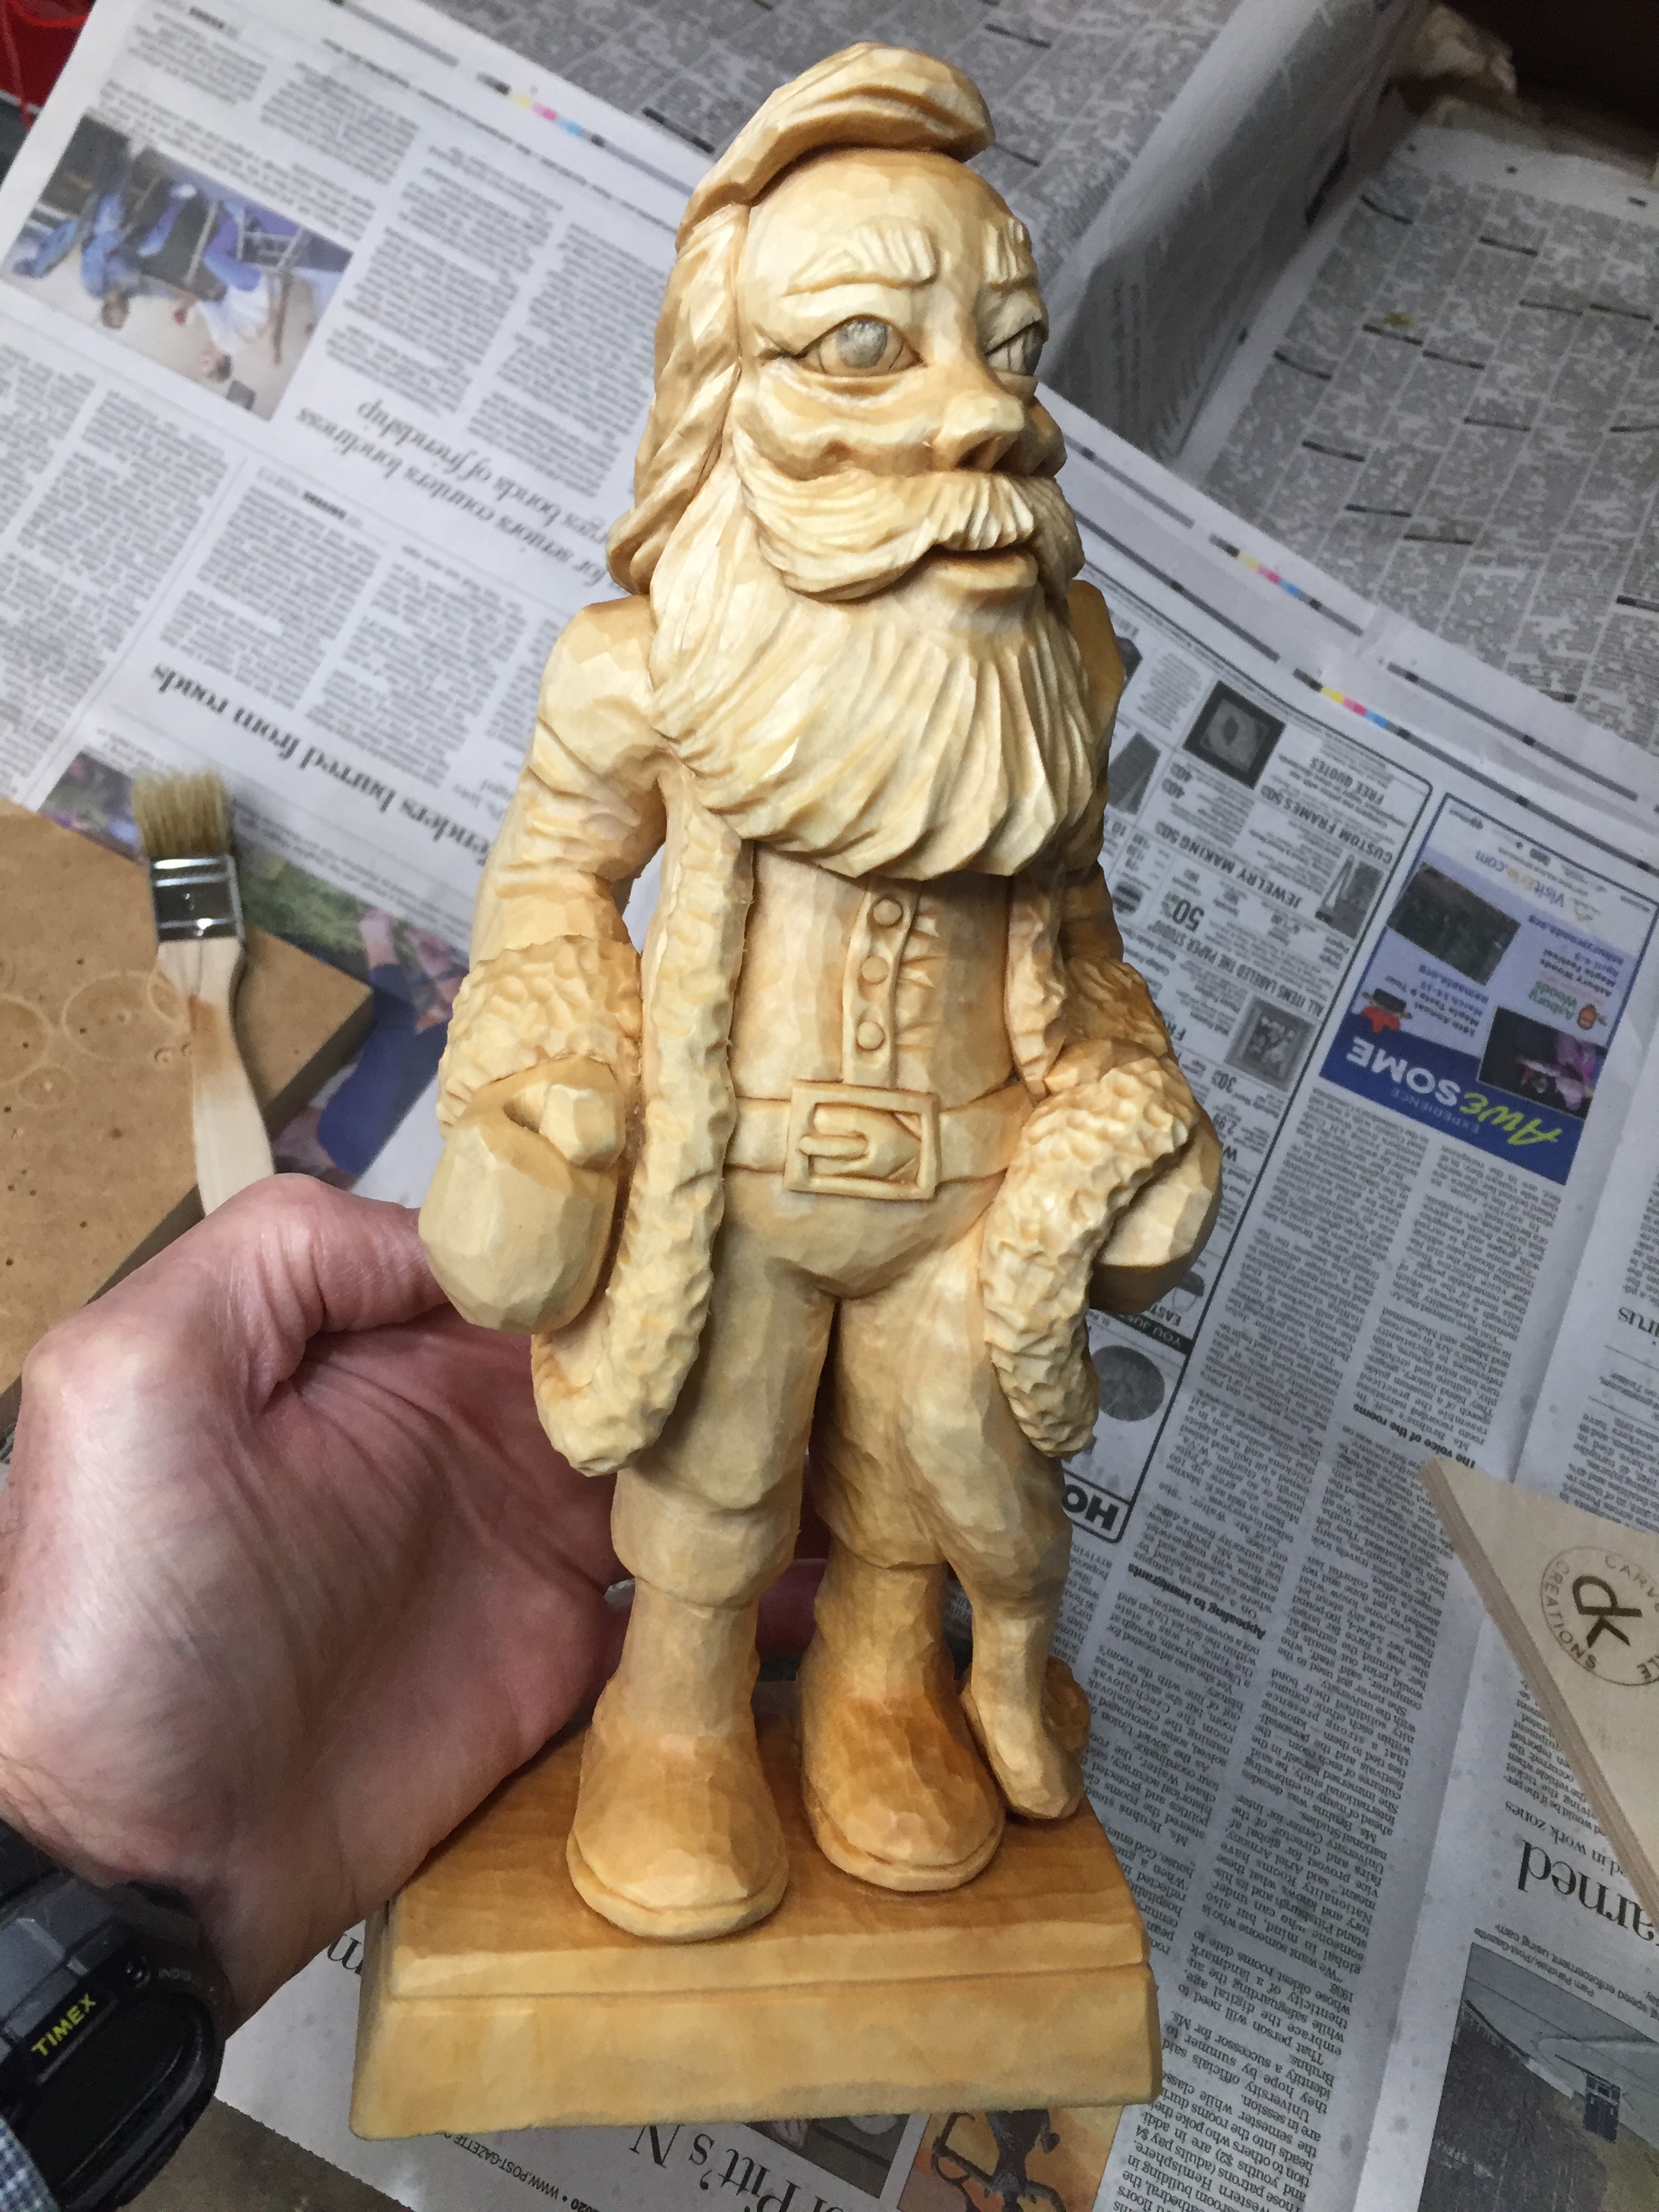
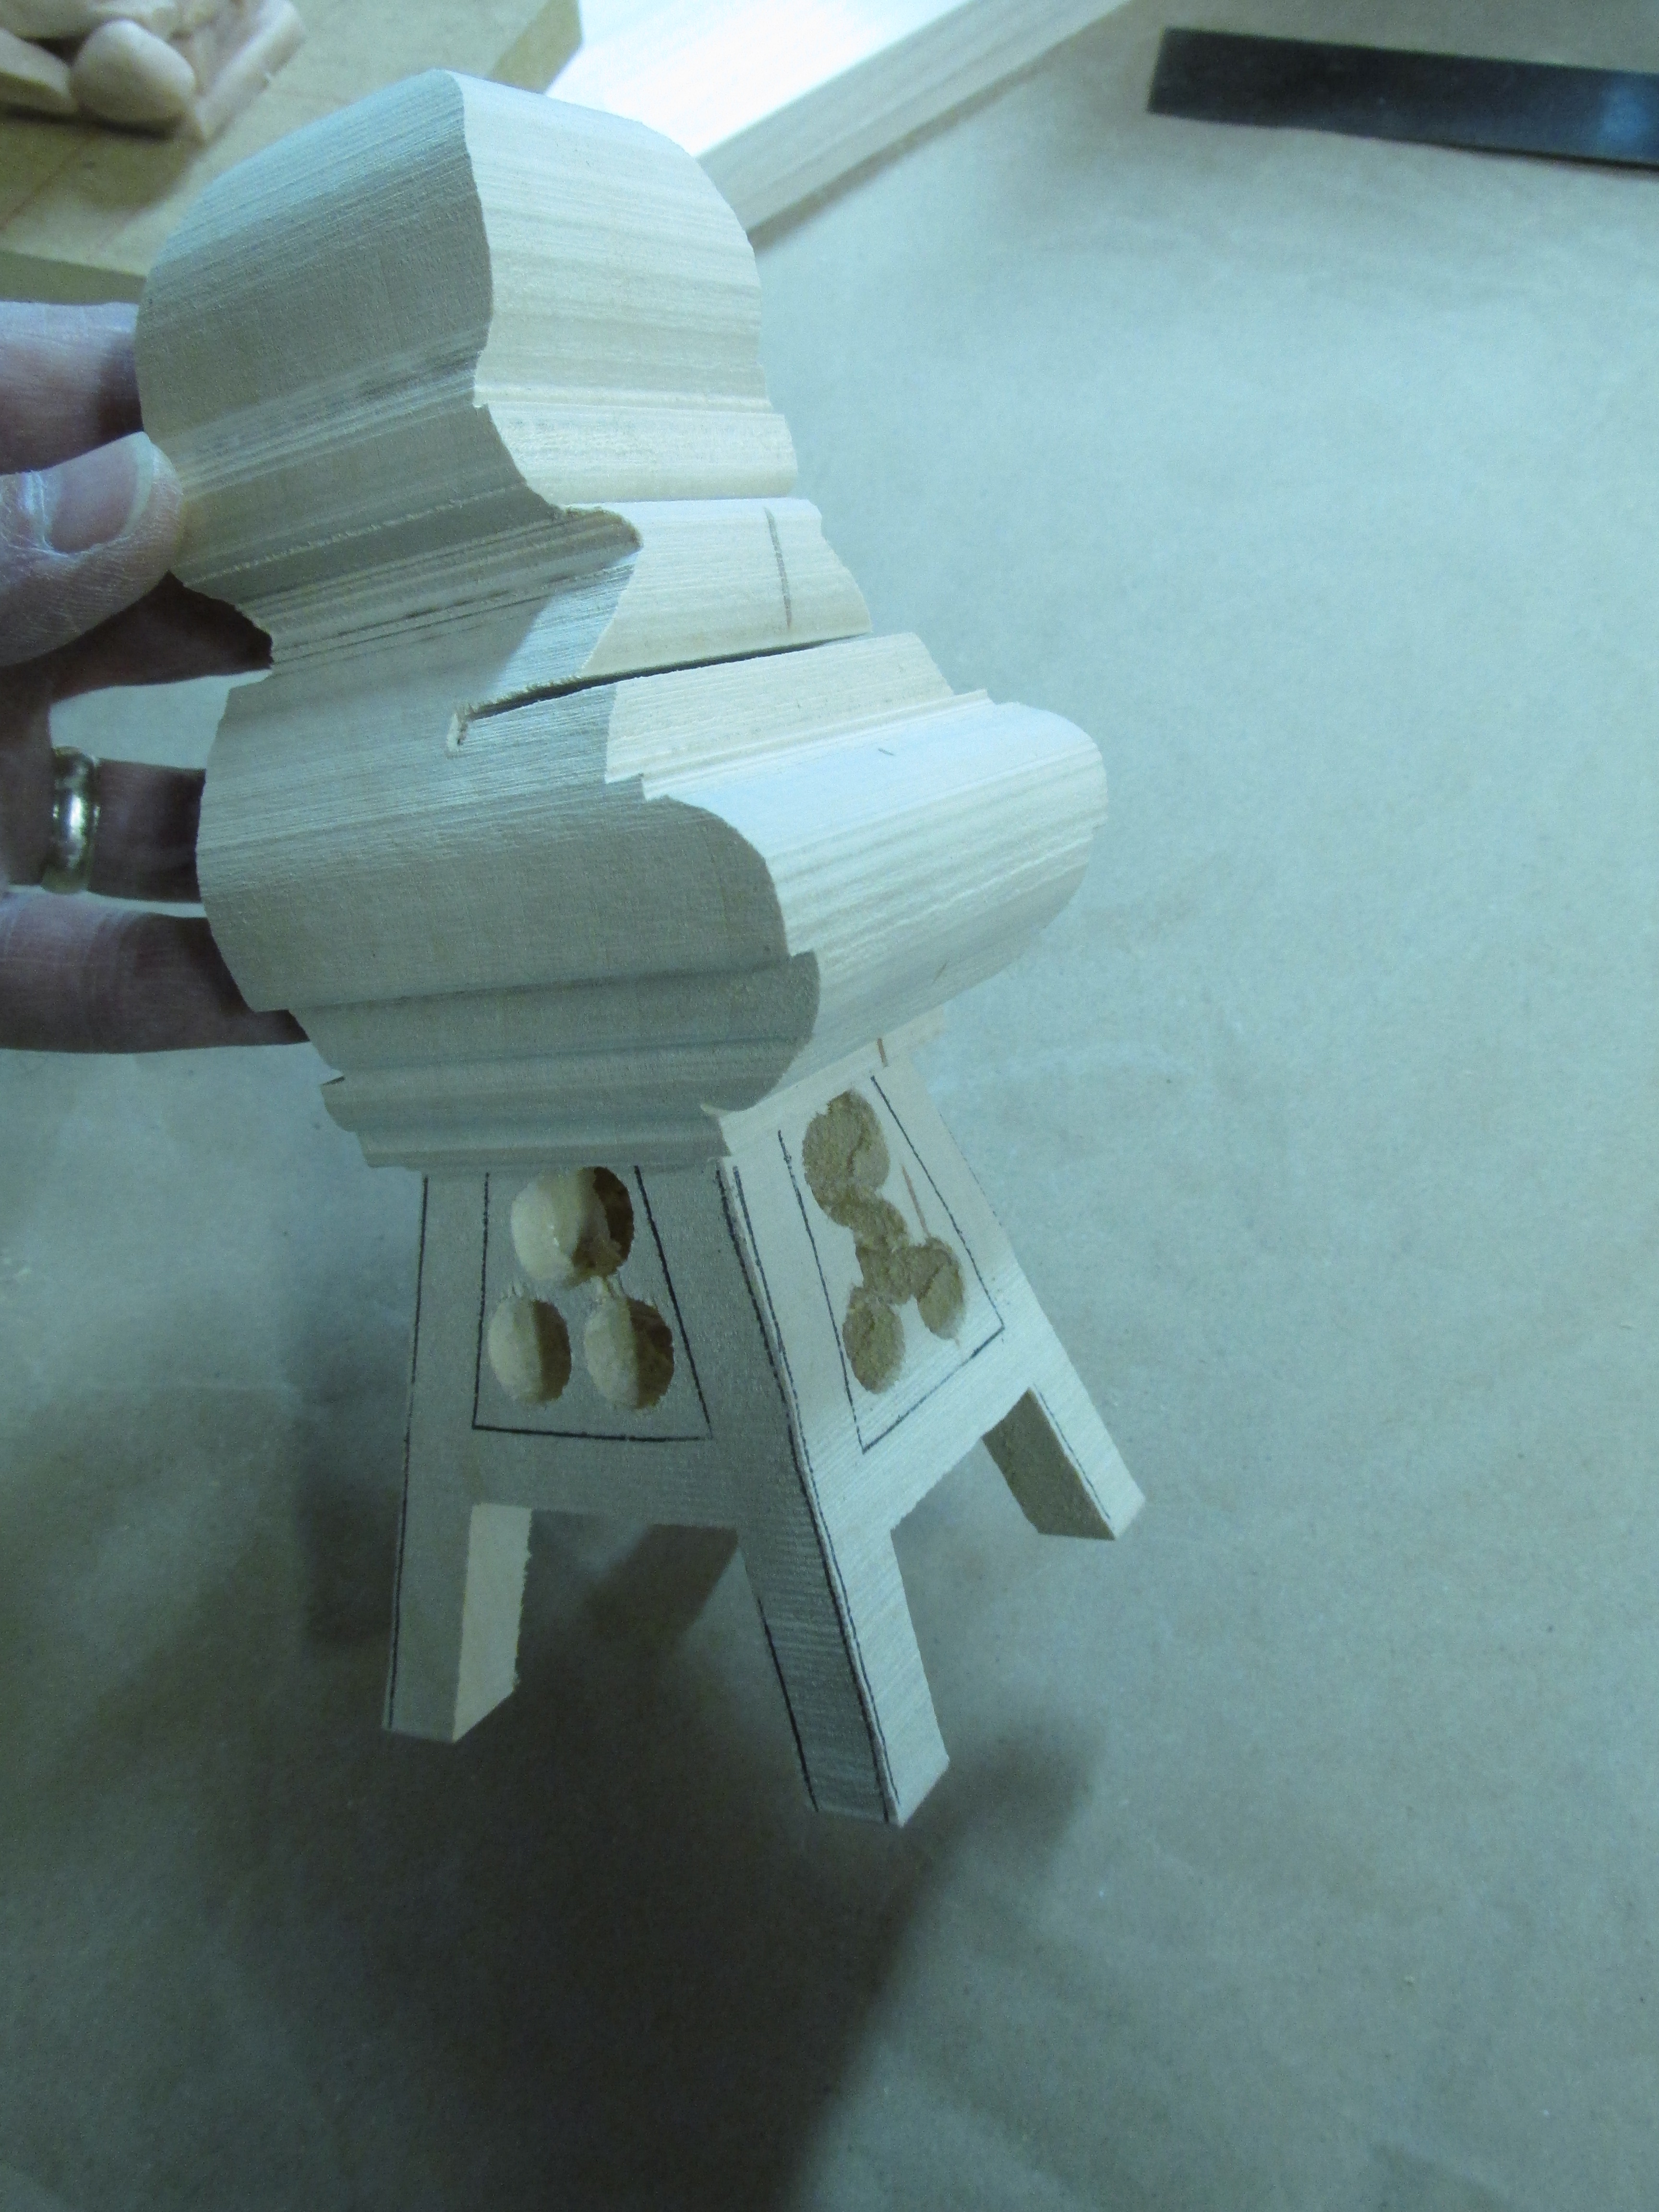
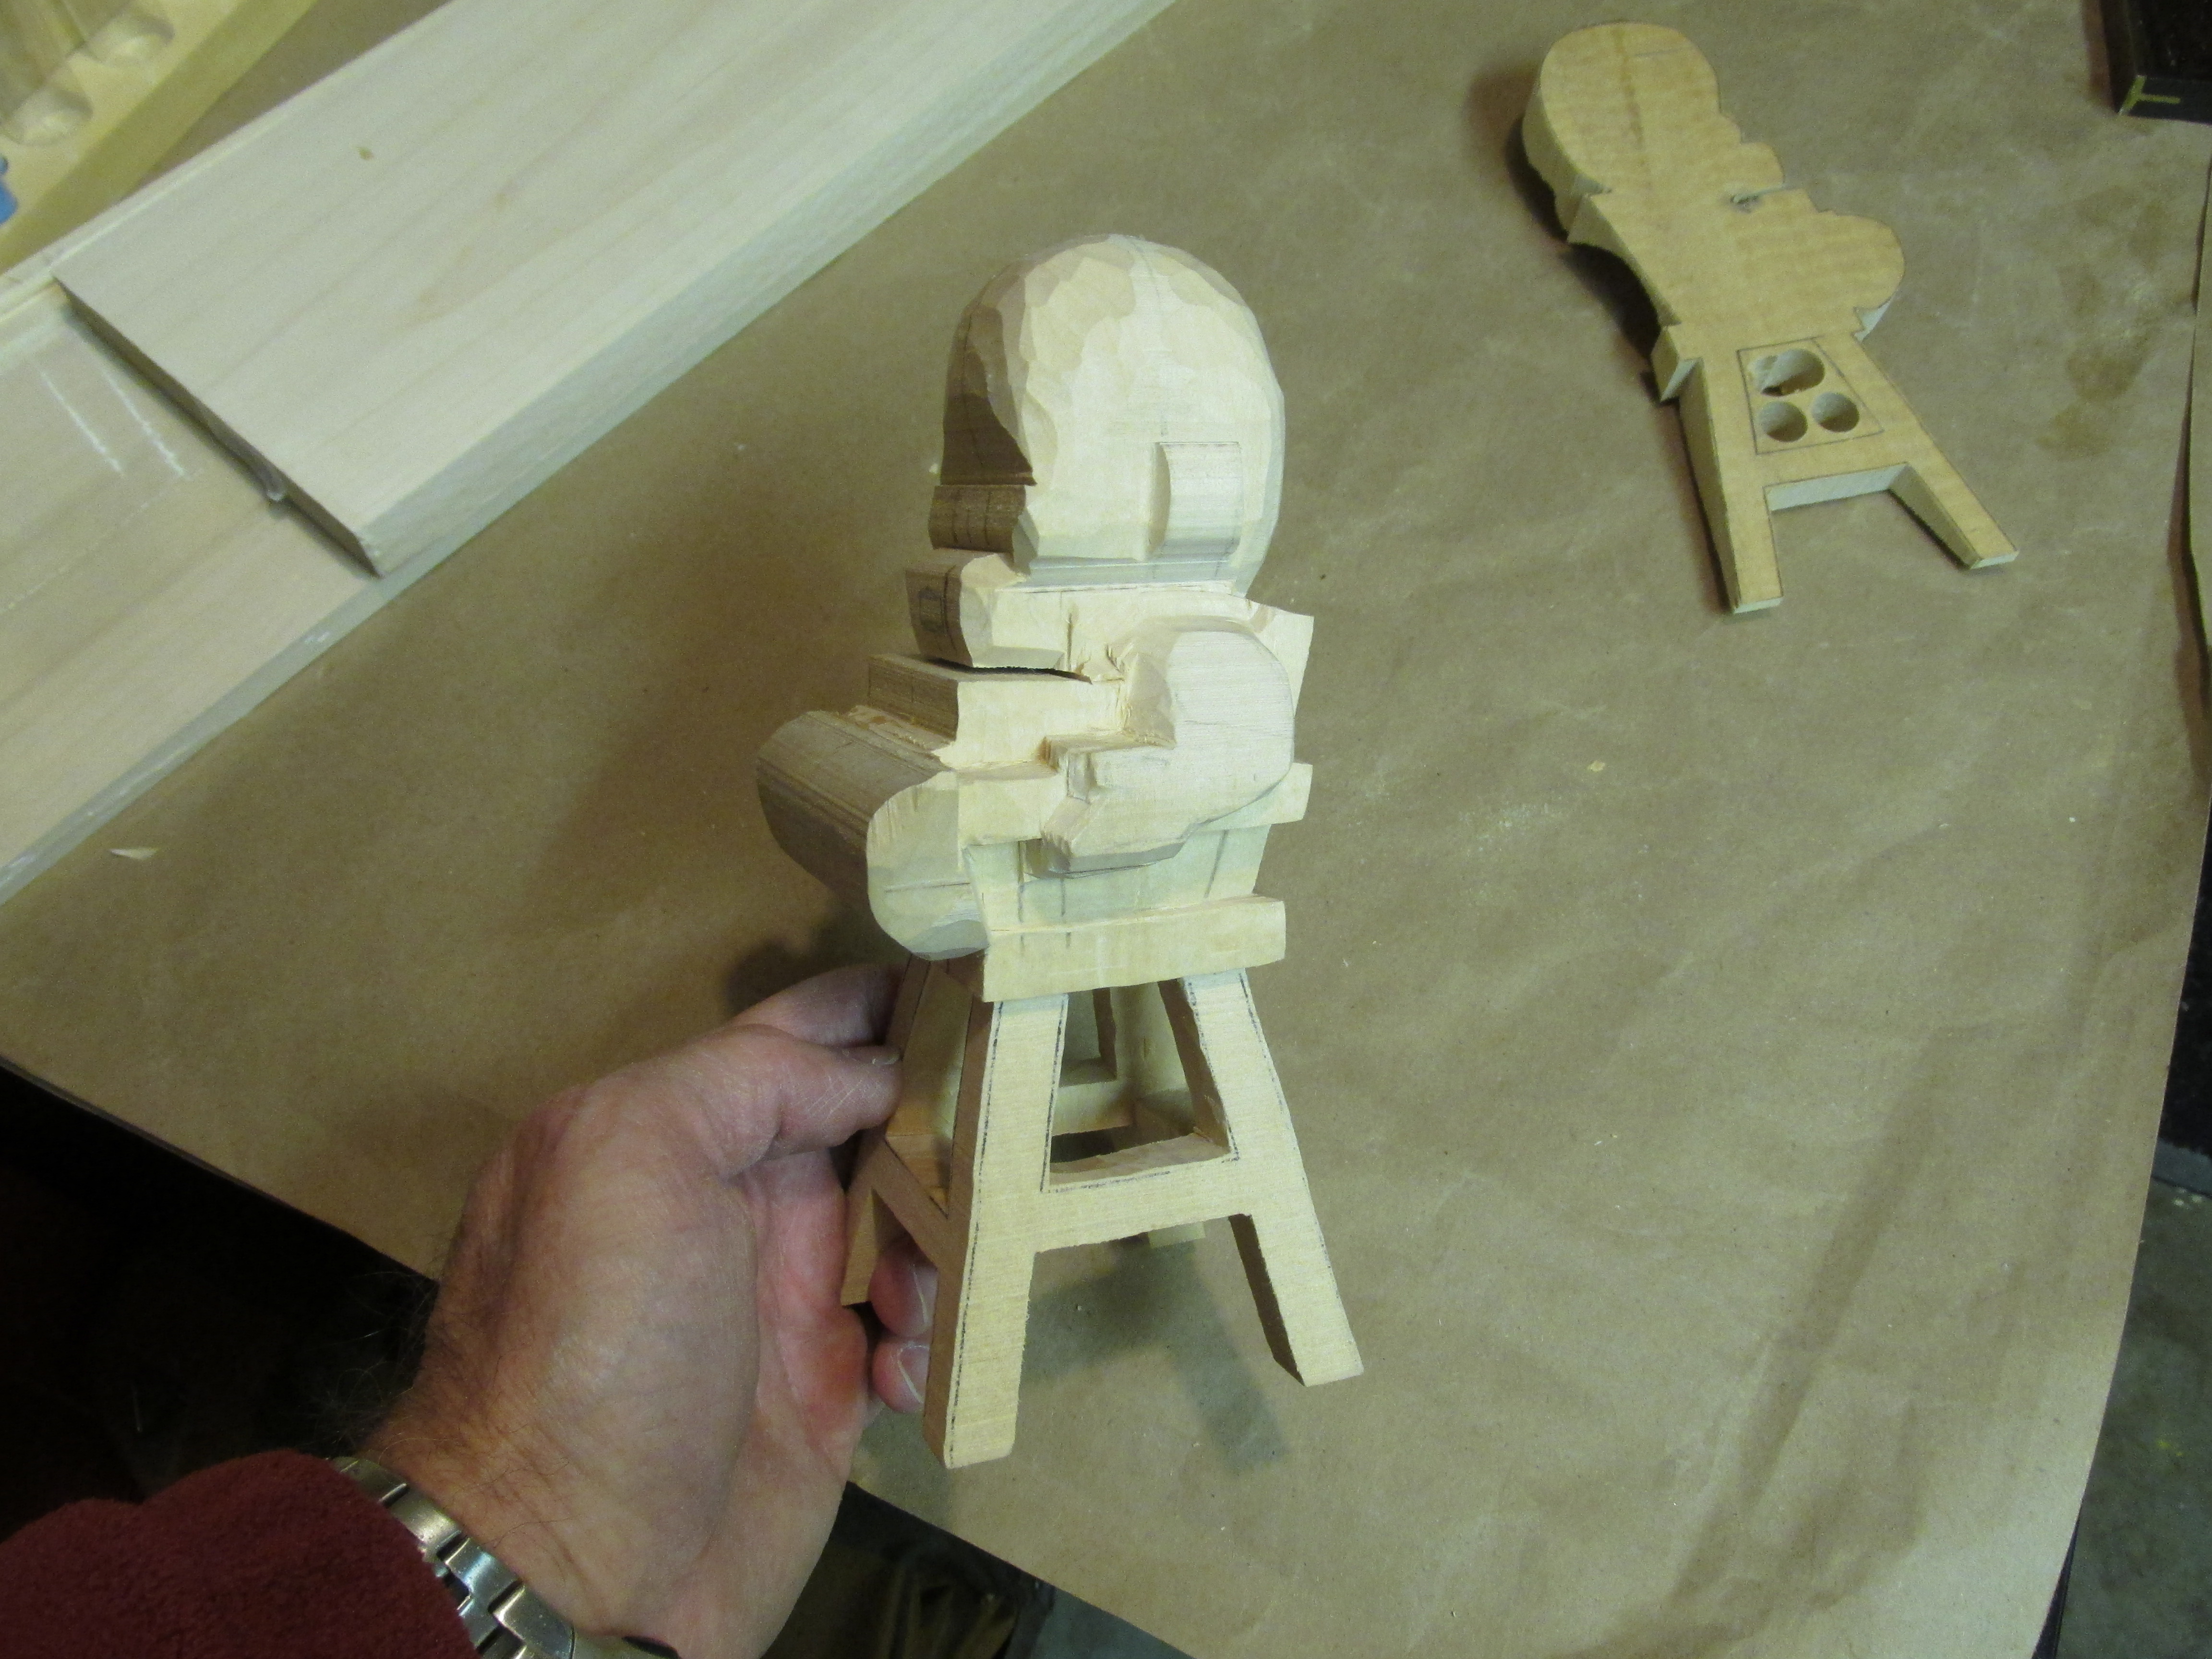
I am including several photos of my project showing my progress.The total height of the figure and base is eleven and a half inches (29.5cm). The design included enough wood for options to place Santa’s hat on his head or in his left hand. Santa’s right hand was designed to hold a walking staff to be carved separately.
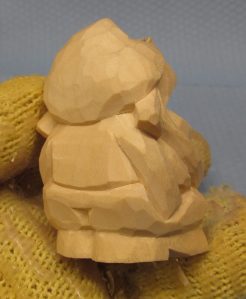
This is the “roughout” provided for the class.
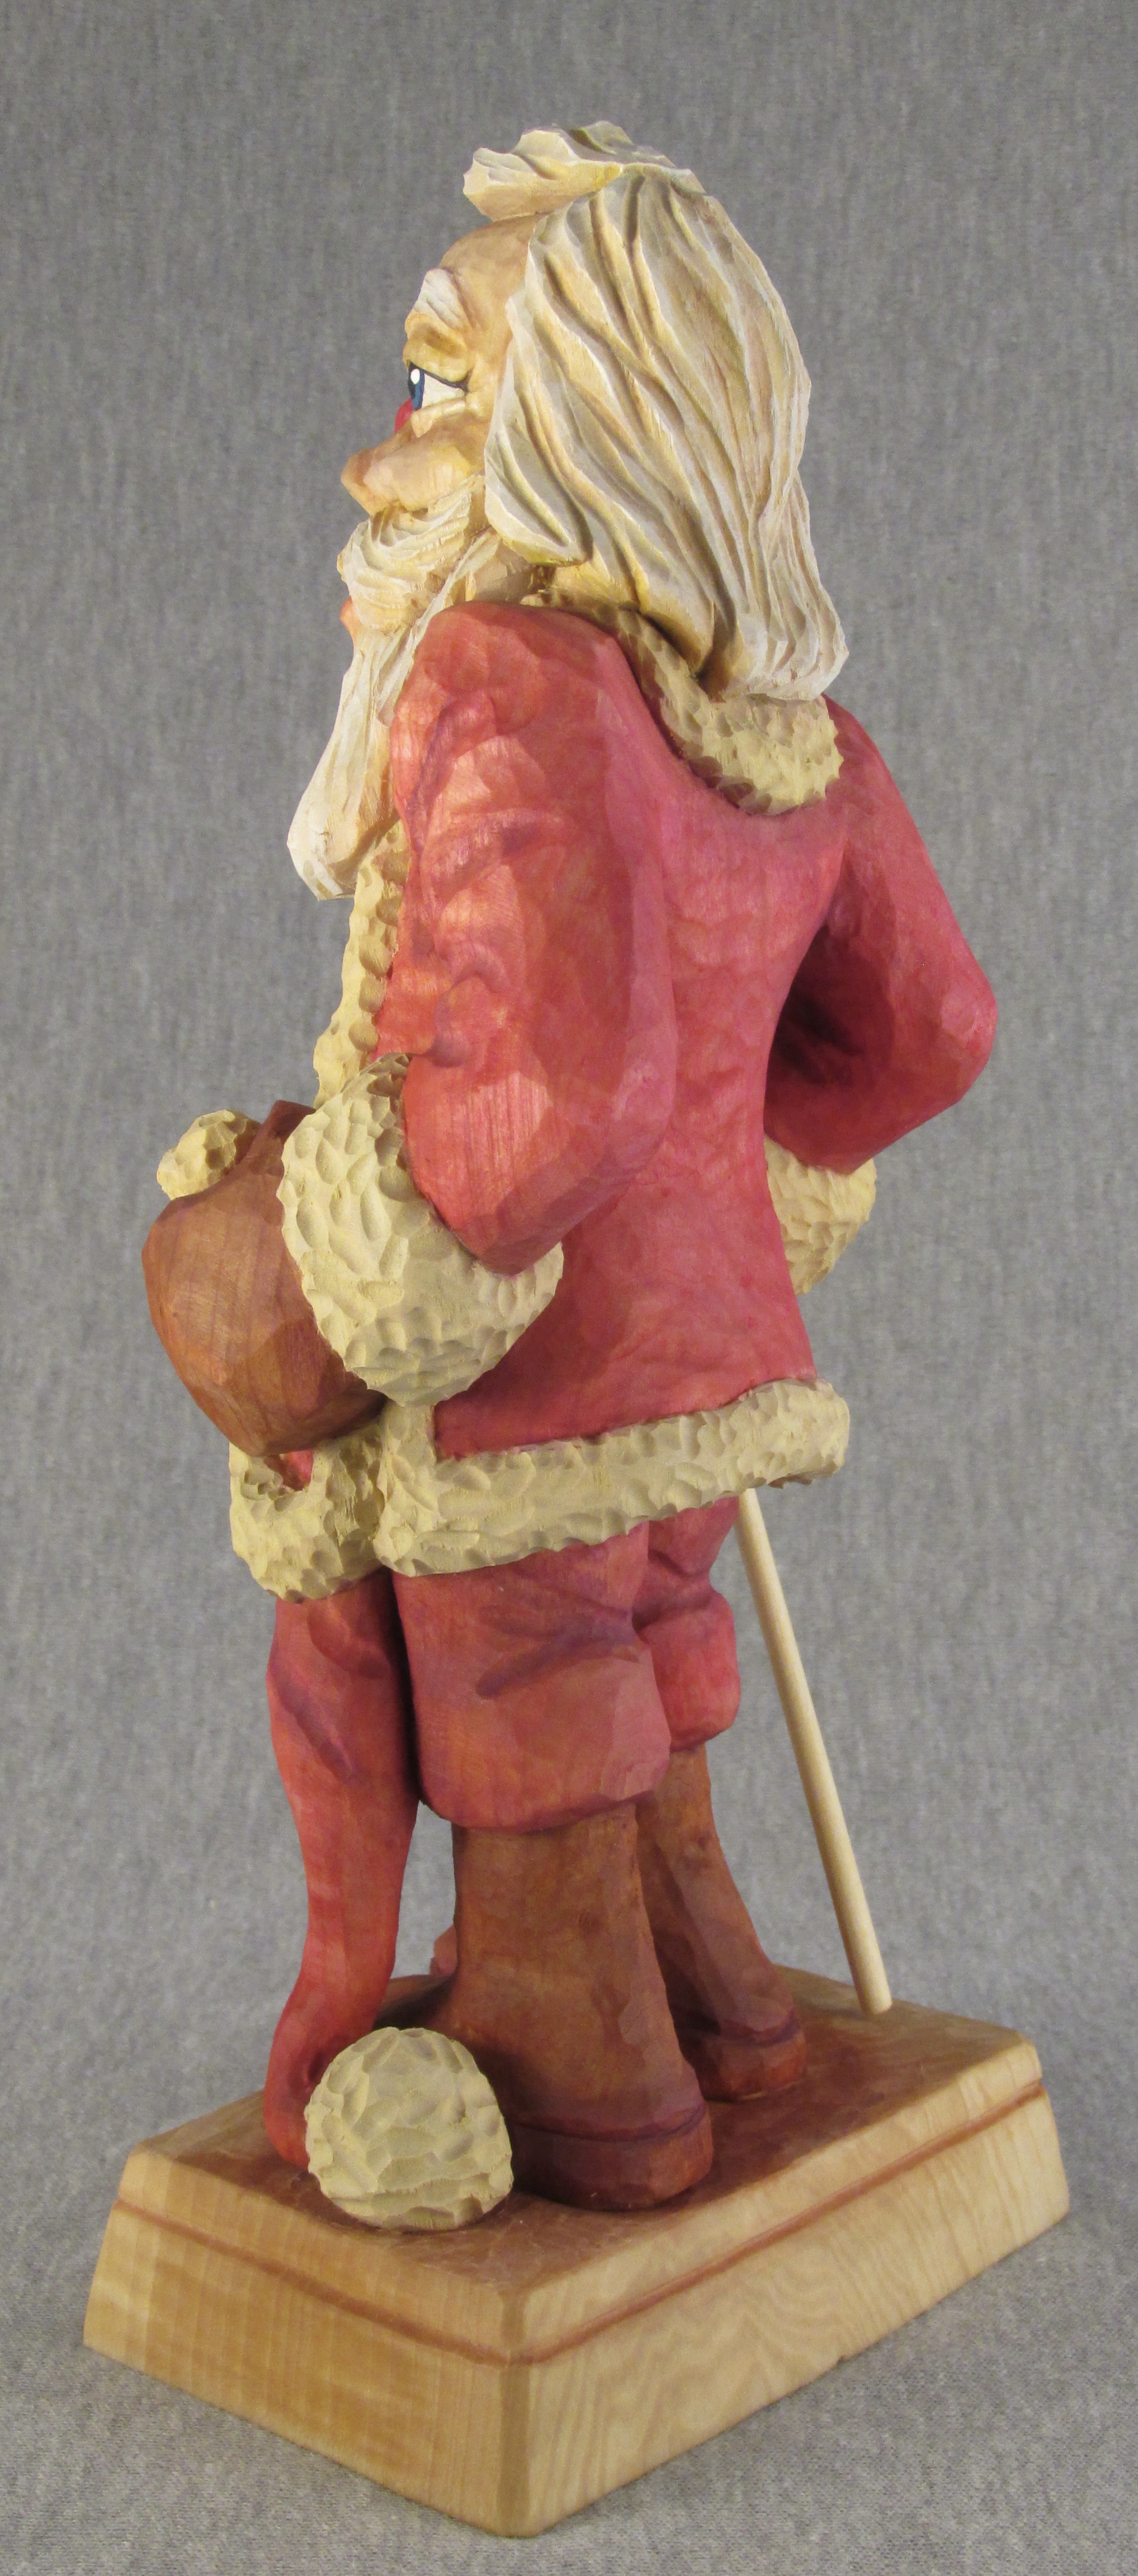
The first four photos show a lot of progress made at this point. Details on the shirt, belt, boots and remaining fur trim are to be added. The two photos with the newspaper background show the completed carving in the painting stage. The piece has been coated with boiled Linseed oil (BLO). The last two pictures have the shaded areas enhanced with acrylic burnt sienna. The costume has been painted with red acrylic and the eyes have the beginning coat of white.
Here is the completed 2020 Stetson Heirloom Santa, ready to be passed from this generation to many more to come.As practice, during the class, I used a small pattern based on the roughout to carve two Santas. These were cut on the bandsaw.
This is a simple example of beginning with a blank cut on the bandsaw and creating variations. The pattern is from CCA member Ryan Olsen. The wood is Basswood. The figure is three inches (76mm) tall and one and a half inches (38mm) square.
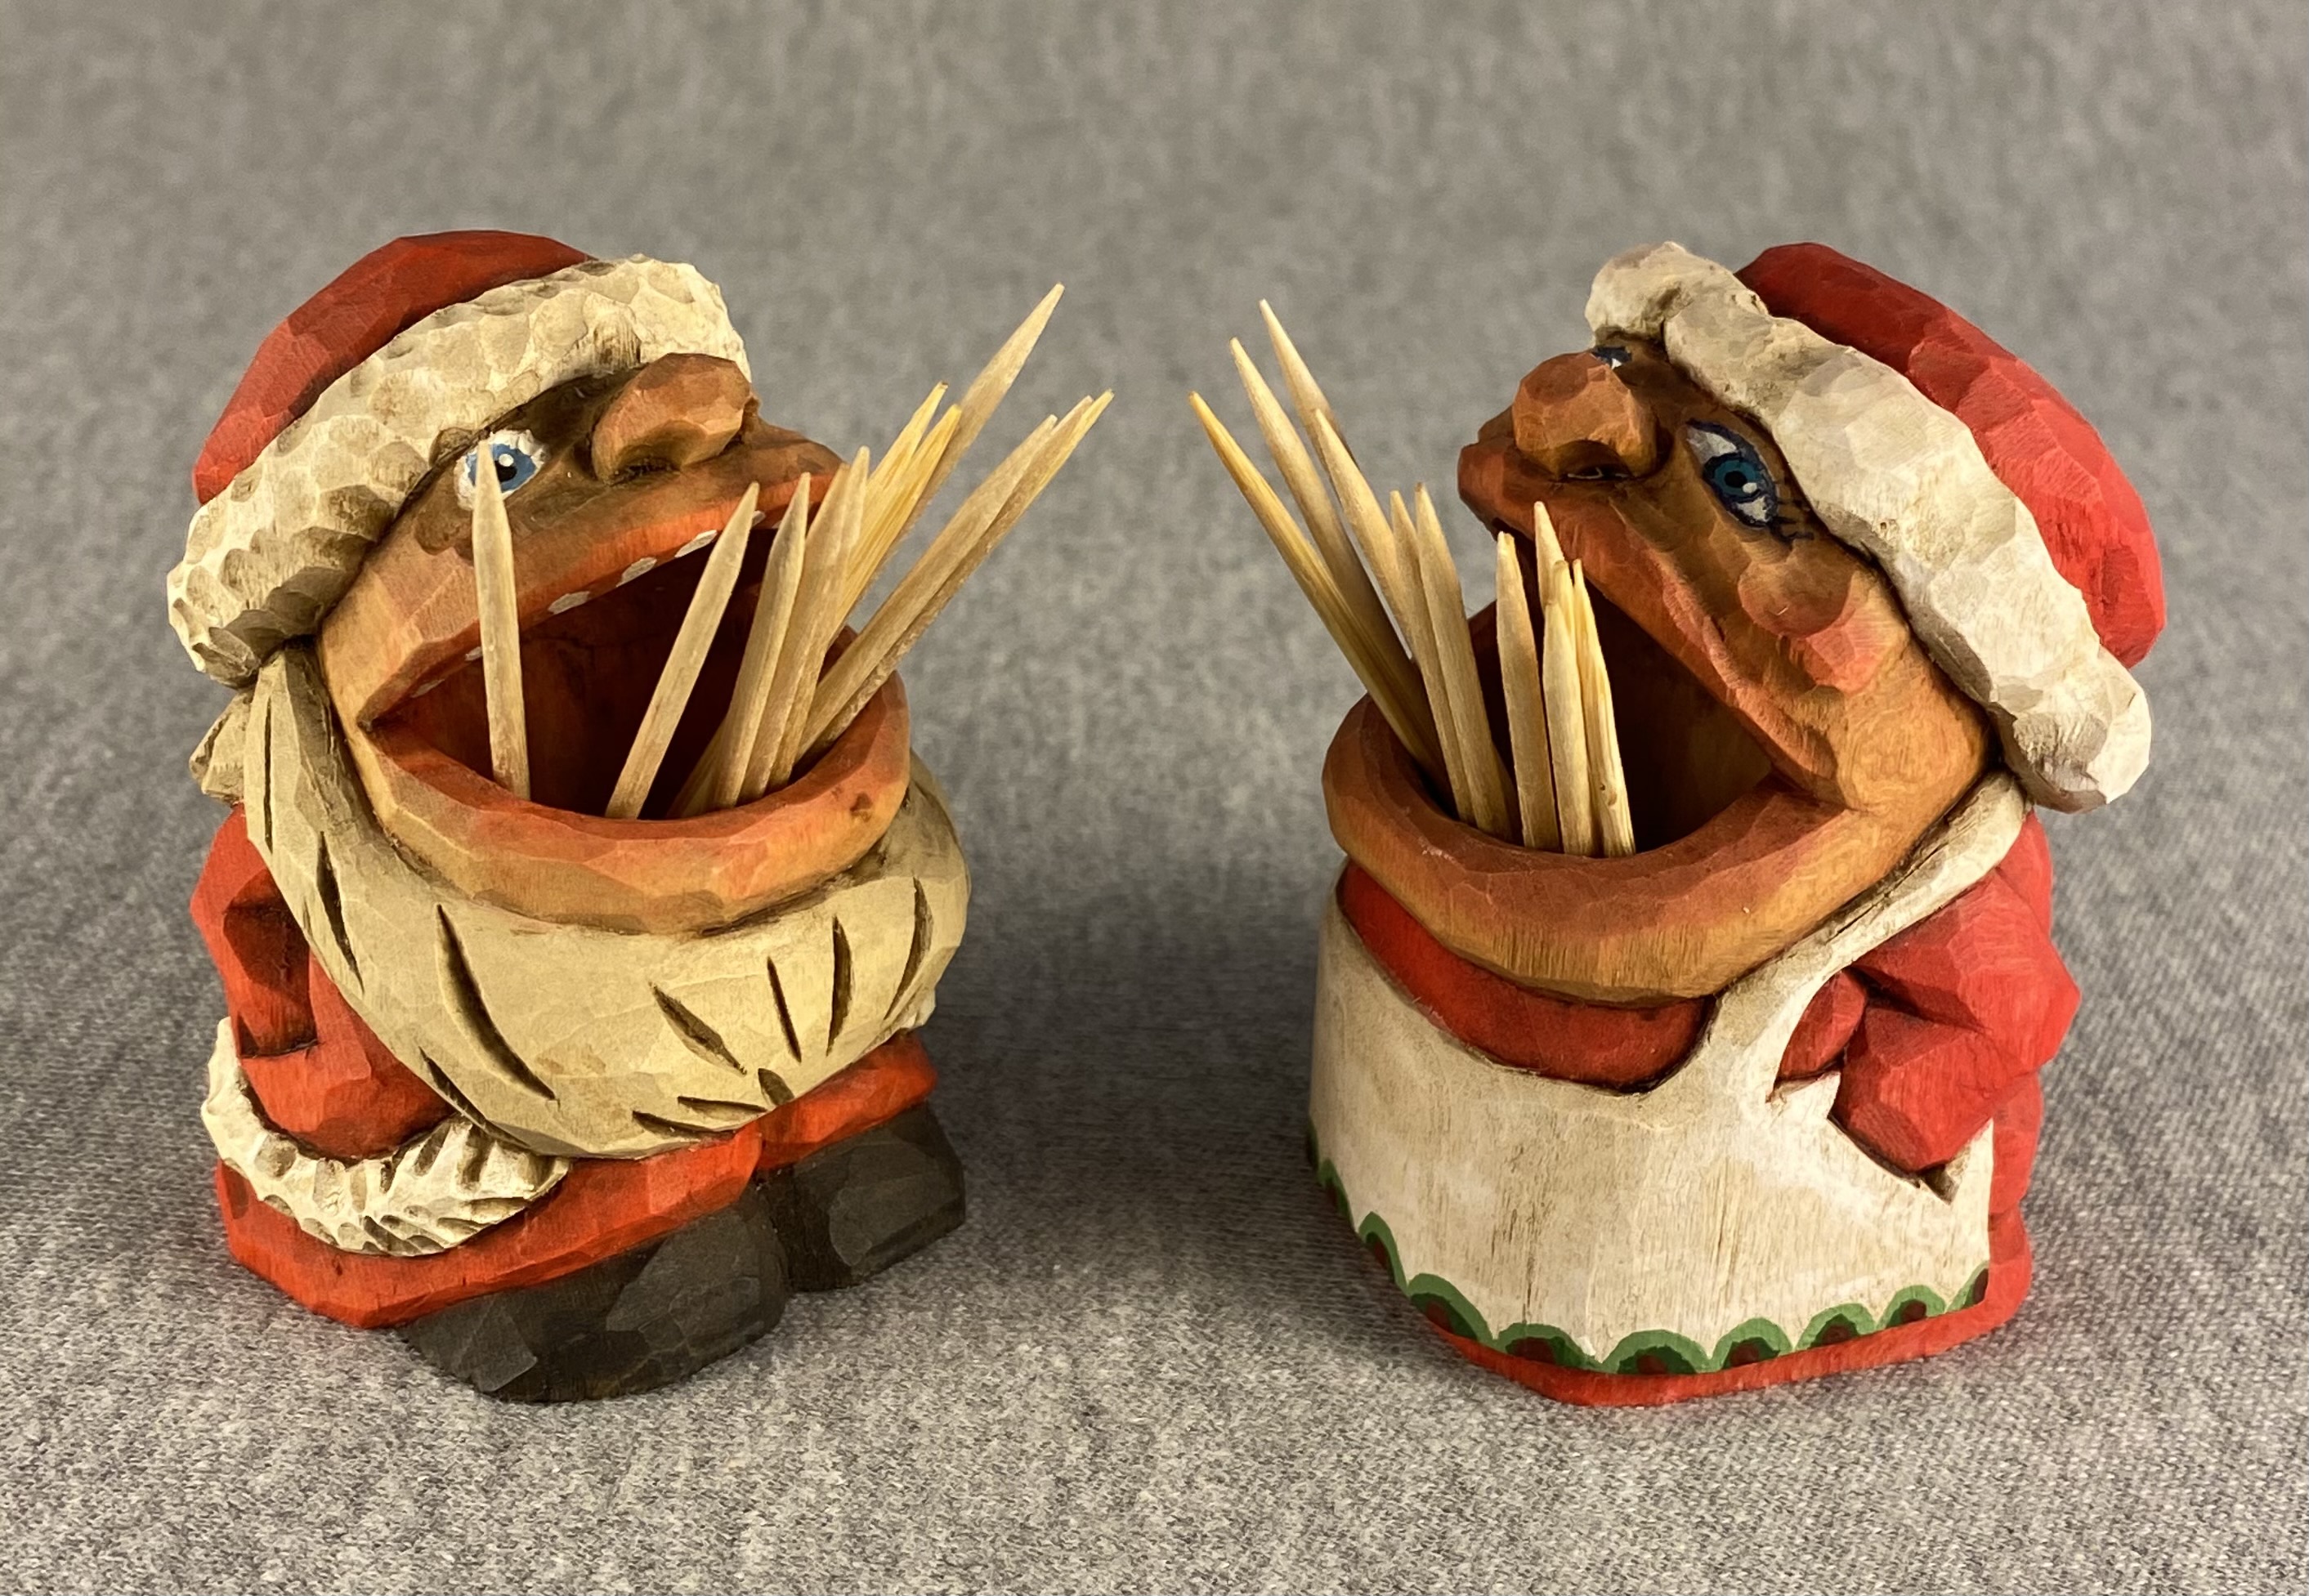
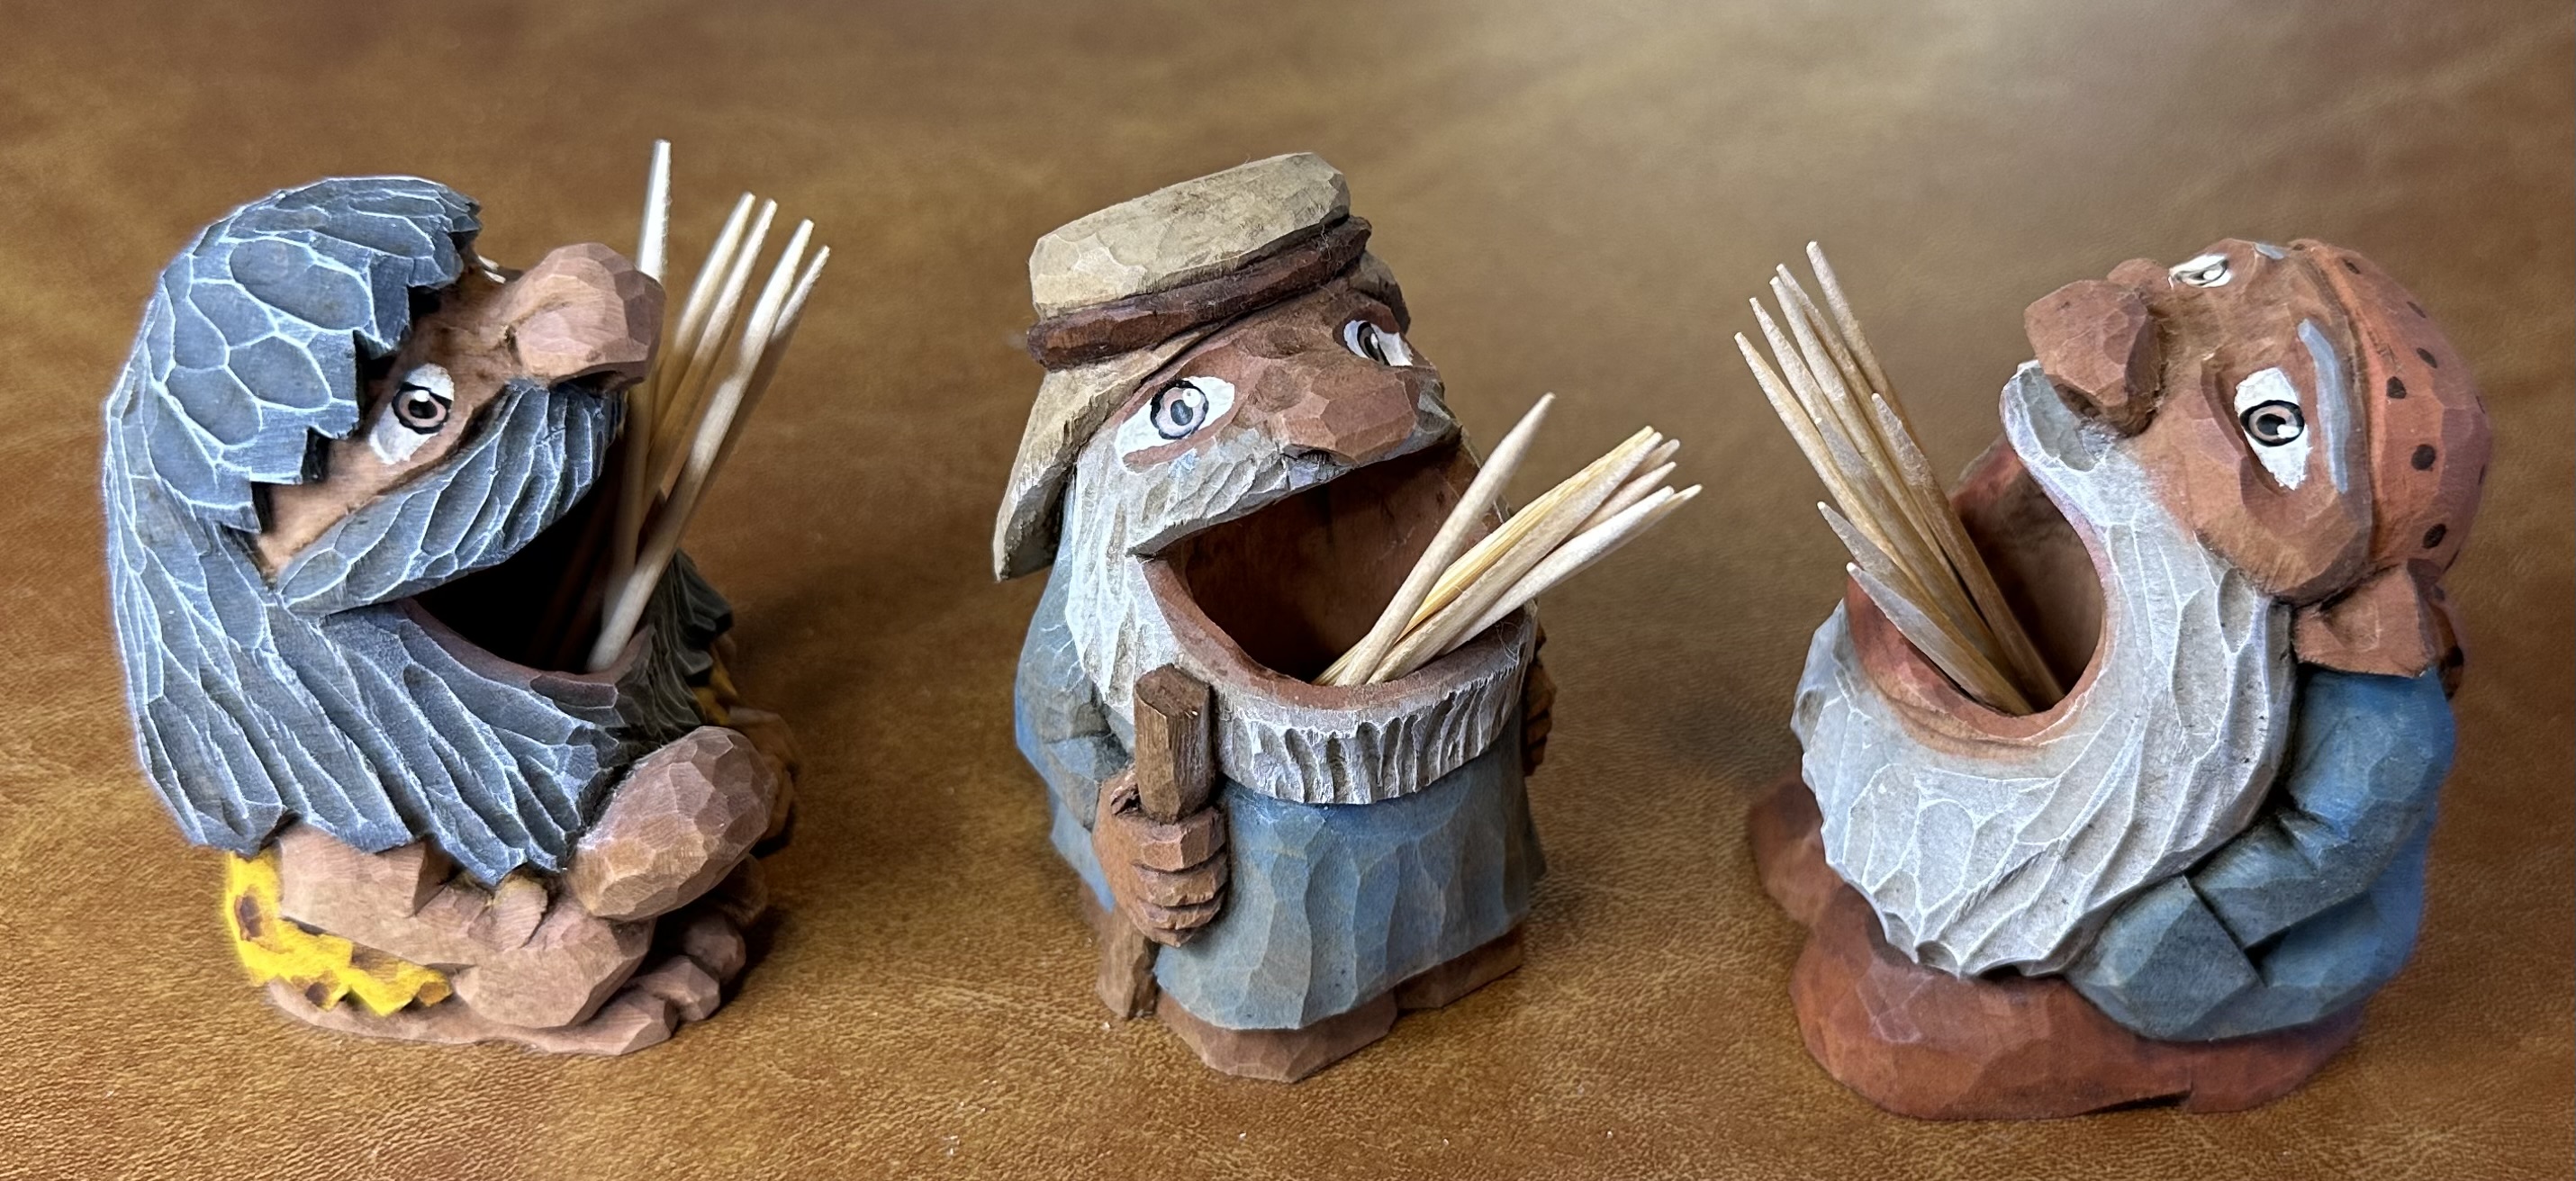
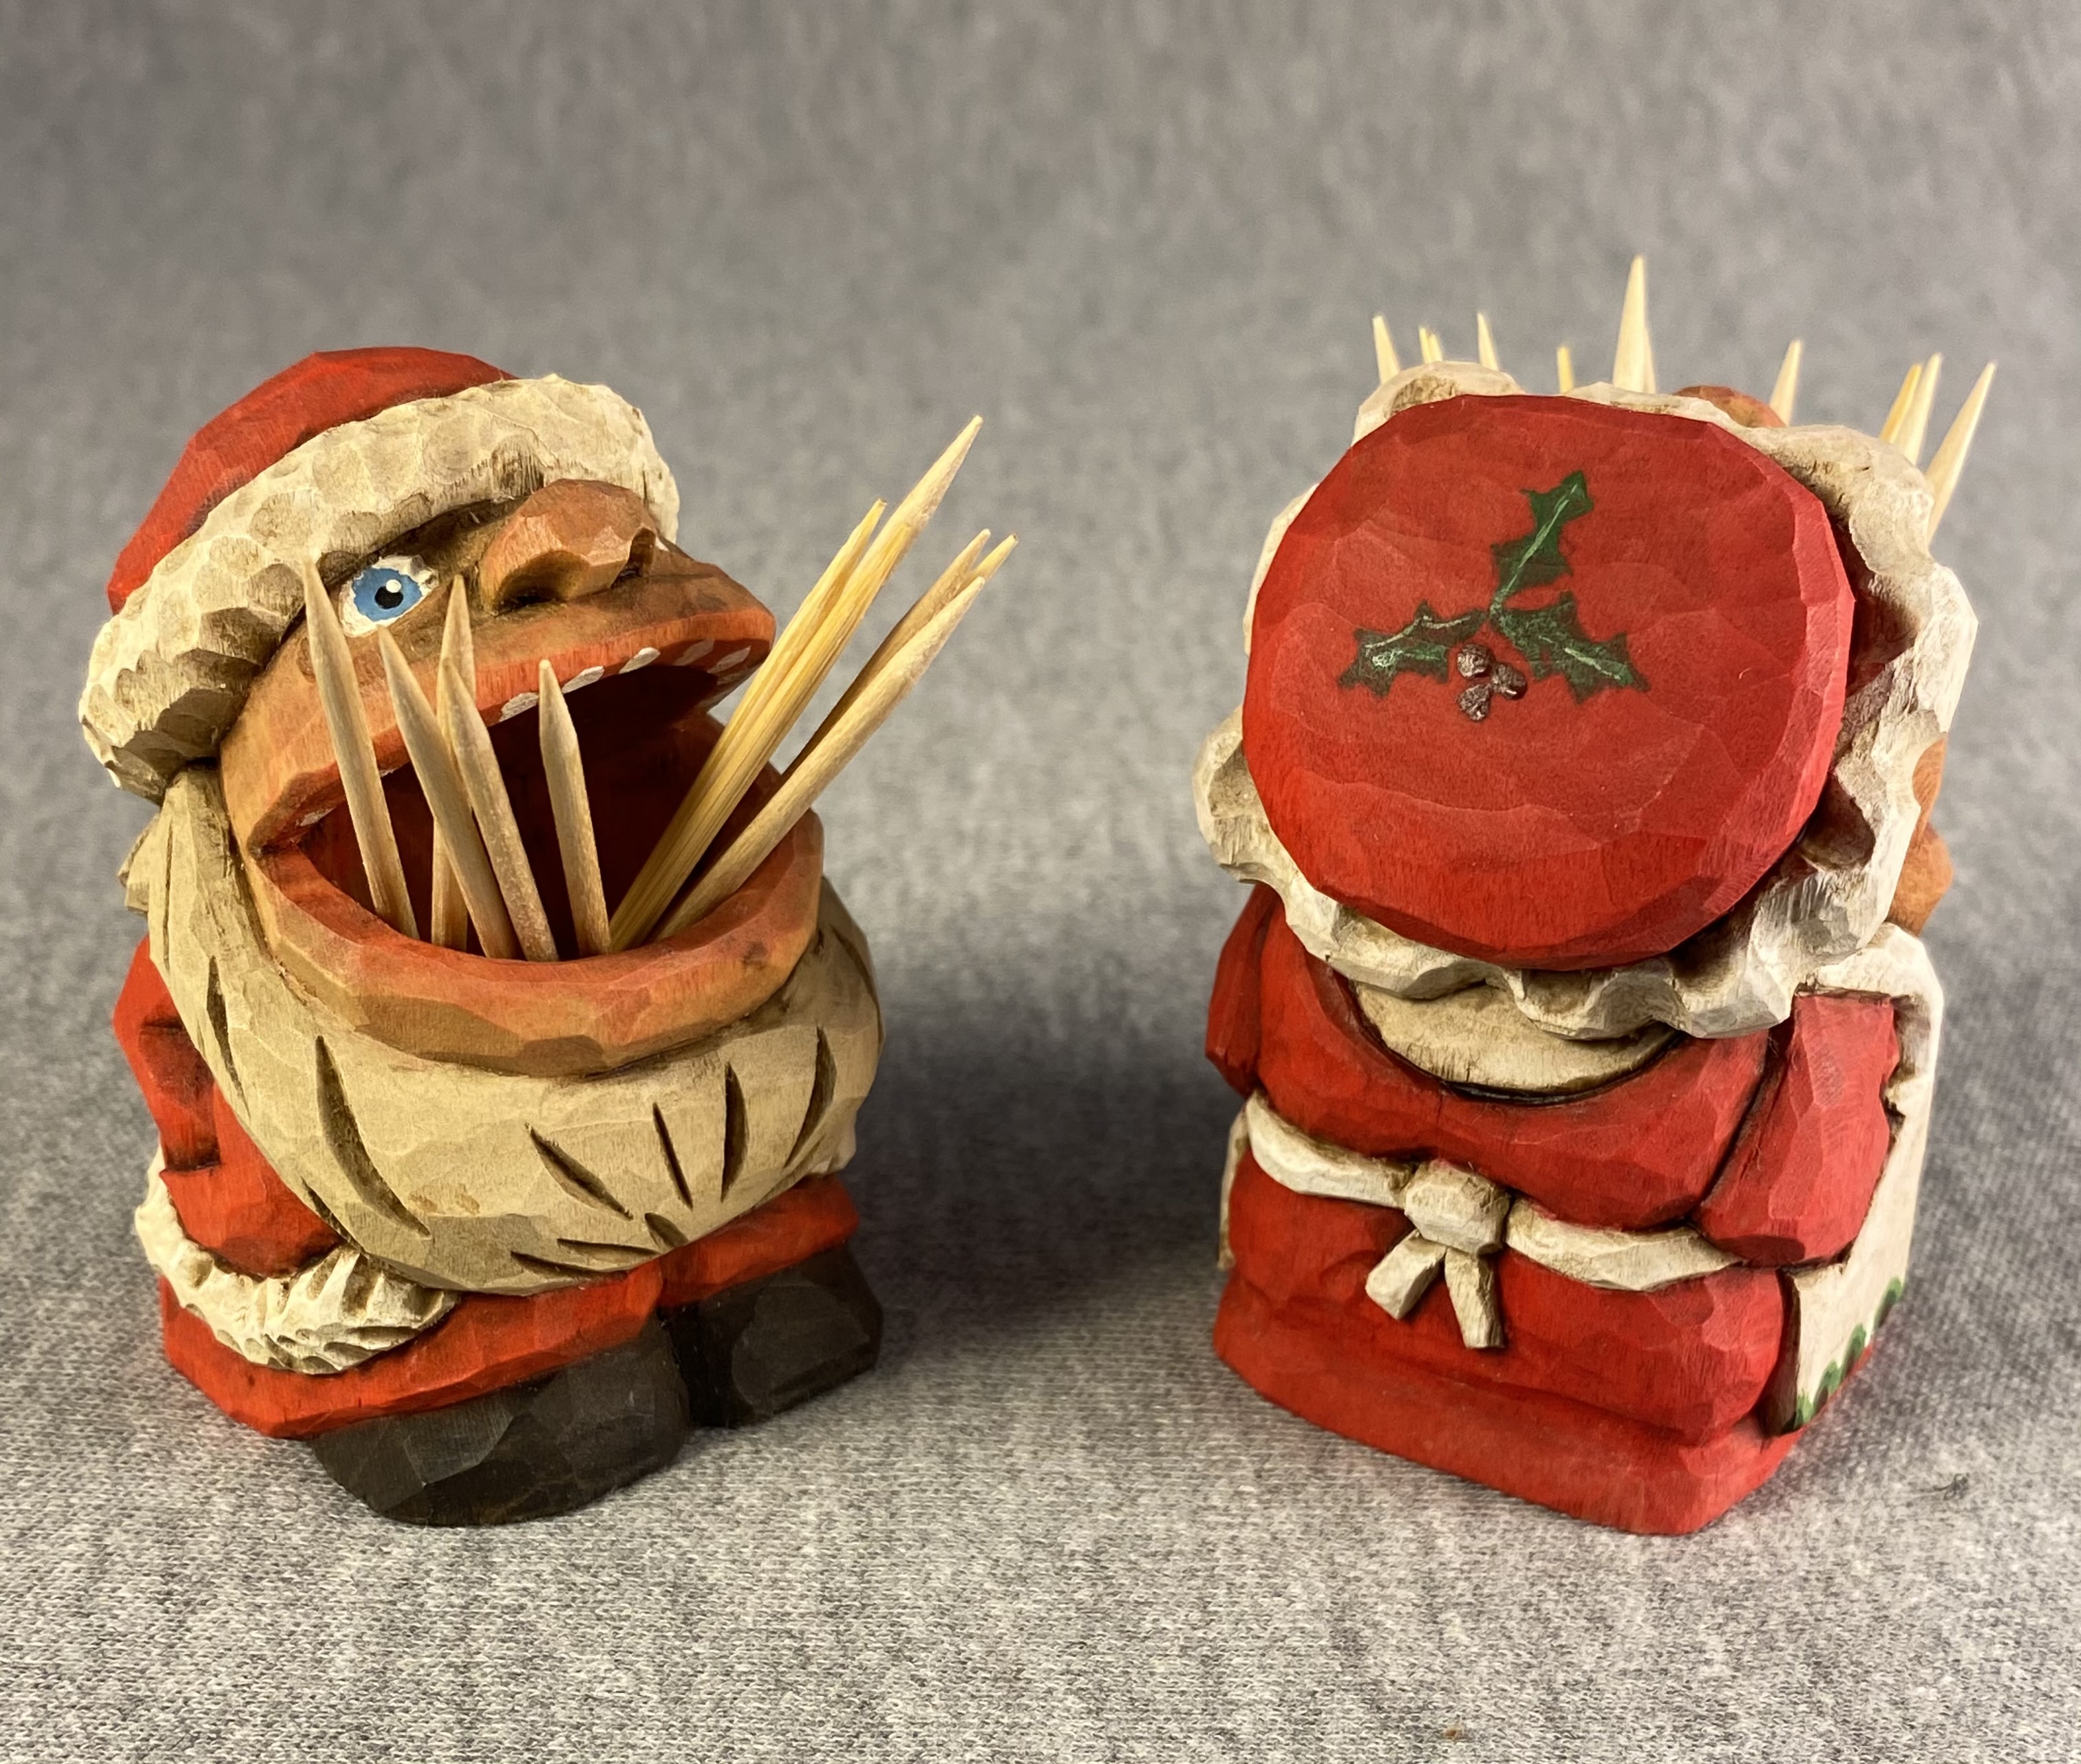
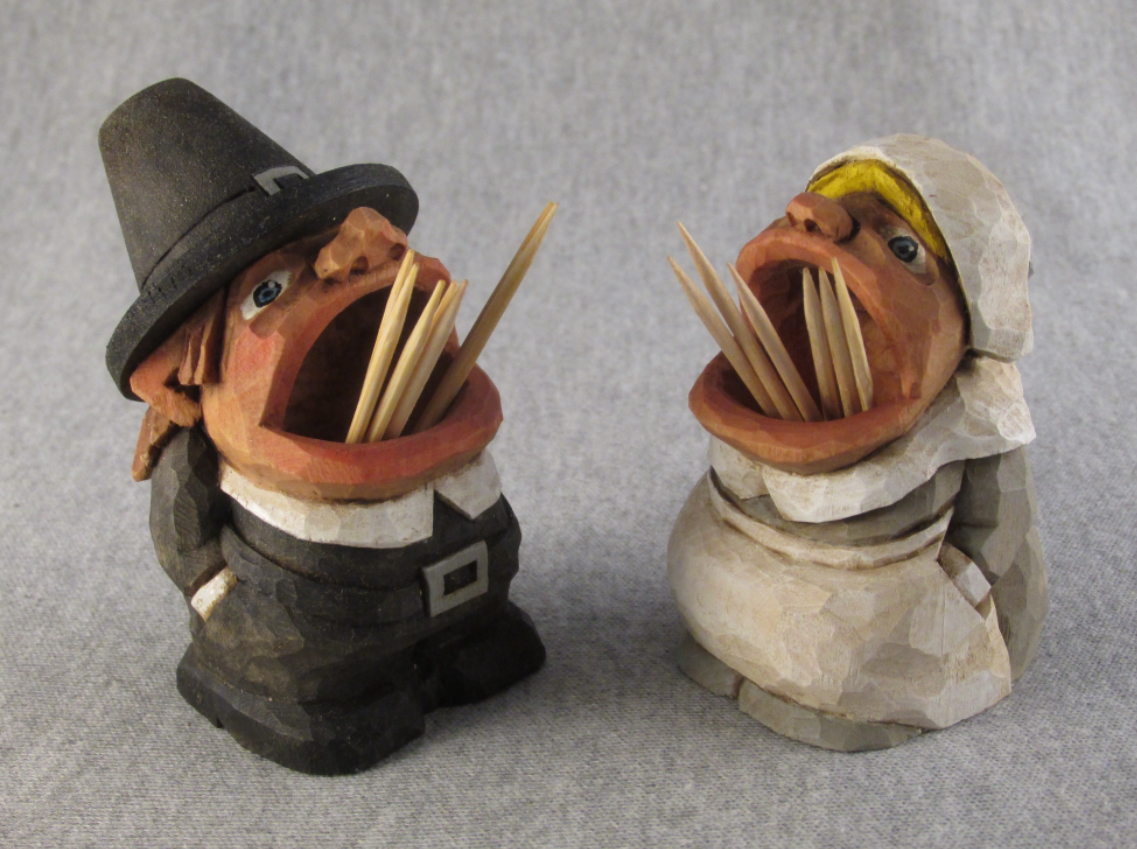
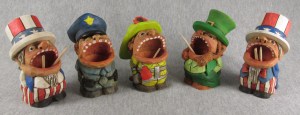
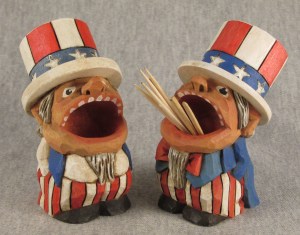
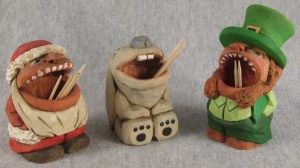
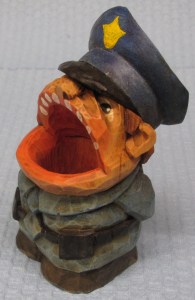
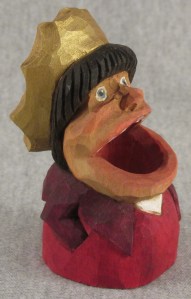
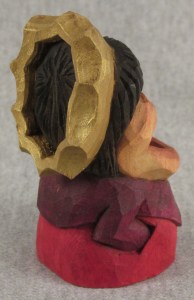
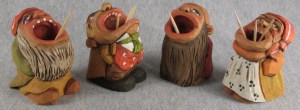
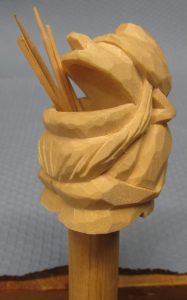
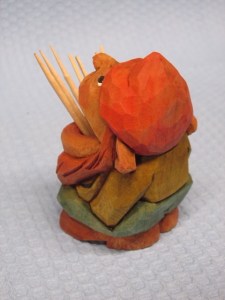
I’ve been fascinated by carved toothpick holders, especially the old European ones. Near the end of World War I a company called ANRI began producing and marketing hand carved products, both decorative and utilitarian. Toothpick holders are some of the more useful ones. They were mostly whimsical representations of women, men and gnomes. The carving style was very simple and some of the features were just added with paint. My intent was to retain the symplicity of the originals by limiting the number of tools used. I copied some of the original patterns before I tried my own designs. I discovered I was carving more details as I designed more patterns. This means you can attempt this project from a wide range of carving experience. I will focus on the aspects unique to toothpick holders such as the open mouth, the internal cavity and the limited area for the facial features.
MATERIALS:
* 3/4″ (19mm) hardwood dowel or hand carved dowel from basswood
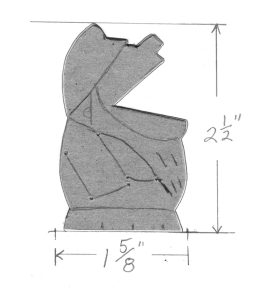
* Basswood, 1 5/8″ (41mm) X 1 5/8″ (41mm) X 2 1/2″ (64mm)
* Minwax clear satin polyurethane liquid
* Acrylic paints, such as Jo Sonja in assorted colors of your choice
* Finishing wax, such as WATCO dark and light
TOOLS:
* Forstner bit, 3/4″ (19mm) and a drill press
* Carving knife with 1 3/4″ (44mm) blade
* #9 Gouge, 3/8″ (9mm)
* #11 Gouge, 1/8″ (3mm)
* Micro Gouge 3/16″ (5mm)
* V-tool, 60 degrees, 1/8 (3mm)
GETTING STARTED:
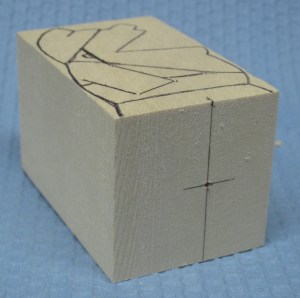
I usually design just a side view. I always make a cardboard template of my design. Make sure the toothpick hole is located toward the front of the profile but not so close that you may punch through when carving the details. Trace the profile onto a block of basswood and mark the center of the hole on the bottom. Locate the hole in the center, left to right, on the block.
Drill the hole before cutting the profile. The depth for the hole in this project is
1 1/4″ (32mm). The hole may not reach the mouth opening, but working from the inside of the mouth and up thru the bottom of the hole you will expose the top of the hole. Follow the instructions below to develop the mouth/hole opening.
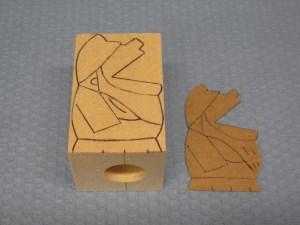
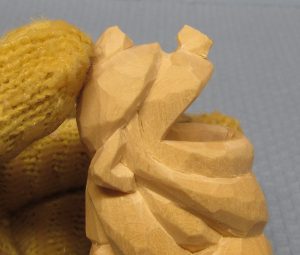
Use a bandsaw to cut the profile. Most profiles are simple enough to shape with a knife if you don’t have a bandsaw. In that case, trace the cardboard template on the opposite side to keep the profile aligned. I always draw a center line and add lines for details on the front and back before carving.
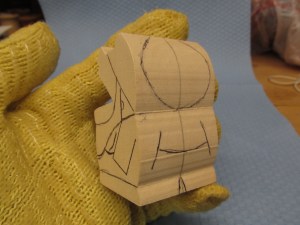
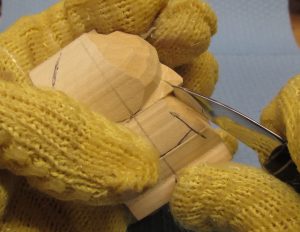
Begin carving by removing wood from both sides of the nose.
Continue shaping with a knife.
Work on both sides to keep the features symmetrical.
Taper the ears toward the face so the ear appears to stop under the beard.
Remove a wedge of wood between the back of the ear and the hat.
Carve the shoes and complete the other features of the body.
SHAPING THE MOUTH:
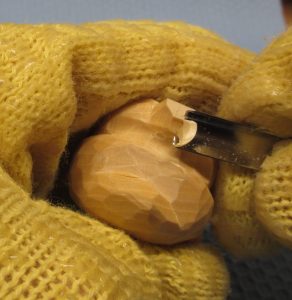
Shape the outside of the lower lip with the knife.
Shape the inside of the lower lip using the end of the knife blade. This is a good time to remove the surface left by the bandsaw.
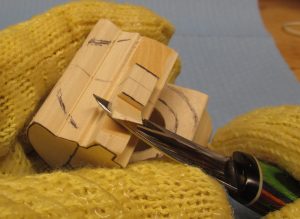
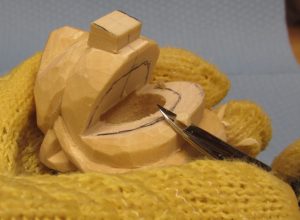
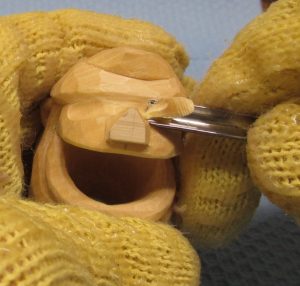
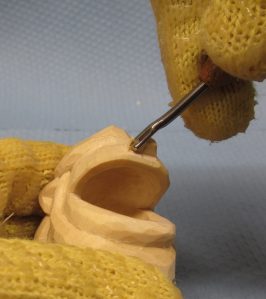
Mark a line parallel to the shape of the upper lip. Leave enough space for an optional row of teeth. The roof of the mouth is recessed using a #9, 9mm (3/8″) palm tool.
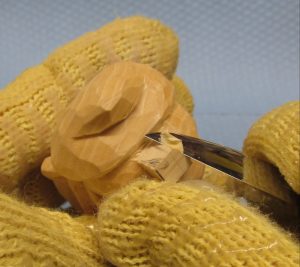
The same tool is used to taper the top of the hole to complete the transition to the roof of the mouth. Work from the bottom of the hole. Work around the inside of the hole to taper it toward the lower lip.
CARVING THE FACE
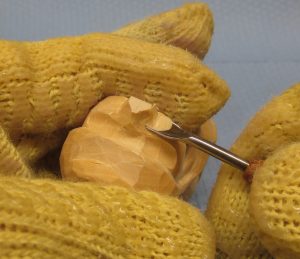
Taper the sides of the nose into a modified tent shape. Because the nose aligns with the grain, this action resembles sharpening a pencil with a knife.
You now have more room to use a #11, 3mm gouge to form the area between the eyes. This cut will remove wood from the nose. Avoid cutting the hat.
This is the completed cut of the area between the eyes.
Use a #11, 5mm gouge to make a recessed area for a painted eye. Cut from the side of the head tapering upward toward, and stopping at, the bridge of the nose.
Use the #9, 9mm gouge to improve the tent-shape of the nose. This will add form to the wings of the nose.
Use a 5mm micro gouge the form the wing of the nose. This action is a stop cut.
Use the same tool for the removal cut. Wood is also removed from the upper lip with this action.
Shape the nostril with the same micro tool. Make a stop cut from the tip of the nose toward the lip.
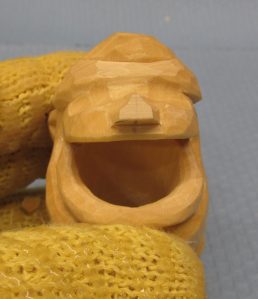
Use the tip of the knife to complete the cut. Add shape to the nose with a knife if necessary.
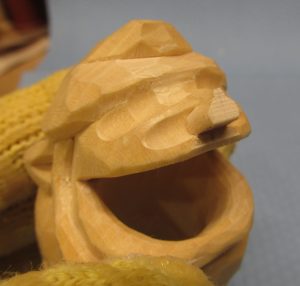
Add several cuts to the beard to suggest hair. Use a small V-tool such as a 60 degree, 1/8″. Now would be a good time to separate the hat from the face using a knife. Note the shadow in the picture.
I cut a short cylinder from a 3/4″ dowel for the plug. I determine the length by testing the amount of toothpick exposed. I mark the dowel and cut it with a bandsaw. Any wood glue can be used to permanently hold the plug. Examine the complete project and remove any remaining surfaces left by the bandsaw.
PAINTING THE TOOTHPICK HOLDER:
Scrub the carving with dish soap and warm water using a denture brush. Thin the paint with water to a stain consistency and apply with a brush to the damp wood. Light colors, such as white and pink should not be thinned as much, if any.
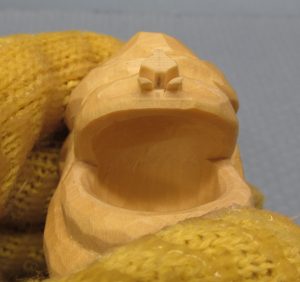
Paint the eyes when the flesh is dry. Use a round brush to apply a white oval shape for each eye. Keep the eyes simple by painting a black dot in the center of the dry white oval. Add a reflection to the eye with a tiny white dot to the side of the dry black dot. Position the white dot in the same spot in each eye.
Teeth are optional. If I add them, I just paint white dots inside the upper lip. A V-tool can be used to add separation to the teeth before painting.
Wait at least 8 hours for the wood and paint to dry. Brush on a liberal amount of polyurethane allowing it to soak in and to fill the valleys. Wait 10 minutes and use paper towels to remove any poly remaining on the surface. Use a clean natural brush to remove what the towel couldn’t reach in the corners. Allow the sealer 8 hours to dry.
For this project I mixed 30% dark and 70% light WATCO finishing wax. Apply the wax with a brush ensuring all surfaces and corners are covered and filled. I wait about 20 minutes before wiping the excess off with a clean cloth. This time do NOT remove the excess from the corners. This technique will darken the paint giving the project an aged look. Set the project aside overnight to dry completely. If it’s still sticky, buff with a cloth.
———————————- Please Note ———————————-
Dispose of the cloths properly. WATCO wax contains boiled linseed oil so cloths and paper towels soaked with the wax can spontaneously combust.
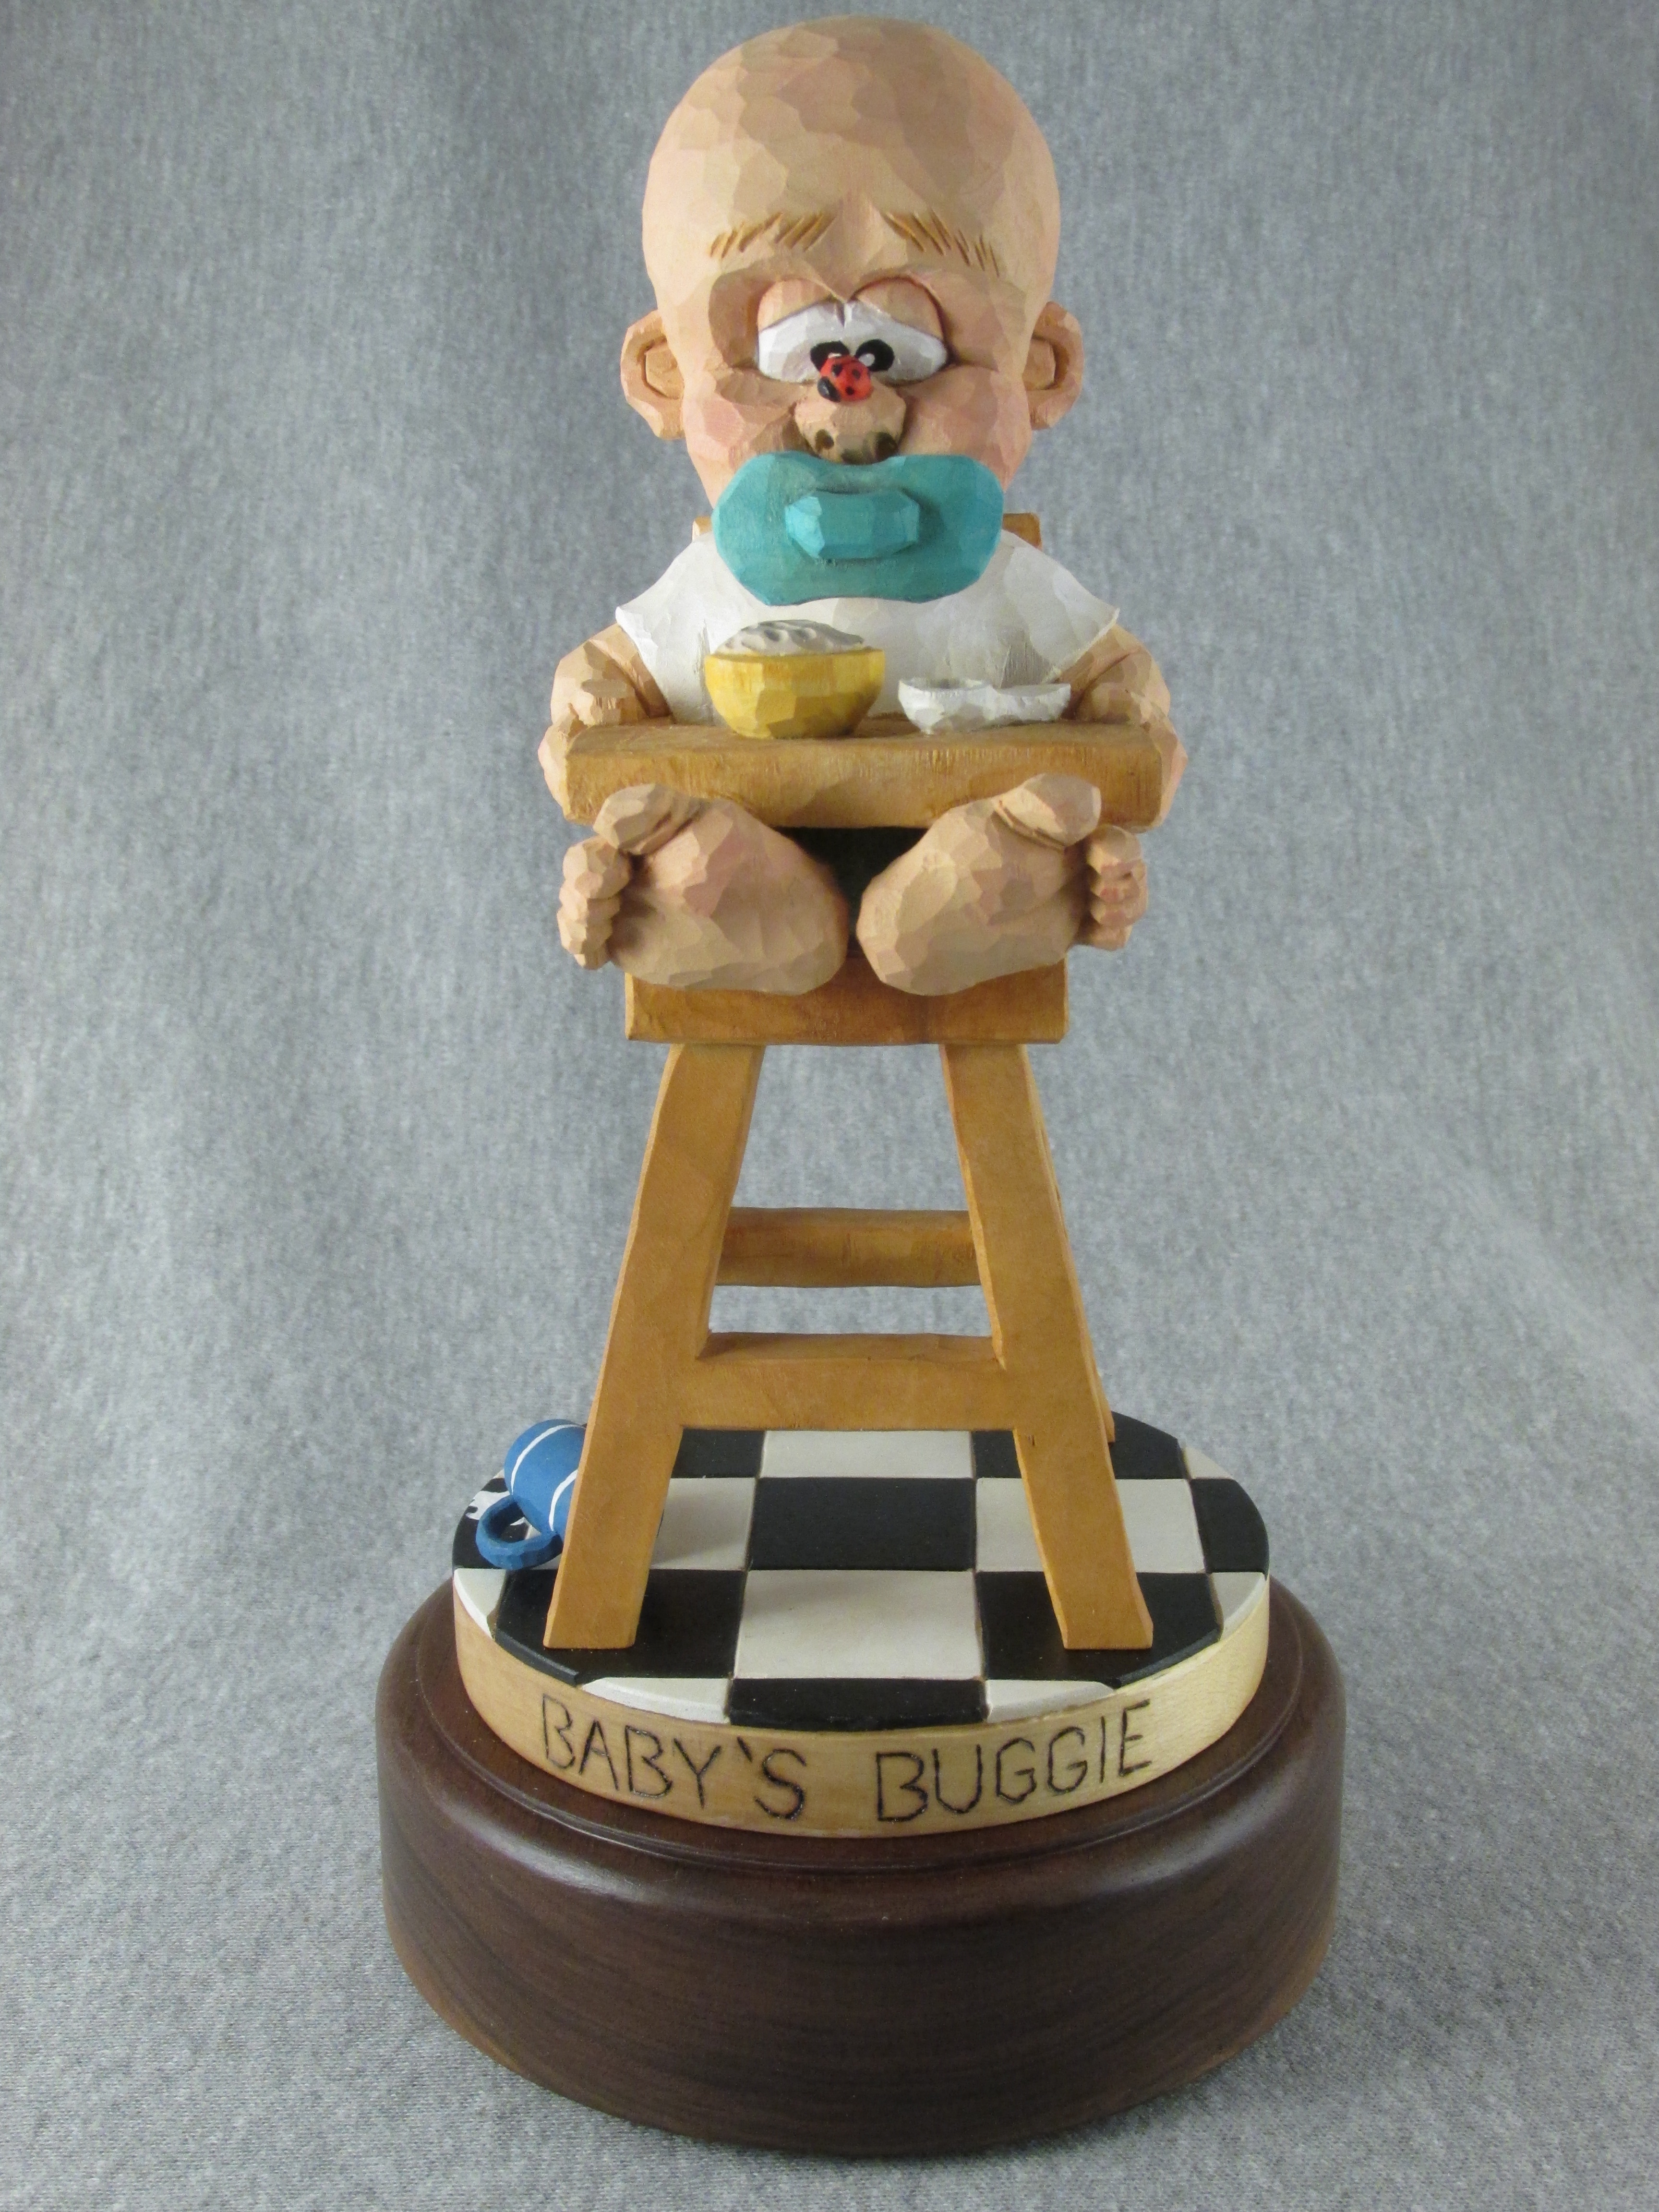
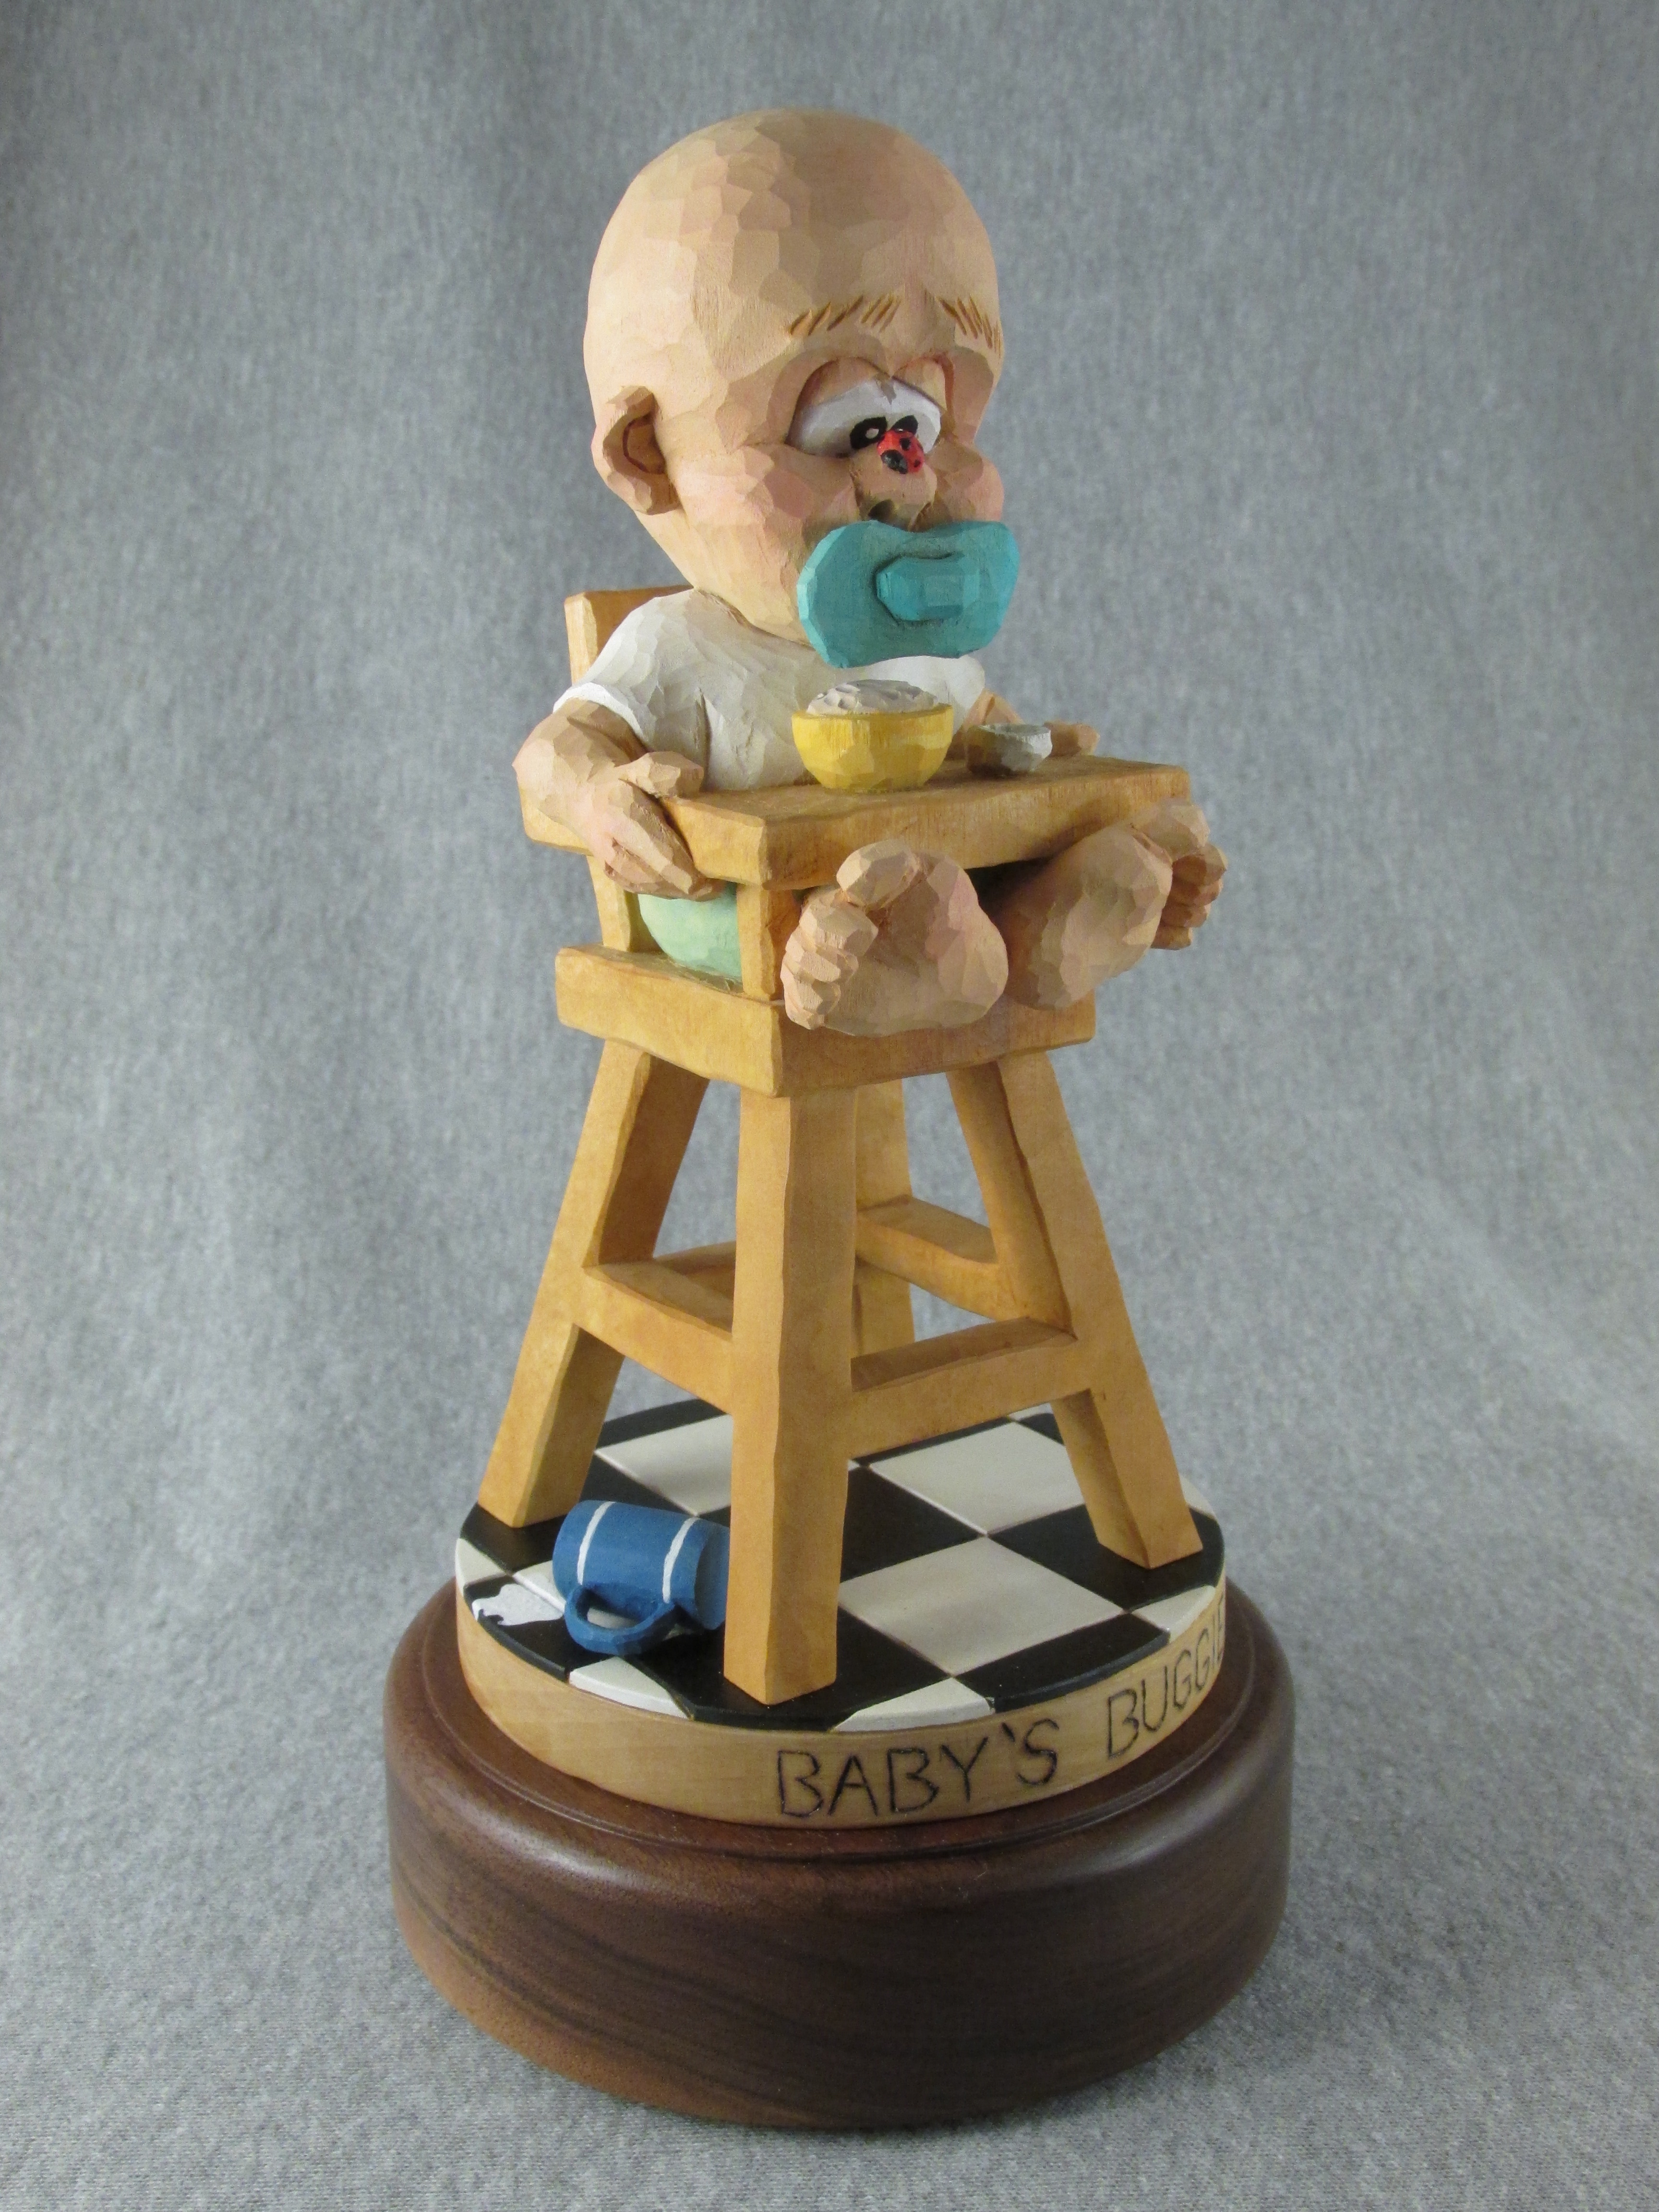
I thought I would share my winning entry for the Caricature Carvers of America (CCA) competition this year. The competition is closed to the public and all entries must be dropped off or mailed in. The details can be found at the link above. The link can also be used to view the winners from previous years and will show this year’s winners in the near future.
My entry was carved from a basswood roughout designed by Roger Stegall of Mayflower, Arkansas. I worked independently following my own idea of what could be found within the wood without adding and pieces.
In March of 2015, ten students collaborated with Chris Hammack (CCA) to develop their own pattern for a figure to be carved from a 4X4X8 inch piece of basswood. Everyone had a very unique project. I was not one of those students but I was really attracted to the project developed by Chris and Willie Thornton. I asked Willie if I could make a copy of his pattern and brought it home to work on it. I refined it a little but kept the same concept. It was a challenge but I enjoyed working on it. Here are pictures of the progress.
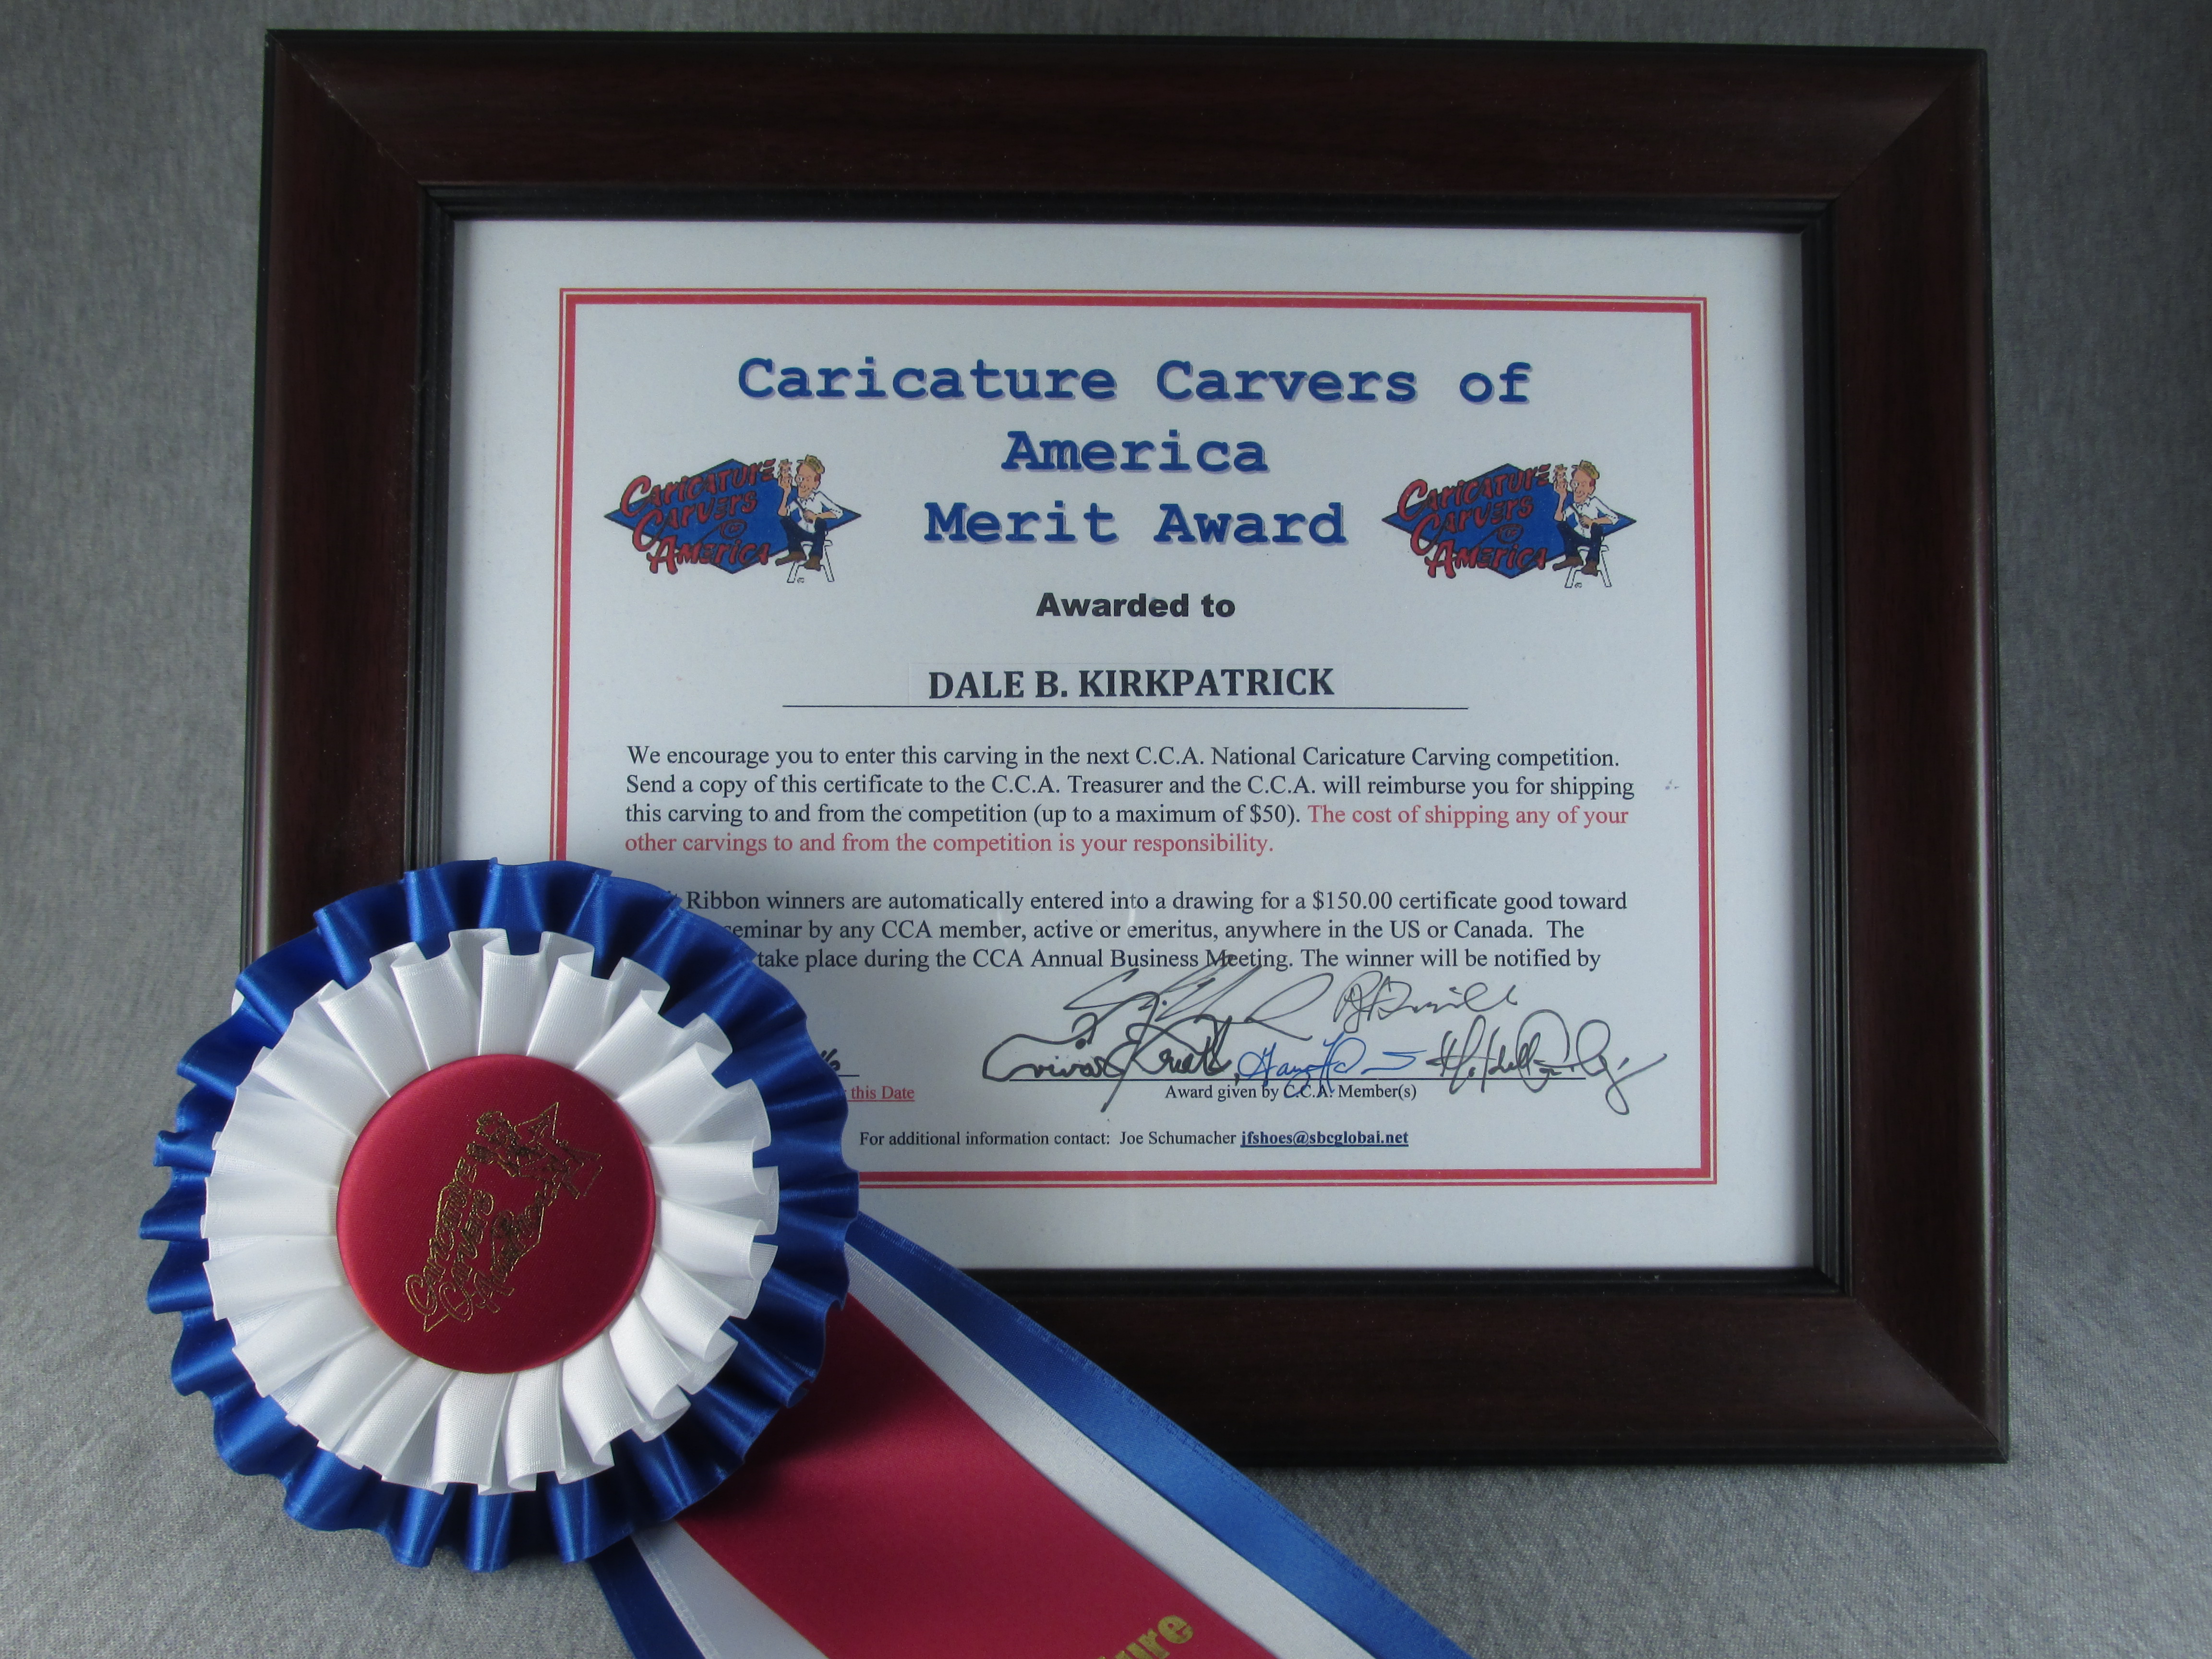
This project has been recognized by the CCA with a Merit Award during the March 2017 Roundup Class. This award also encourages the recipient to enter the project in the annual CCA competition in August. Here’s the Merit Award and ribbon.
Here is the third place ribbon from the CCA Competition. The category was “Group Mixed” because of the ladybug and baby.
This post is the first in a series of three that will take you through the steps I took to produce a carving of an old-time clock peddler. (Part 2, Part 3) My cousin is a clock collector. He also repairs and re-conditions clocks. When I visited him and his wife in May of this year, he showed a cast figure to me. It appeared to be a copy of an original woodcarving. He asked if I would be interested in reproducing it in wood. As you will see the figure was very interesting and well done. Thinking since it was carved from wood originally, I said yes. He offered a rough slab of basswood that was at least 20 years old. I did some quick measuring and decided it would work.
During the carving I became more and more skeptical of the original method used to make my model. I am now convinced it was never carved from wood but fashioned from clay and cleverly made to look like wood. The fine details, such as the threads in the stockings, the flowers decorating the back-board holding the clocks and the fine details in the clocks, including the roman numerals could not have been added by carving into wood. The original artist is not identified but I would welcome any information dealing with the origin of this model. I did my best to reproduce the figure and used artistic license to deal with some details that required magical powers I do not possess.
This post will cover the preparation of the wood, including surfacing, trimming and adding scrap pieces to accommodate the pattern. It will also show making the pattern, applying the pattern and cutting the blank on the band saw.
The second post will show many photos taken during the carving progression. The third and final post will show the completed carving, both without and with the stain.
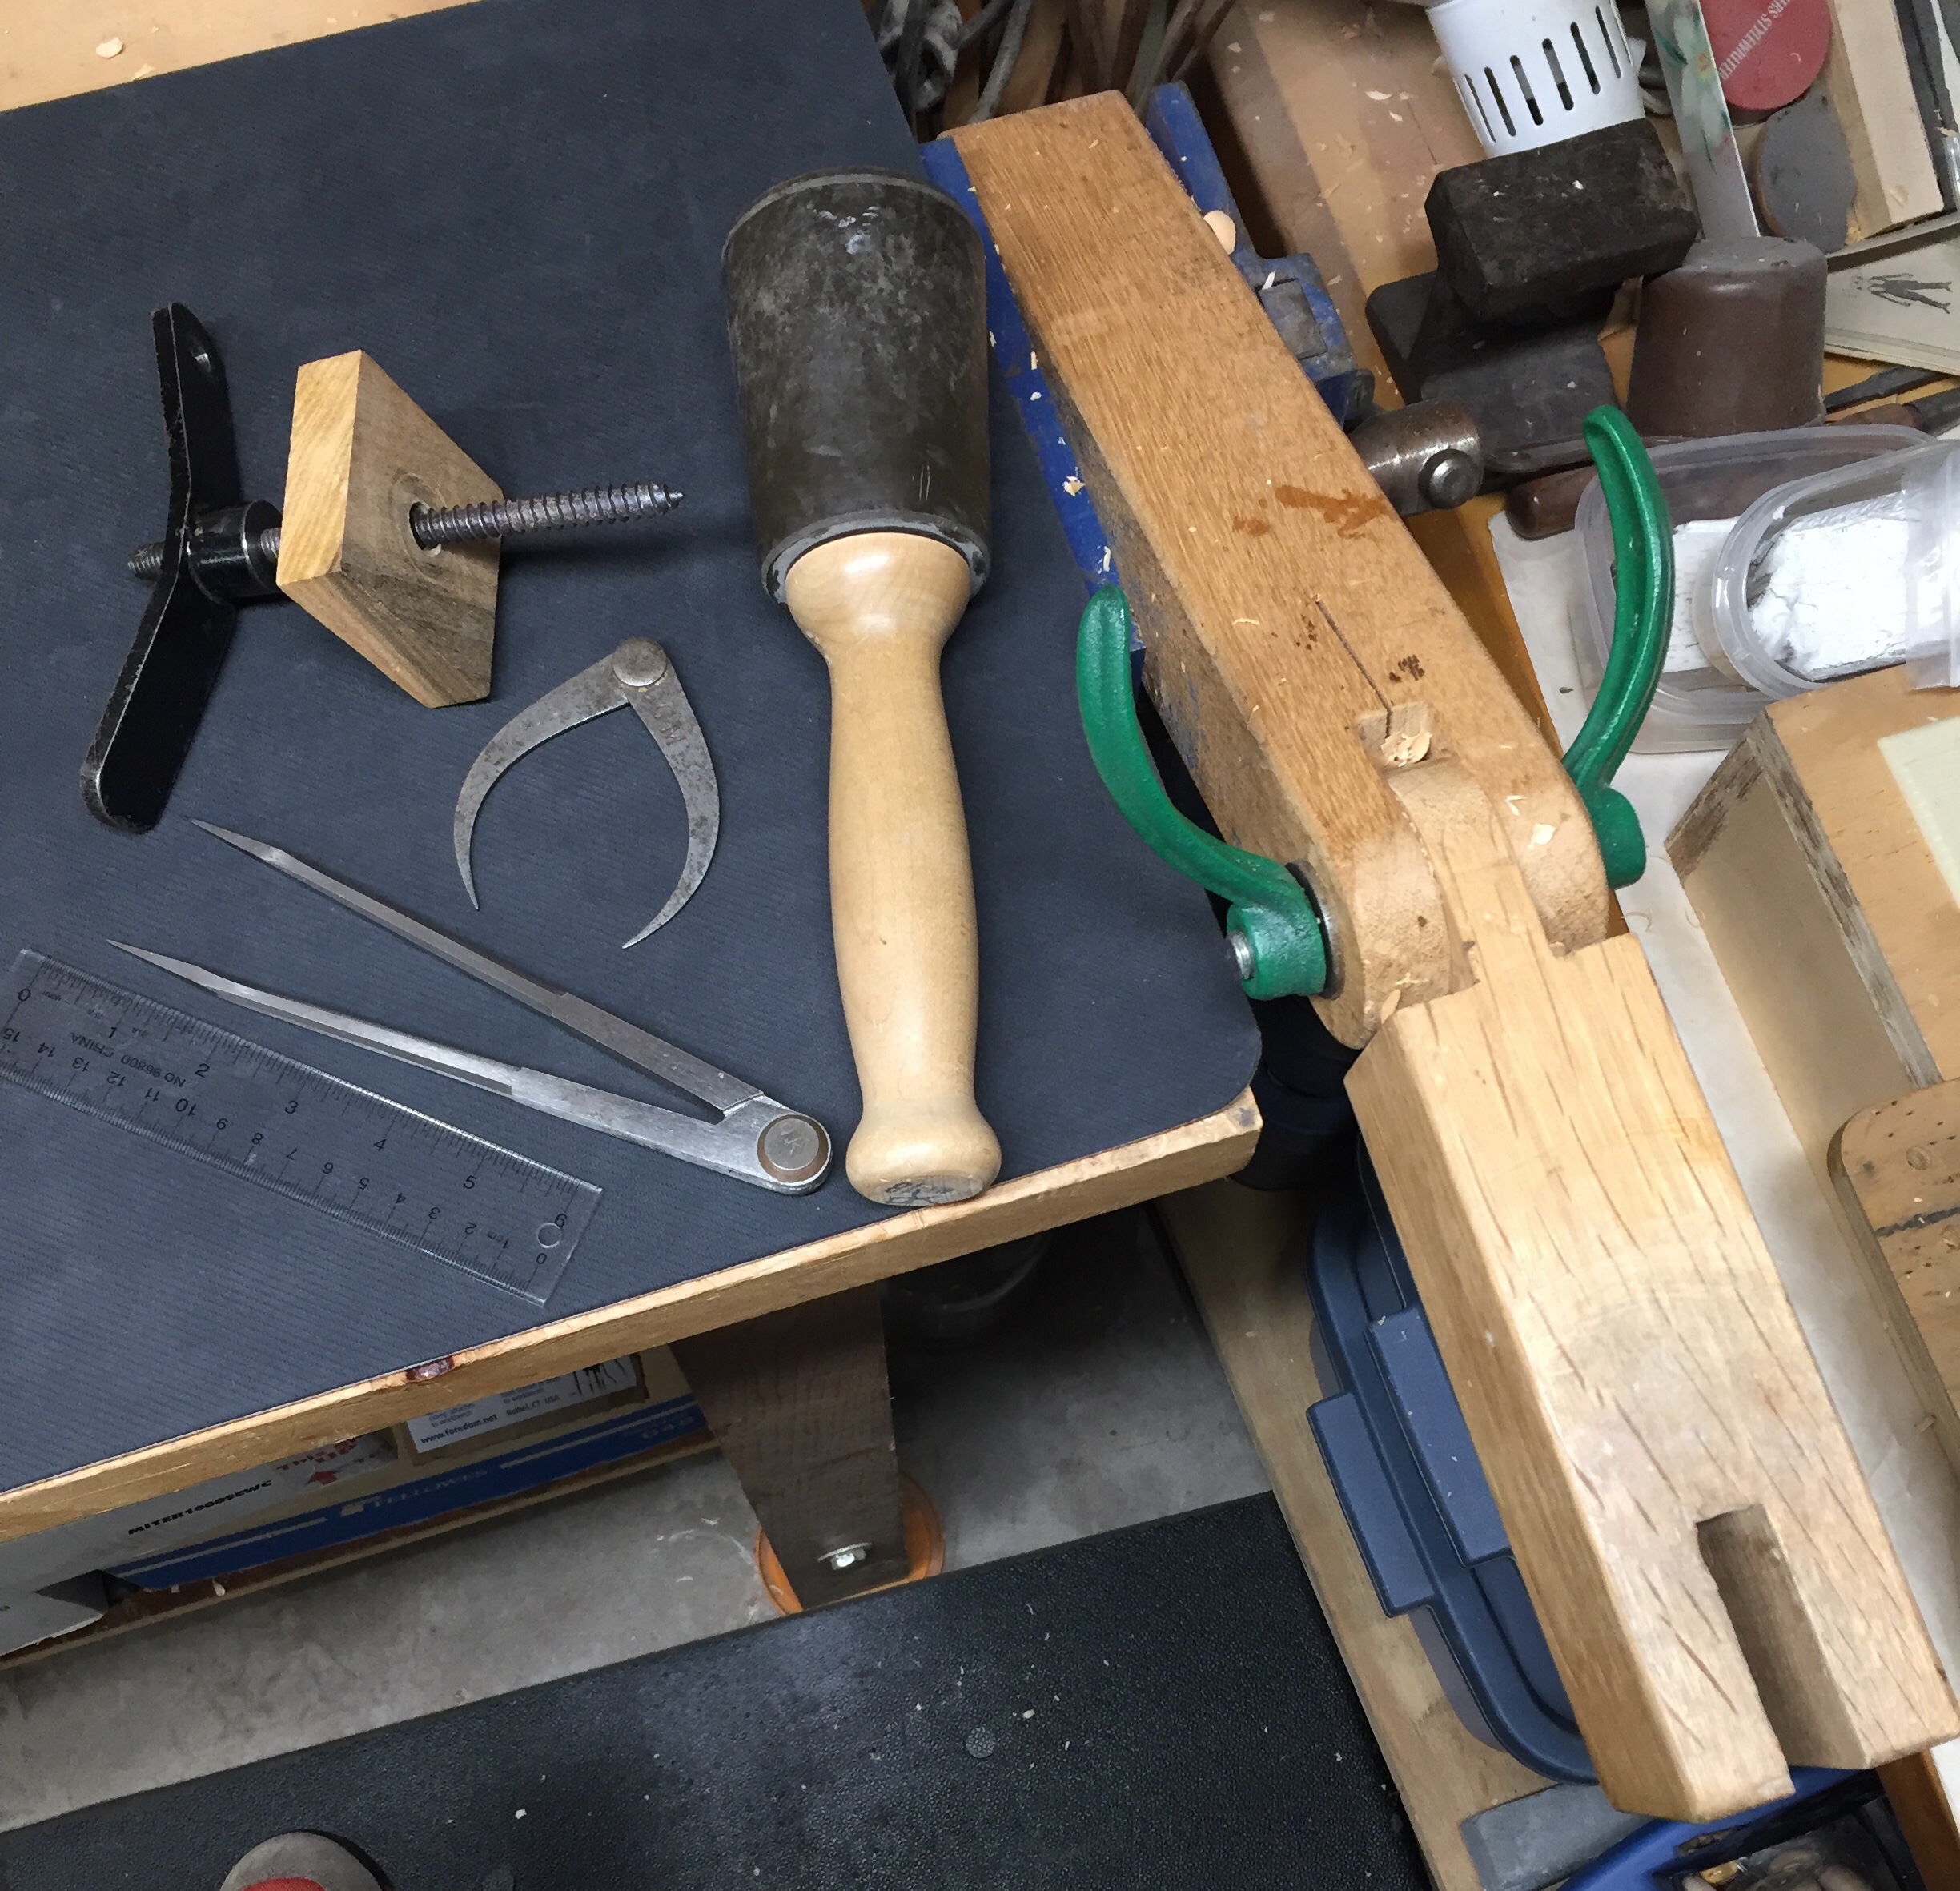
This is the second of three posts showing a carving I made of an old-time clock peddler. (Part 1, Part 3) Here you will see many photos taken of the project as it evolved into a finished carving. I also show a picture of my tools and my carving bench. the project is mounted on a carving arm and held in place with a carving screw. My carving tools are designed for use with a mallet but only the very early stages required the mallet to remove larger amounts of wood. The remainder of the cuts were done by simply pushing the tools. You will also see a measuring device used to transfer dimensions from the model to the project. The first picture shows my mallet, a carving screw, two dividers, a carving arm and a plastic scale.
This is the last of a three-part series of posts to document my project to carve a clock peddler in basswood. (Part 1, Part 2) These are pictures of the completed carving. You may notice the finished base is smaller than the project as it’s seen attached to the carving arm. When I applied the pattern to the wood I allowed extra stock on the base to accommodate the carving screw. After removing the screw, I trimmed the base. I’m including shots before the stain was applied because the shadows on the raw wood give a different perception to the details. The stain I used is from Germany and was developed for basswood carvings. The color is Pearwood. It is a water based stain that contains wax and ammonia in addition to the pigment. It’s applied with a brush and buffed with a special brush and cloth. The carving is 13 3/4 inches (34.9 cm) tall, 5 1/4 inches (13.3 cm) wide and 4 3/4 inches (12 cm) deep.


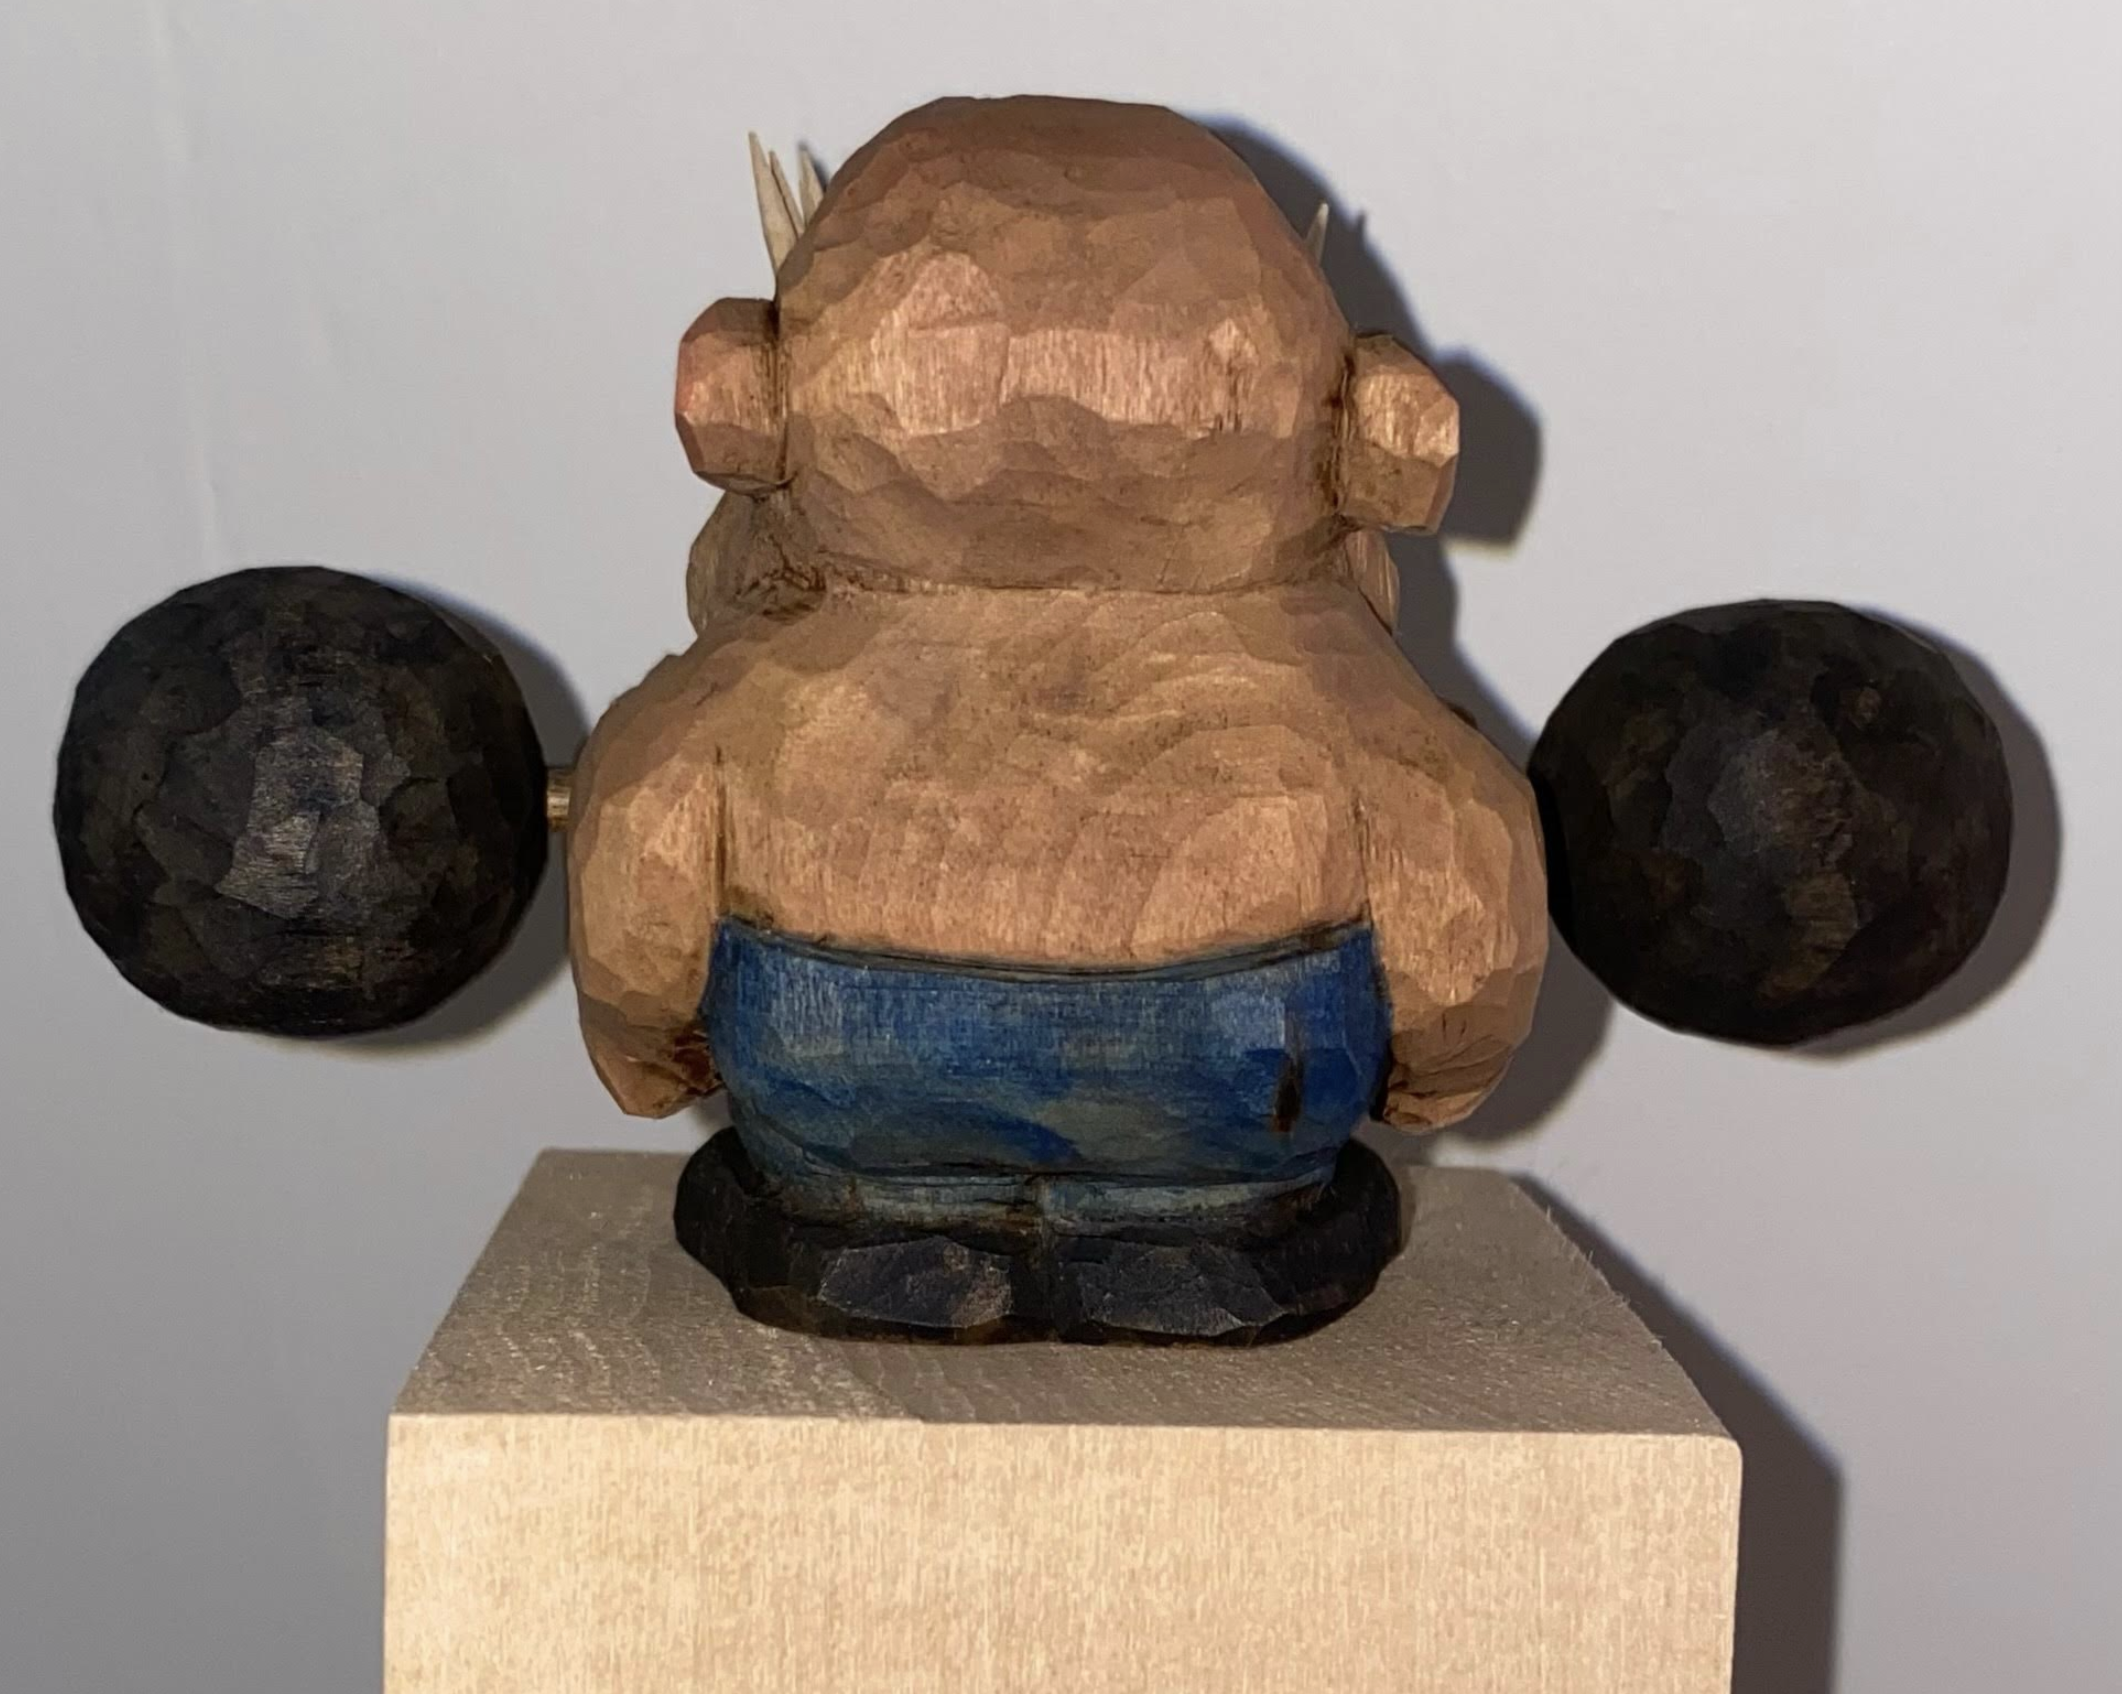


, side view (black)")