
A friend of mine, Rod Beamish from Indiana, showed a bunch of really cute carved ornaments to me a few years ago. I’ve carved a couple dozen of them myself since then and thought I would pass along some tips to encourage others to try carving “Dim Bulbs”.


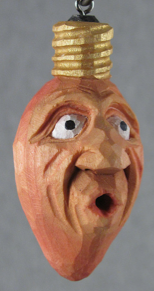


The following description will not be carving instructions as much as tips and shortcuts for those who already know how to carve a corner face. Most corner faces are done for practice or demonstration. When finished, you just have a face on the corner of a scrap of wood. This project will allow you to practice and have something “useful” when you’re done. I’m going to describe the process to prepare the wood and offer some tips to shape the wood before actually carving a face.
I used Rod’s blank to create my own cardboard pattern. The pattern is for 4 ornaments. That’s done to allow more wood to grasp while working on each small ornament. You could increase the number of ornaments on the blank but at some point you’ll cause a problem for yourself. If you have ever carved a walking stick or cane, you know how unwieldy a long stick can be. Click here to link to a PDF for Dim Bulb Pattern.
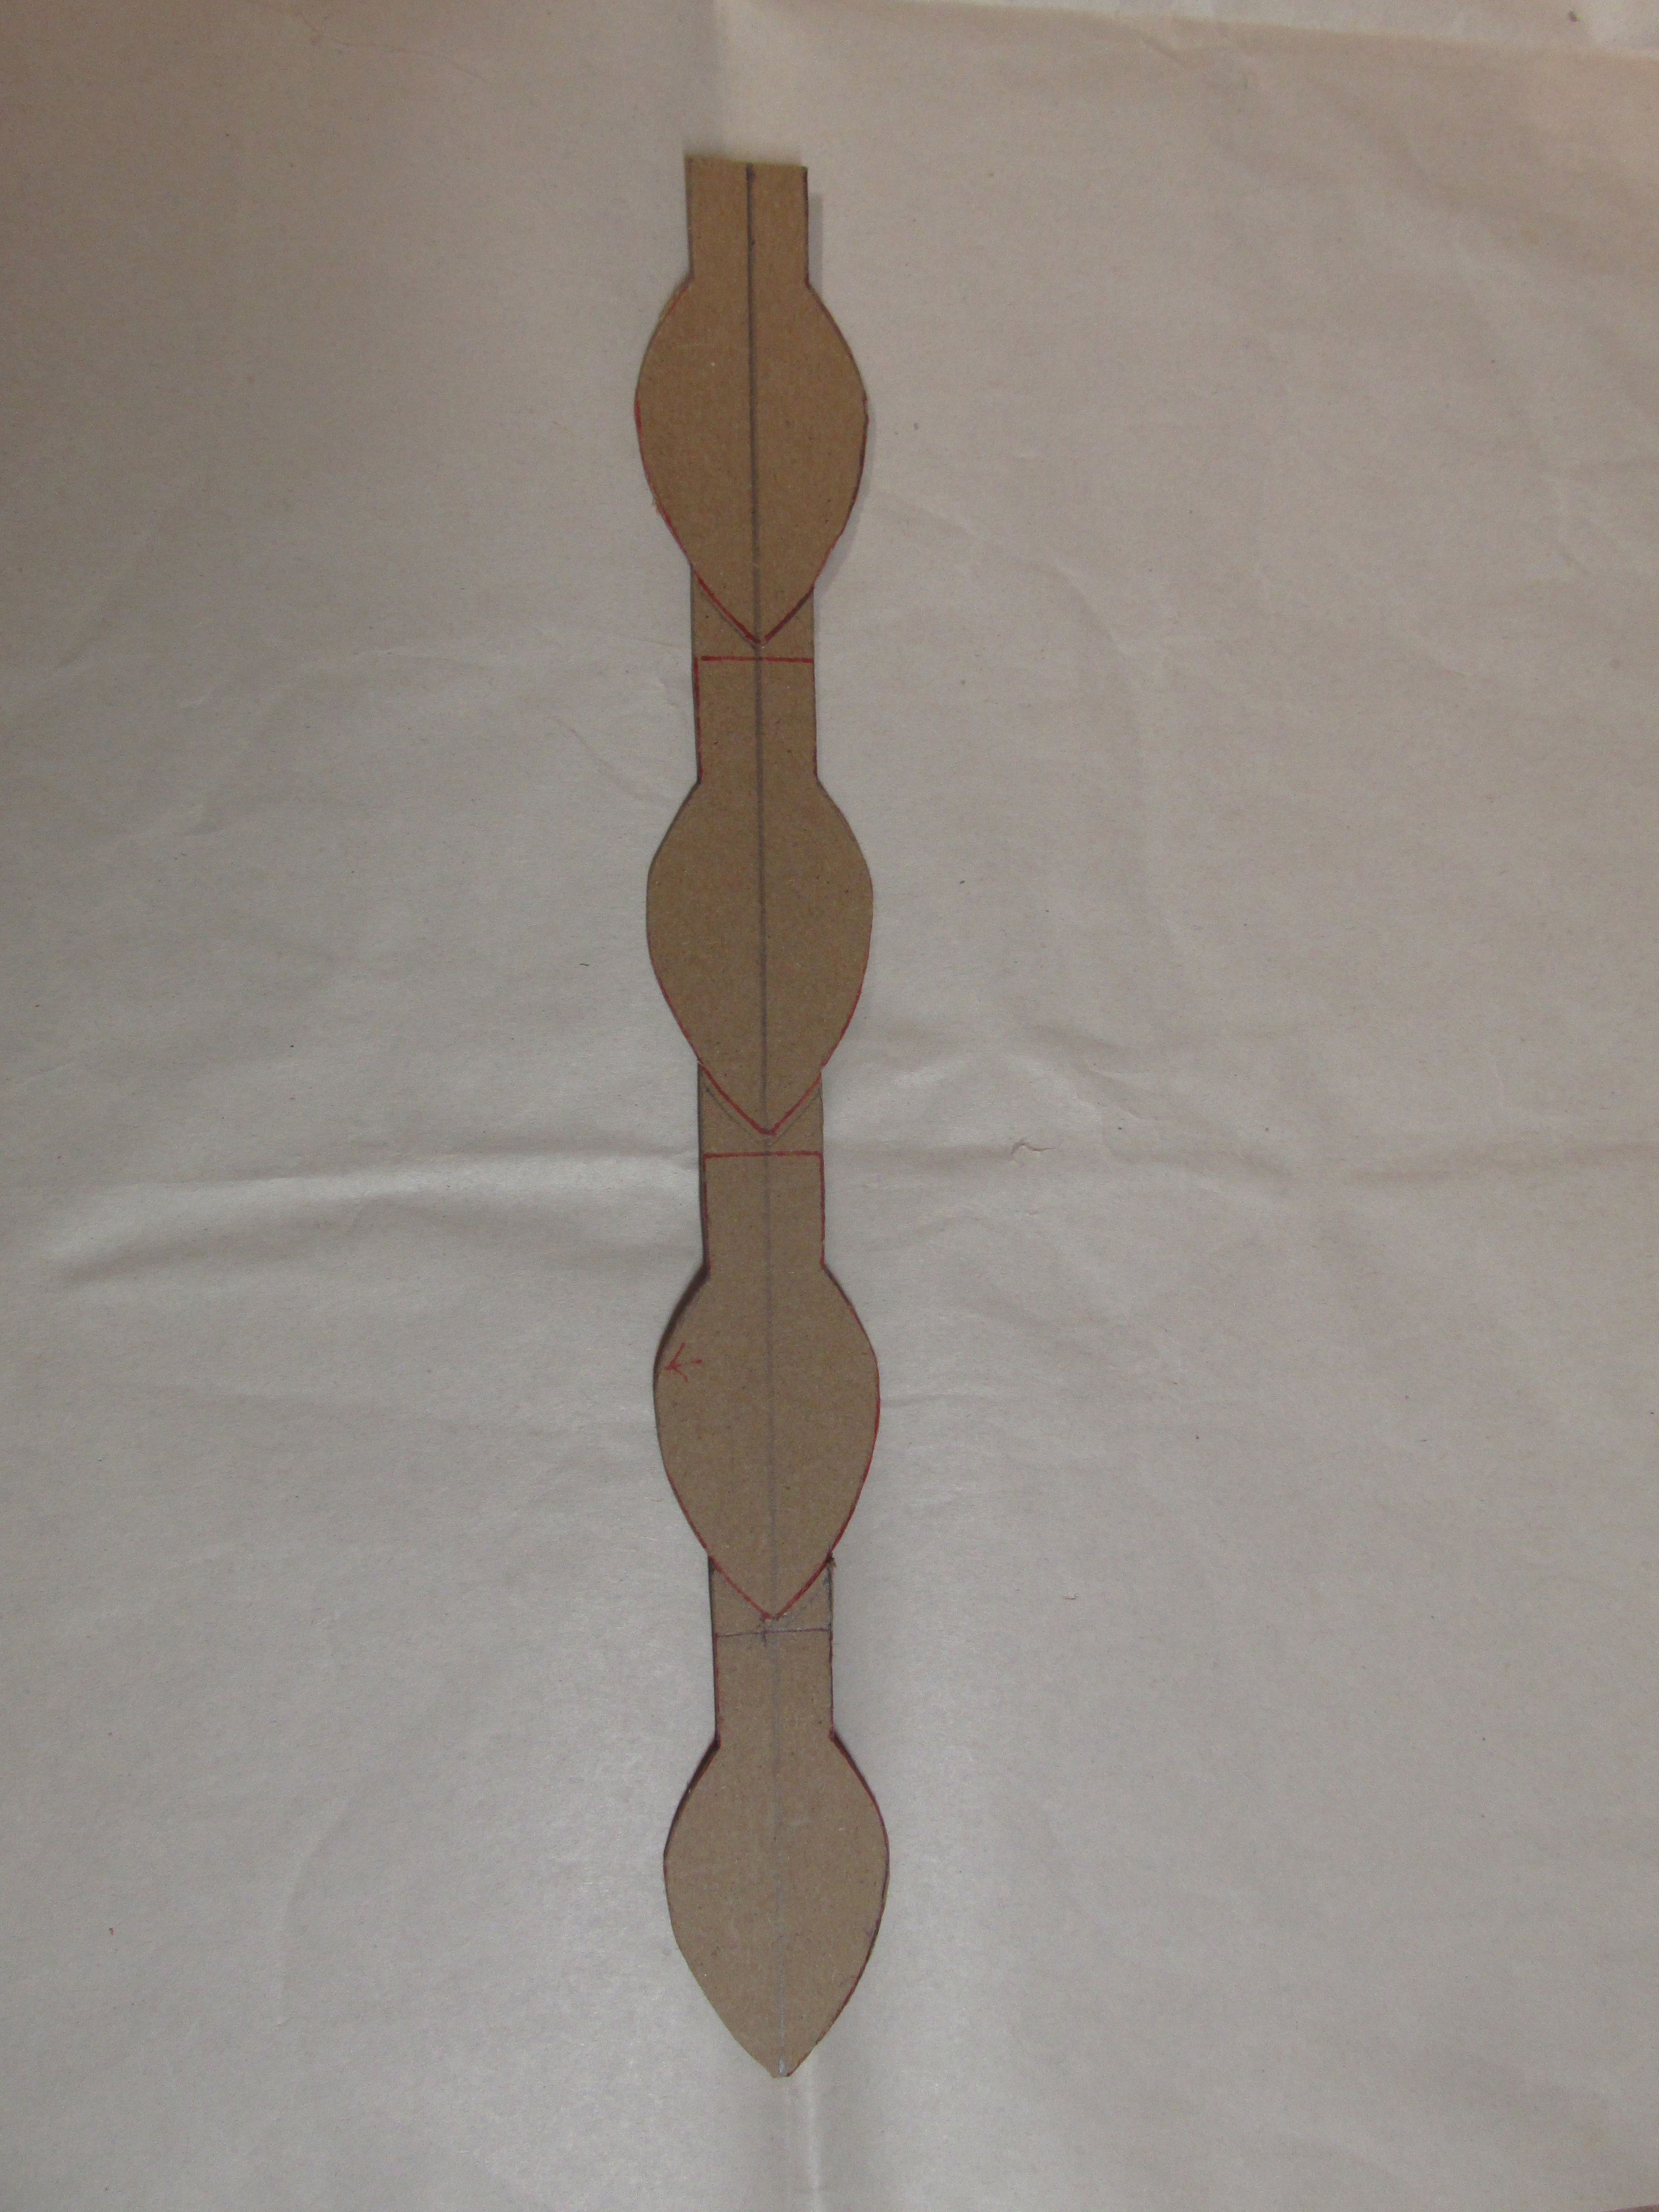 Cardboard pattern
Take special care when making this pattern so each ornament is the same width and the edges fall in straight line. This will help when it’s time to draw a center line. Trace the pattern onto two adjacent sides of a piece of wood. Allow about a quarter of an inch of scrap wood on both sides of the pattern. Make sure the pattern is centered on both sides of the wood.
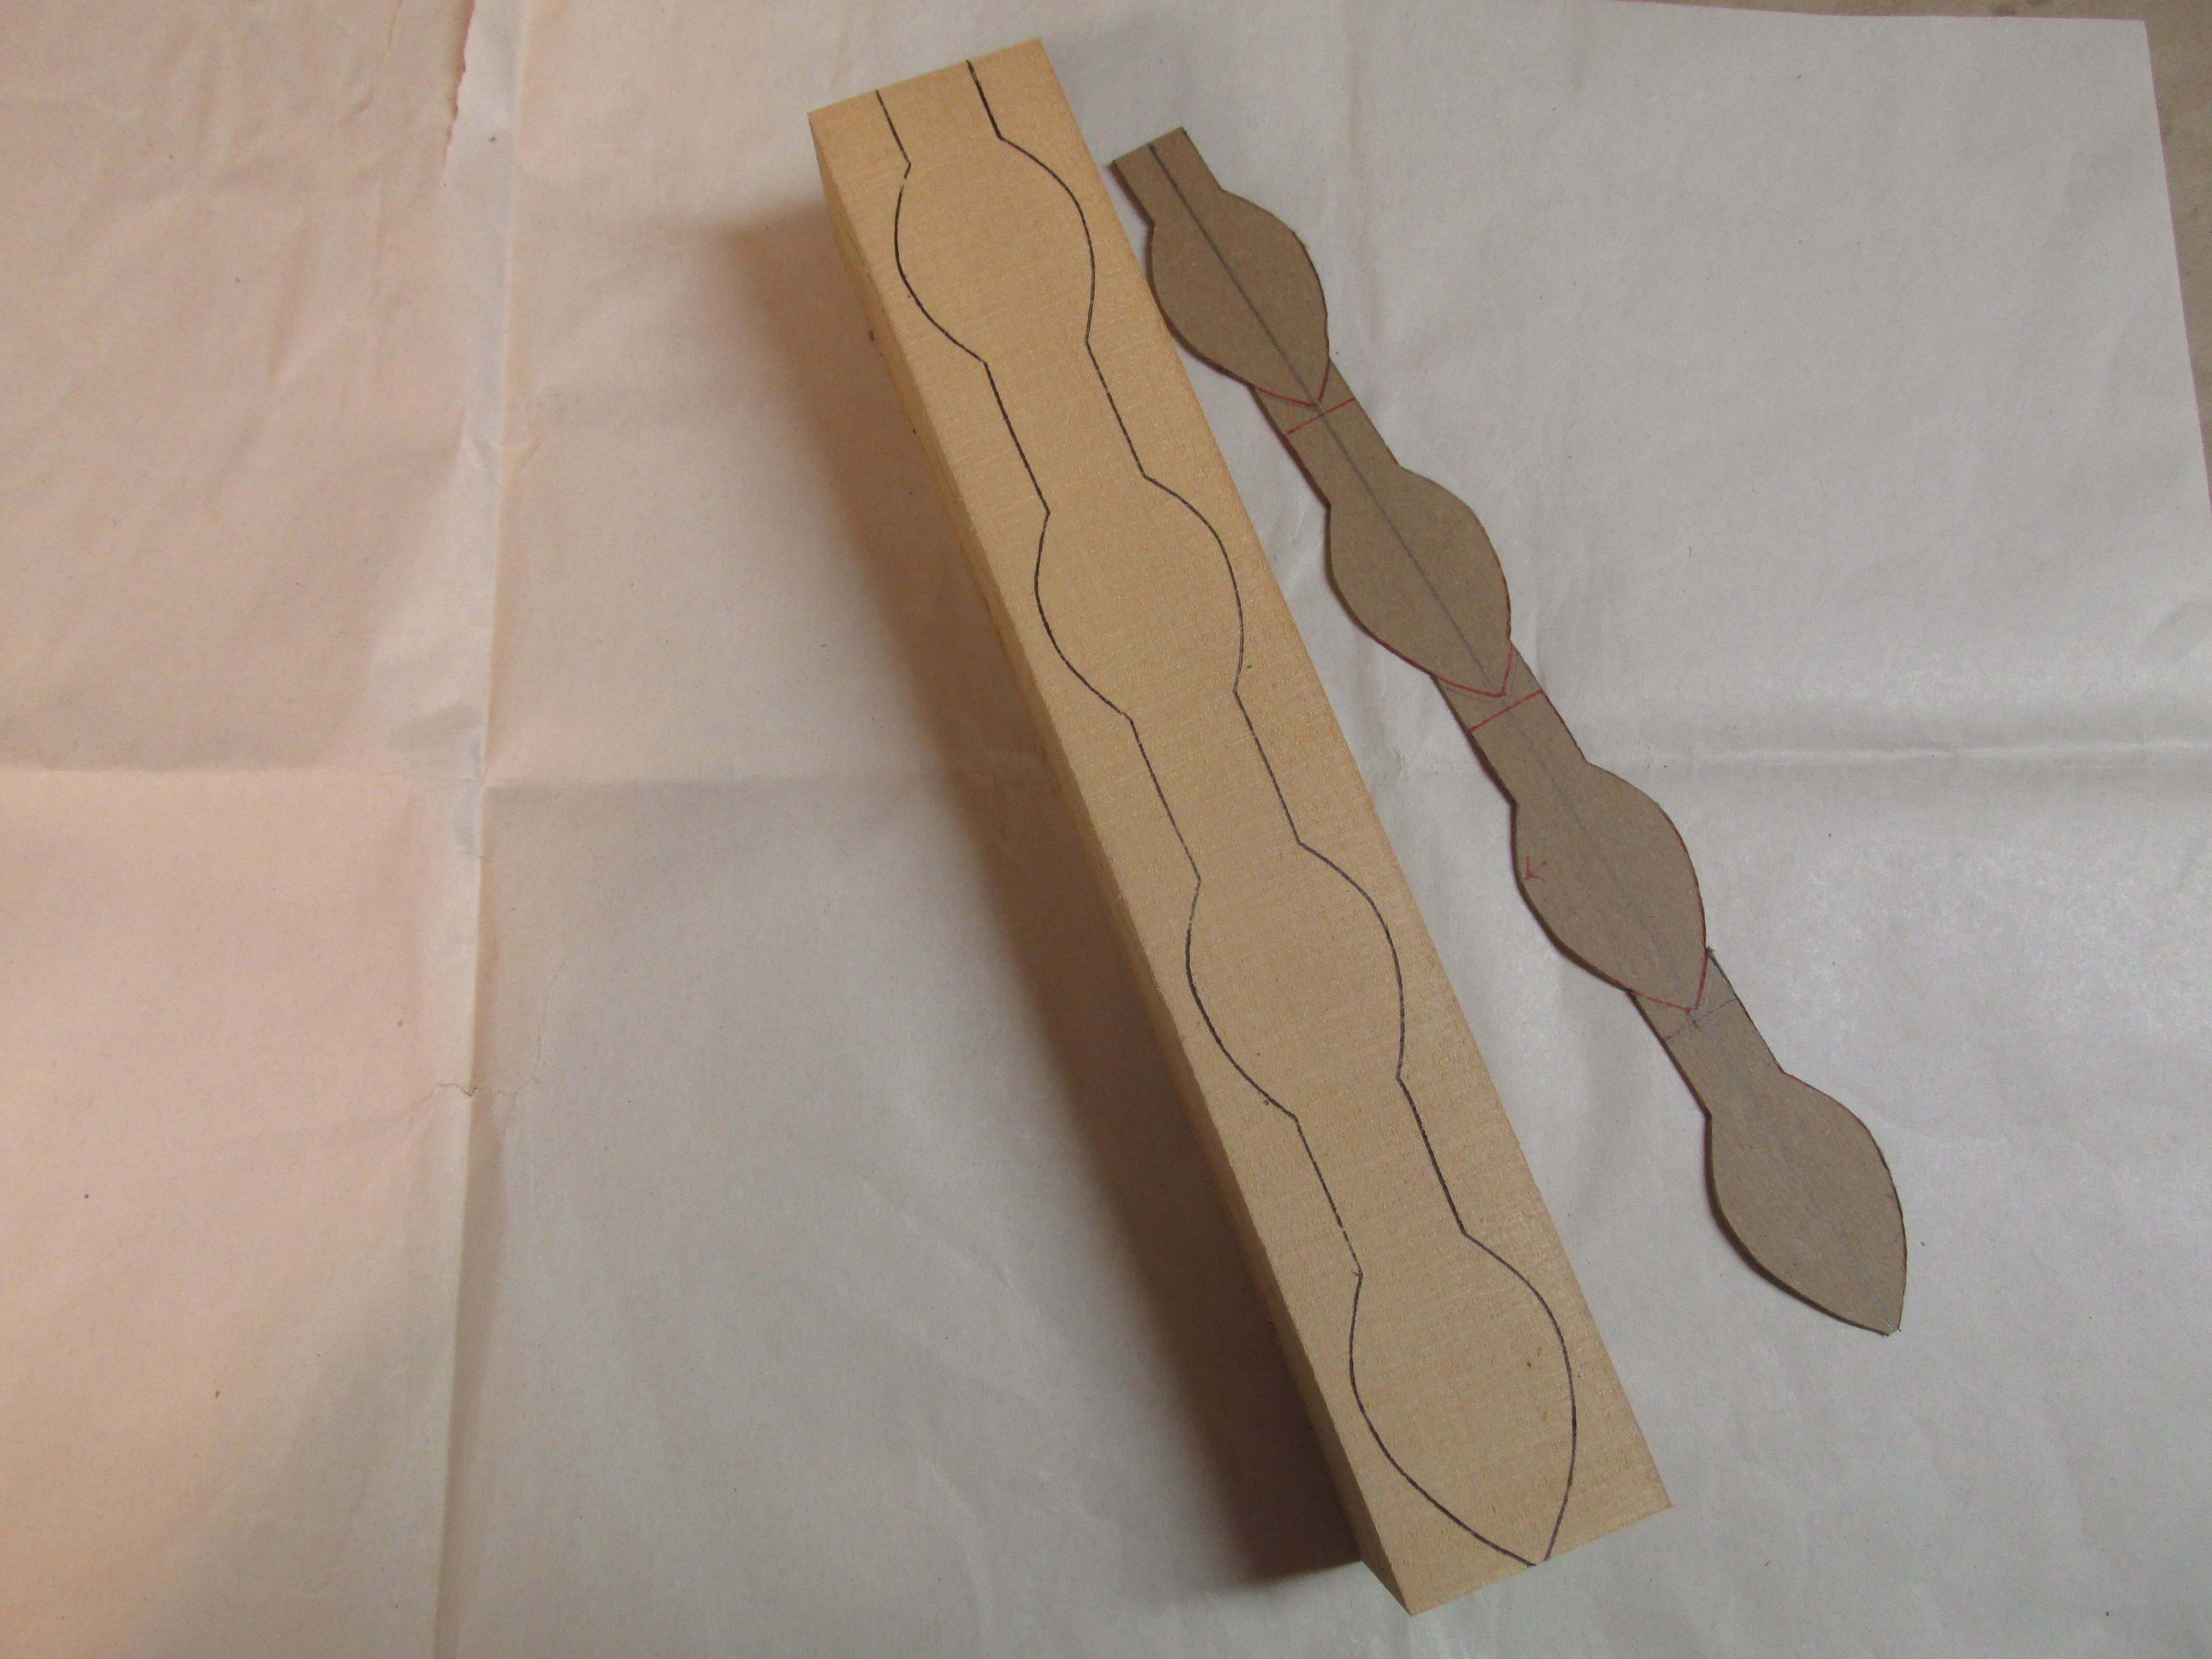 Pattern on one side
 Pattern on adjacent sides
Use a band saw or scroll saw to cut the pattern on one side of the wood. Make one cut on each side of the pattern so you have three pieces of wood after this step.
 First side after cutting
Some people will leave a small section of the line uncut on each side of the blank. That way the scrap will remain attached to the blank for cutting the adjacent side. I prefer to use a one-inch piece of double-sided carpet tape to hold each scrap piece onto the blank while I cut the adjacent side.
 After first cut on adjacent side
 After first cut on adjacent side
Making the cuts on the adjacent side will produce the completed blank. If you used the “incomplete cut” method on the first side, return to the that side and carefully finish removing the scrap pieces. If you use the tape method, pull the scrap from the original side and remove any tape still sticking to the blank. You will have a blank with 4 corners.
 Blank with all scrap pieces
Now is the time to mark a center line on all four sides of the blank. I have a useful tool made by Dave Rushlo. It holds a pencil and is adjustable. It’s great for drawing a center line on blocks of wood or anything where you need a line drawn parallel to a flat surface.
 Blank with center line
The center line defines the widest point of each ornament so as you round three of the four corners to form the back, you’ll leave the line and follow the directions below. The center lines, to the left and right of the fourth corner, define the boundaries for the face. The center line also helps when transforming the square area at the top of each ornament into a cylinder in preparation for the “threads”.
A line should also be drawn between each ornament. This serves as a reminder to reserve enough wood for the “threaded” cylinder as you form the bottom of the ornament above it.
 Line at top of each ornament. Bottom of ornament drawn for visual aid
You can start with any of the ornaments but I recommend shaping the backs and tops of all of them before carving the faces. I choose a corner of the blank that I think has the strongest grain for the noses or a corner free from blemishes. I like to remove some wood from each of the three corners I intend to round over. That way I don’t remove a nose by mistake.
Another tip I can offer is when rounding a corner, remove the center third of the area between it’s left and right center lines. Note the red lines in the photo. Then remove the ridges (the red lines) formed by those cuts trying to use the “thirds” method again.
 Using the “thirds” method to help with symmetry.
This should create a balanced and more rounded area. You’ll still need to make many more smaller cuts to smooth the rounded quarter before repeating the process on the other corners.
 Back corner rounded.
 Top view of back corner rounded.
You’ll have to carefully cut off the center lines on the back of each ornament to remove the original saw cuts and make the adjacent quarters blend. Remember, the center lines are located on the widest dimension of the ornament so the more wood you remove at that line, the thinner your ornament will become.
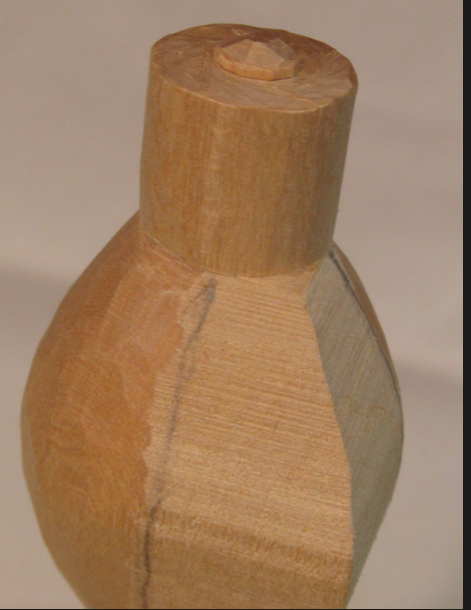
 Front view of top ornament after rounding back three corners.
 Front view after rounding back three corners.
The area for the “threads” should just be roughed out. Remember there is a small bit of wood in the center of the top of each ornament. It represents the contact point between the ornament and the circuit in a real light socket.


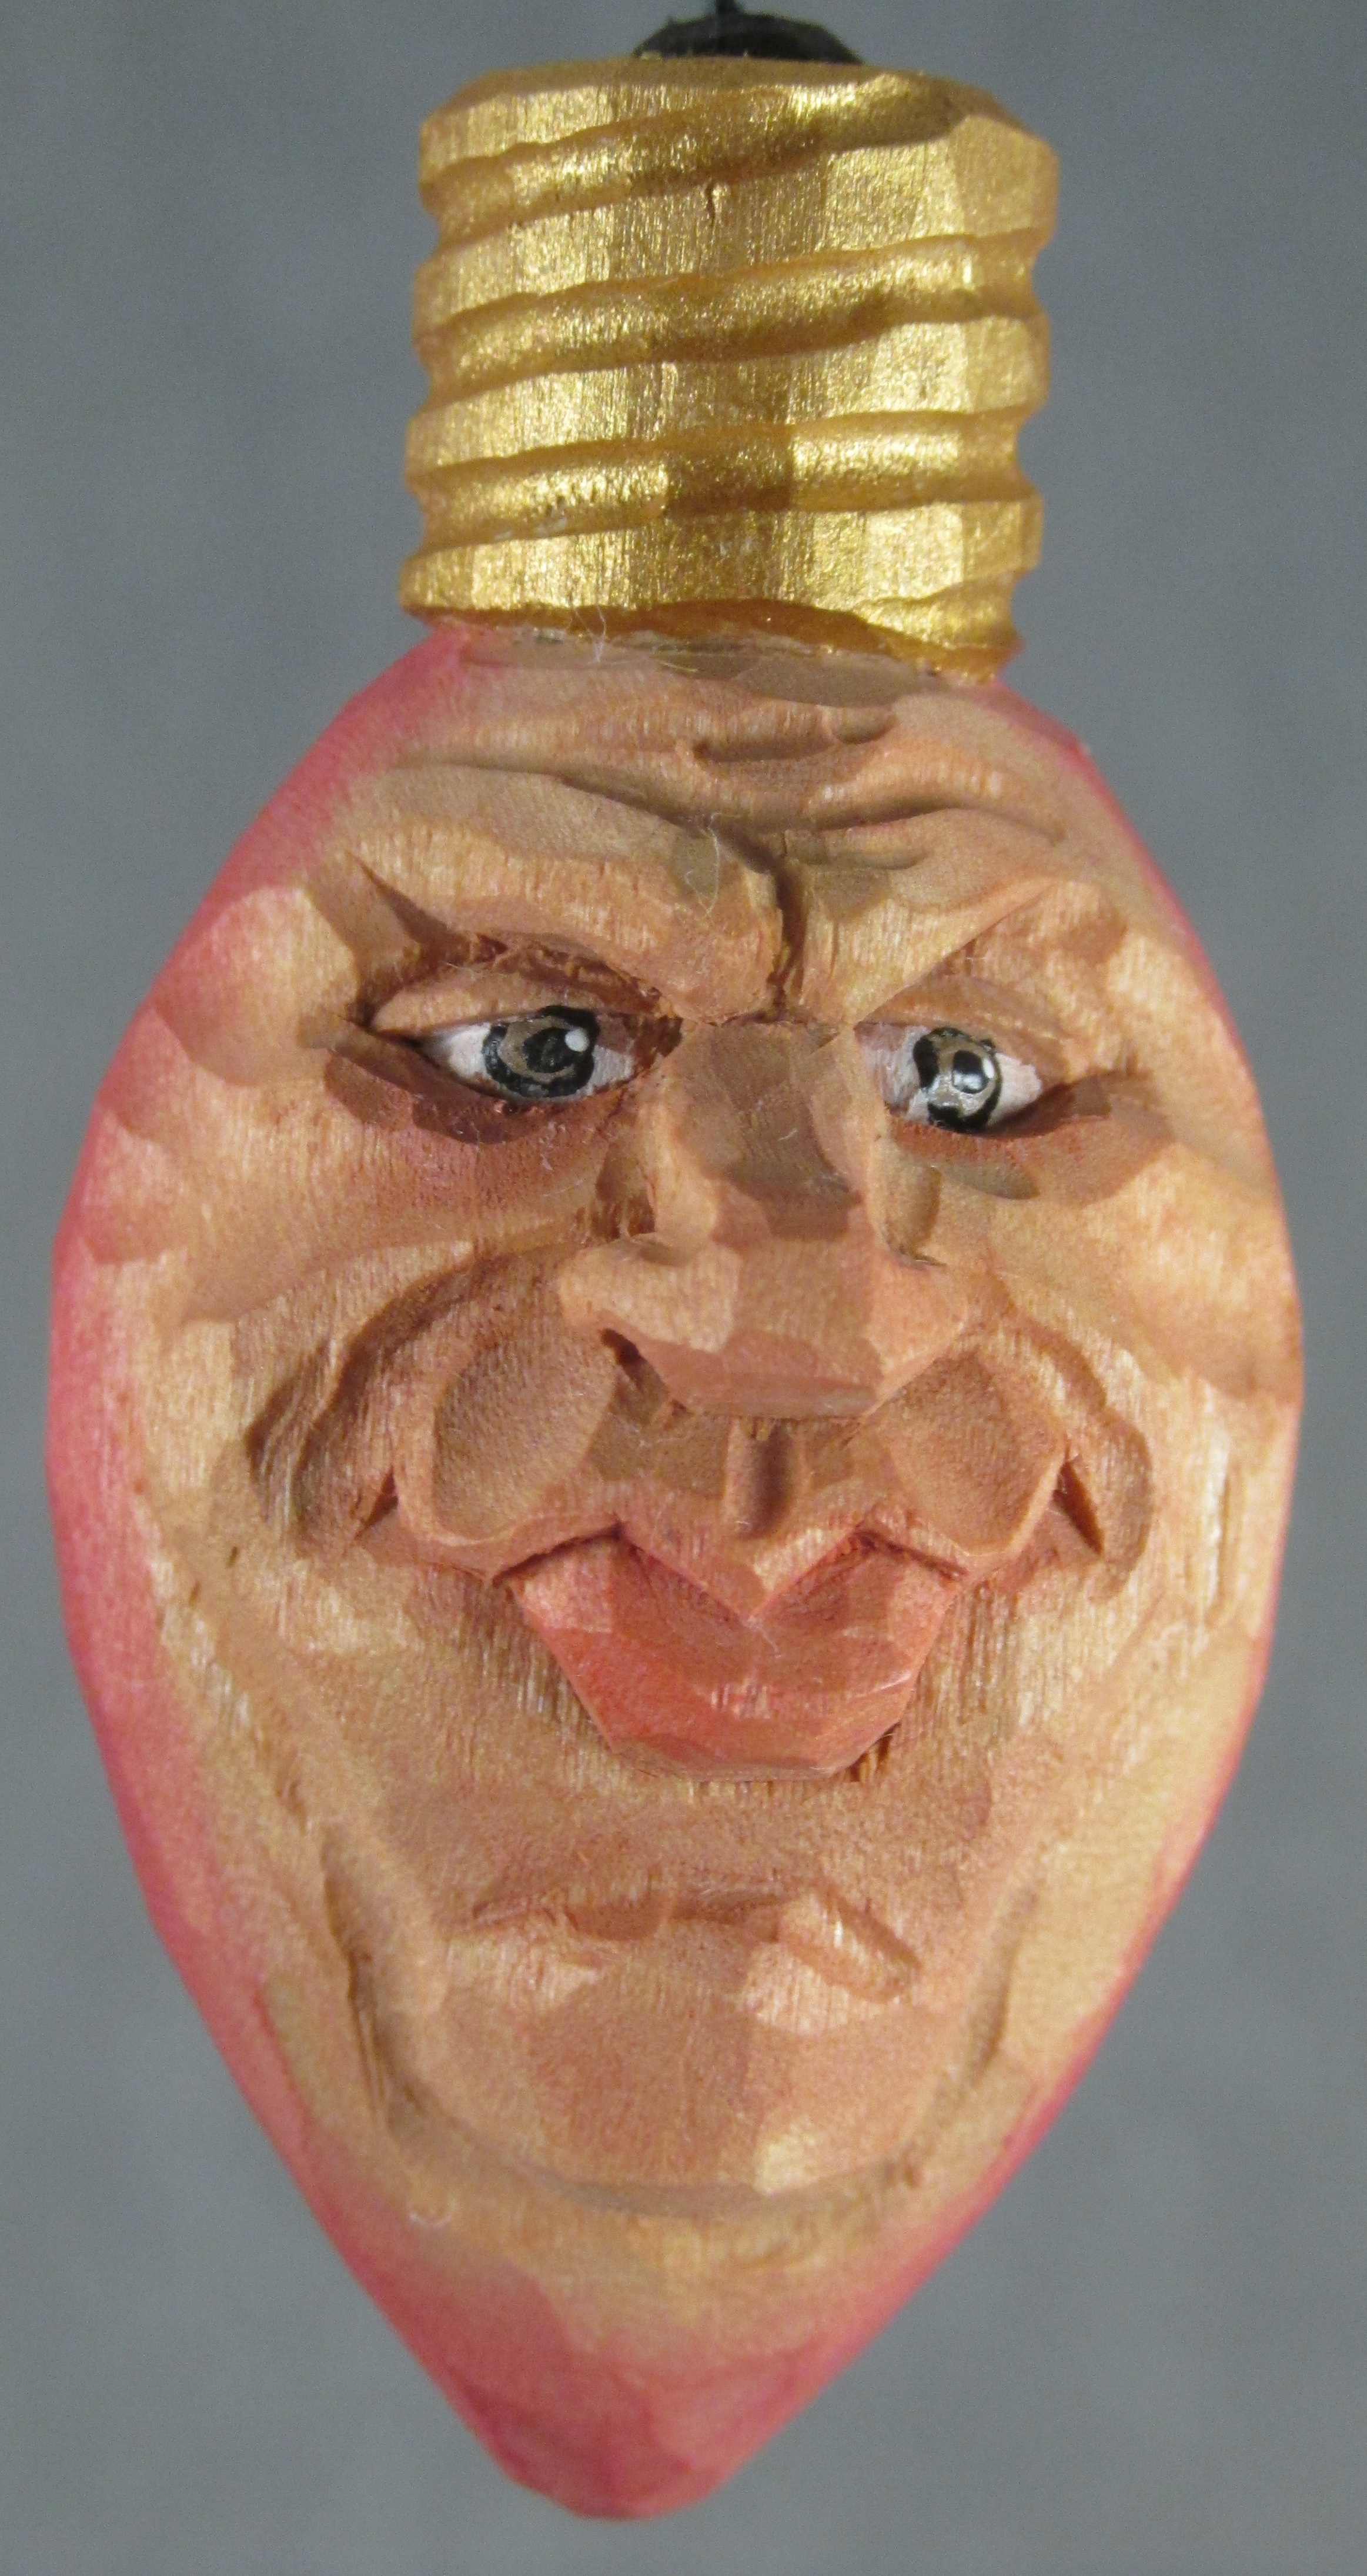
 Faces and cylinders carved
 Adding “contact” point to top of cylinder
 Lines drawn for “threads”
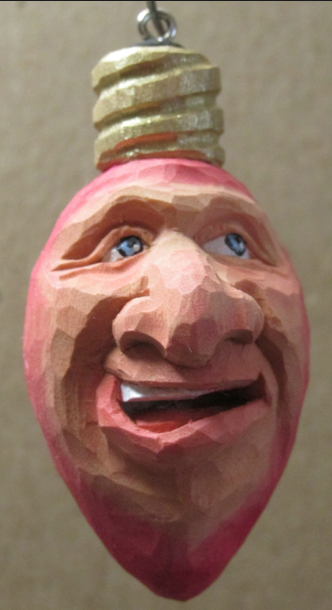
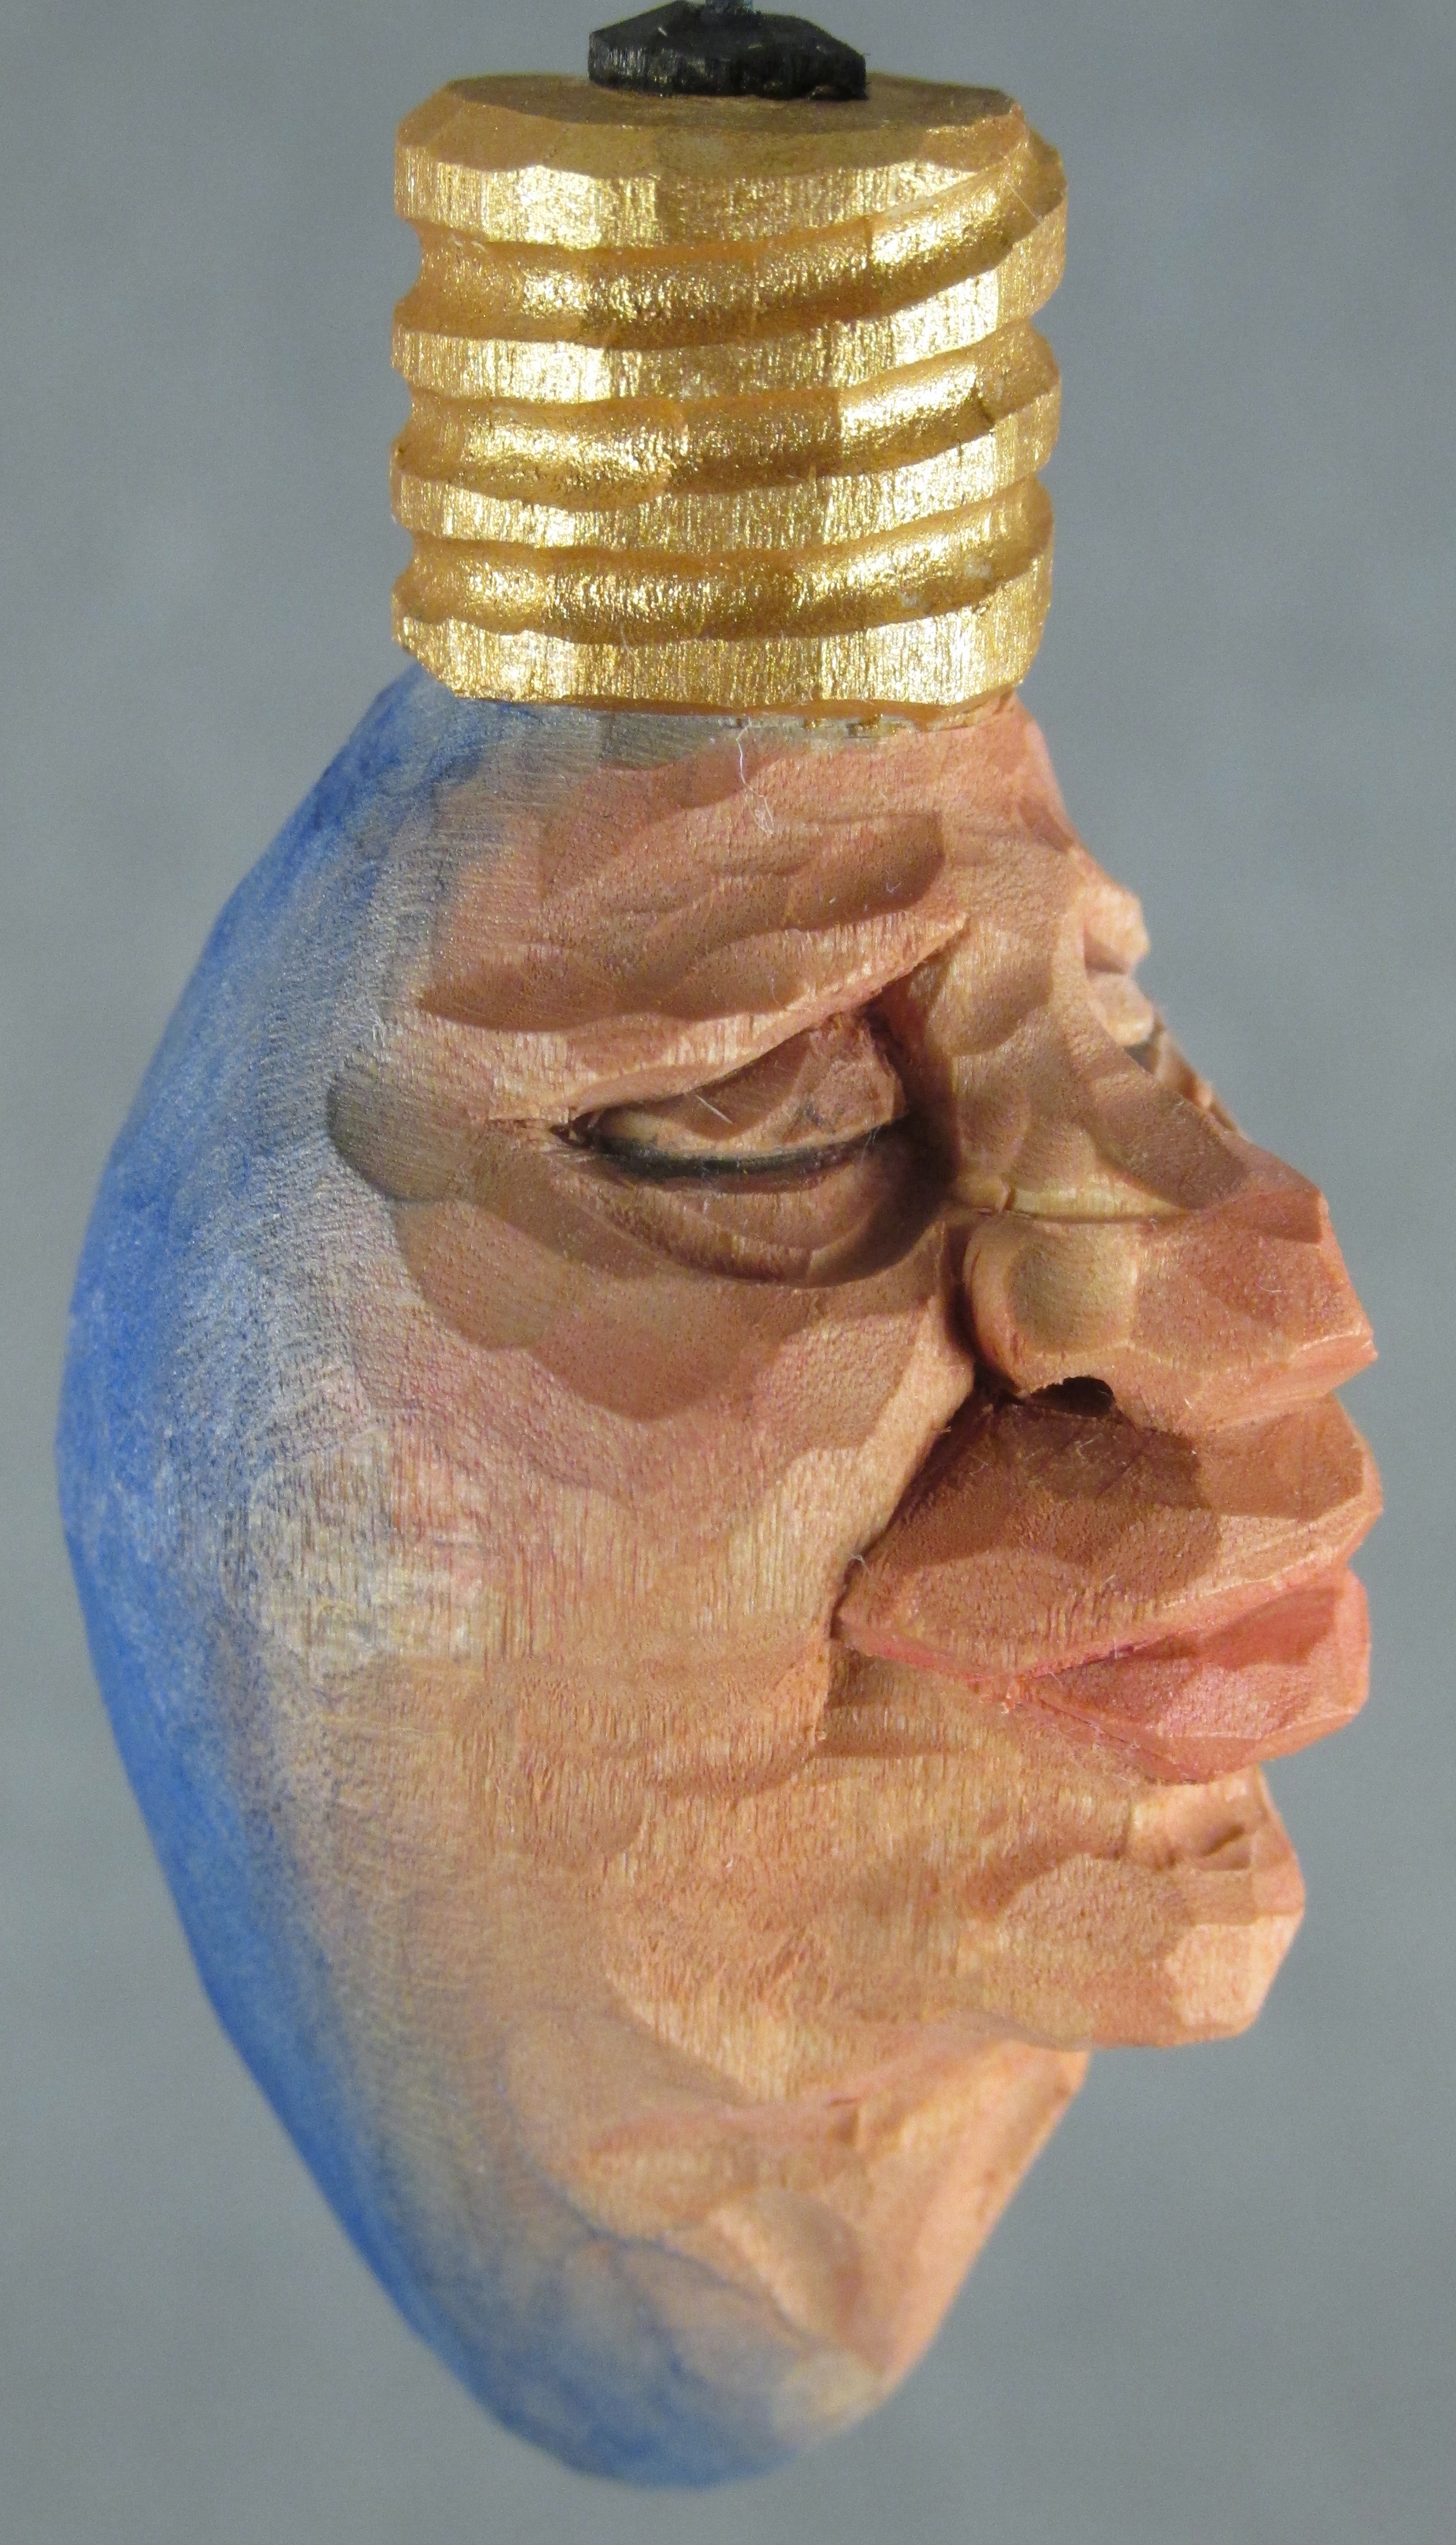
Add the “threads” after the ornaments have been separated. To do this, I draw a lite pencil line for guidance. I like to start at the top of the cylinder above the center of the face. It would be great to finish the thread-cut right below the starting point but that doesn’t always happen. The threads would never work for real but the suggestion of real threads is more convincing if you see the beginning and the end of them as you view the face. On the back my threads are almost horizontal. I use a 3mm # 11 or #9 to cut the threads. I have a Dockyard brand tool that size.
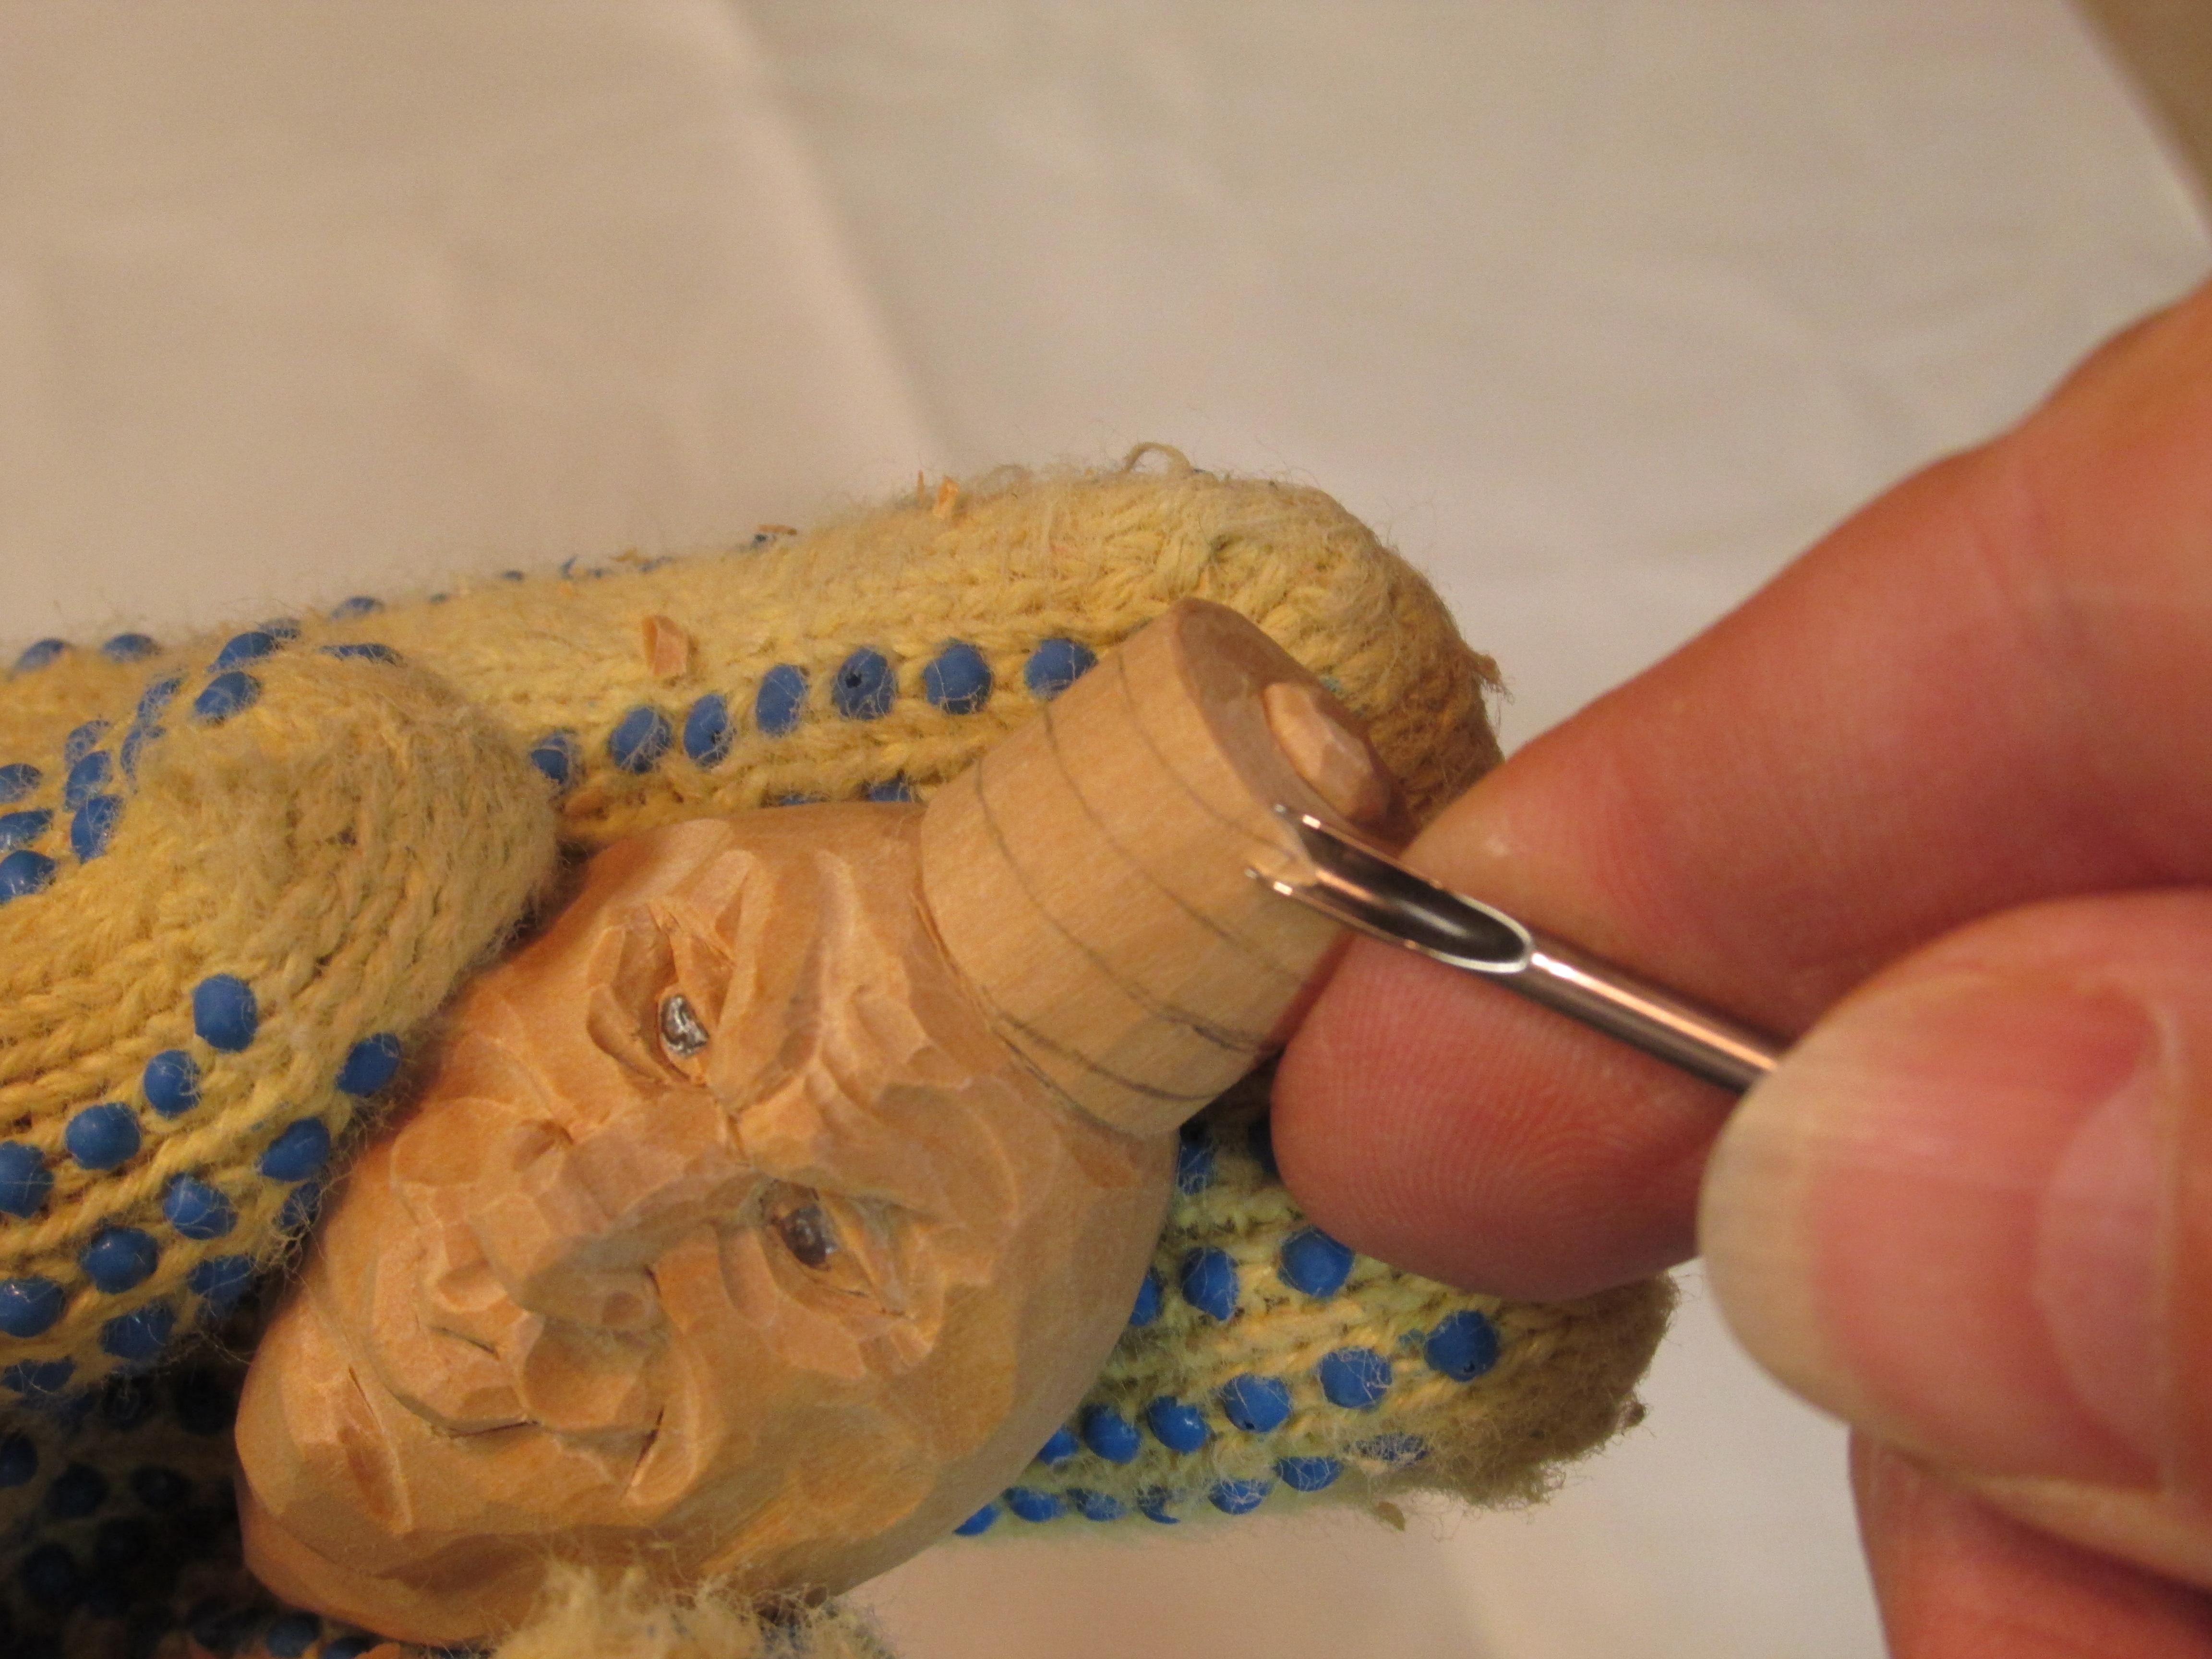
 Cutting the “threads”
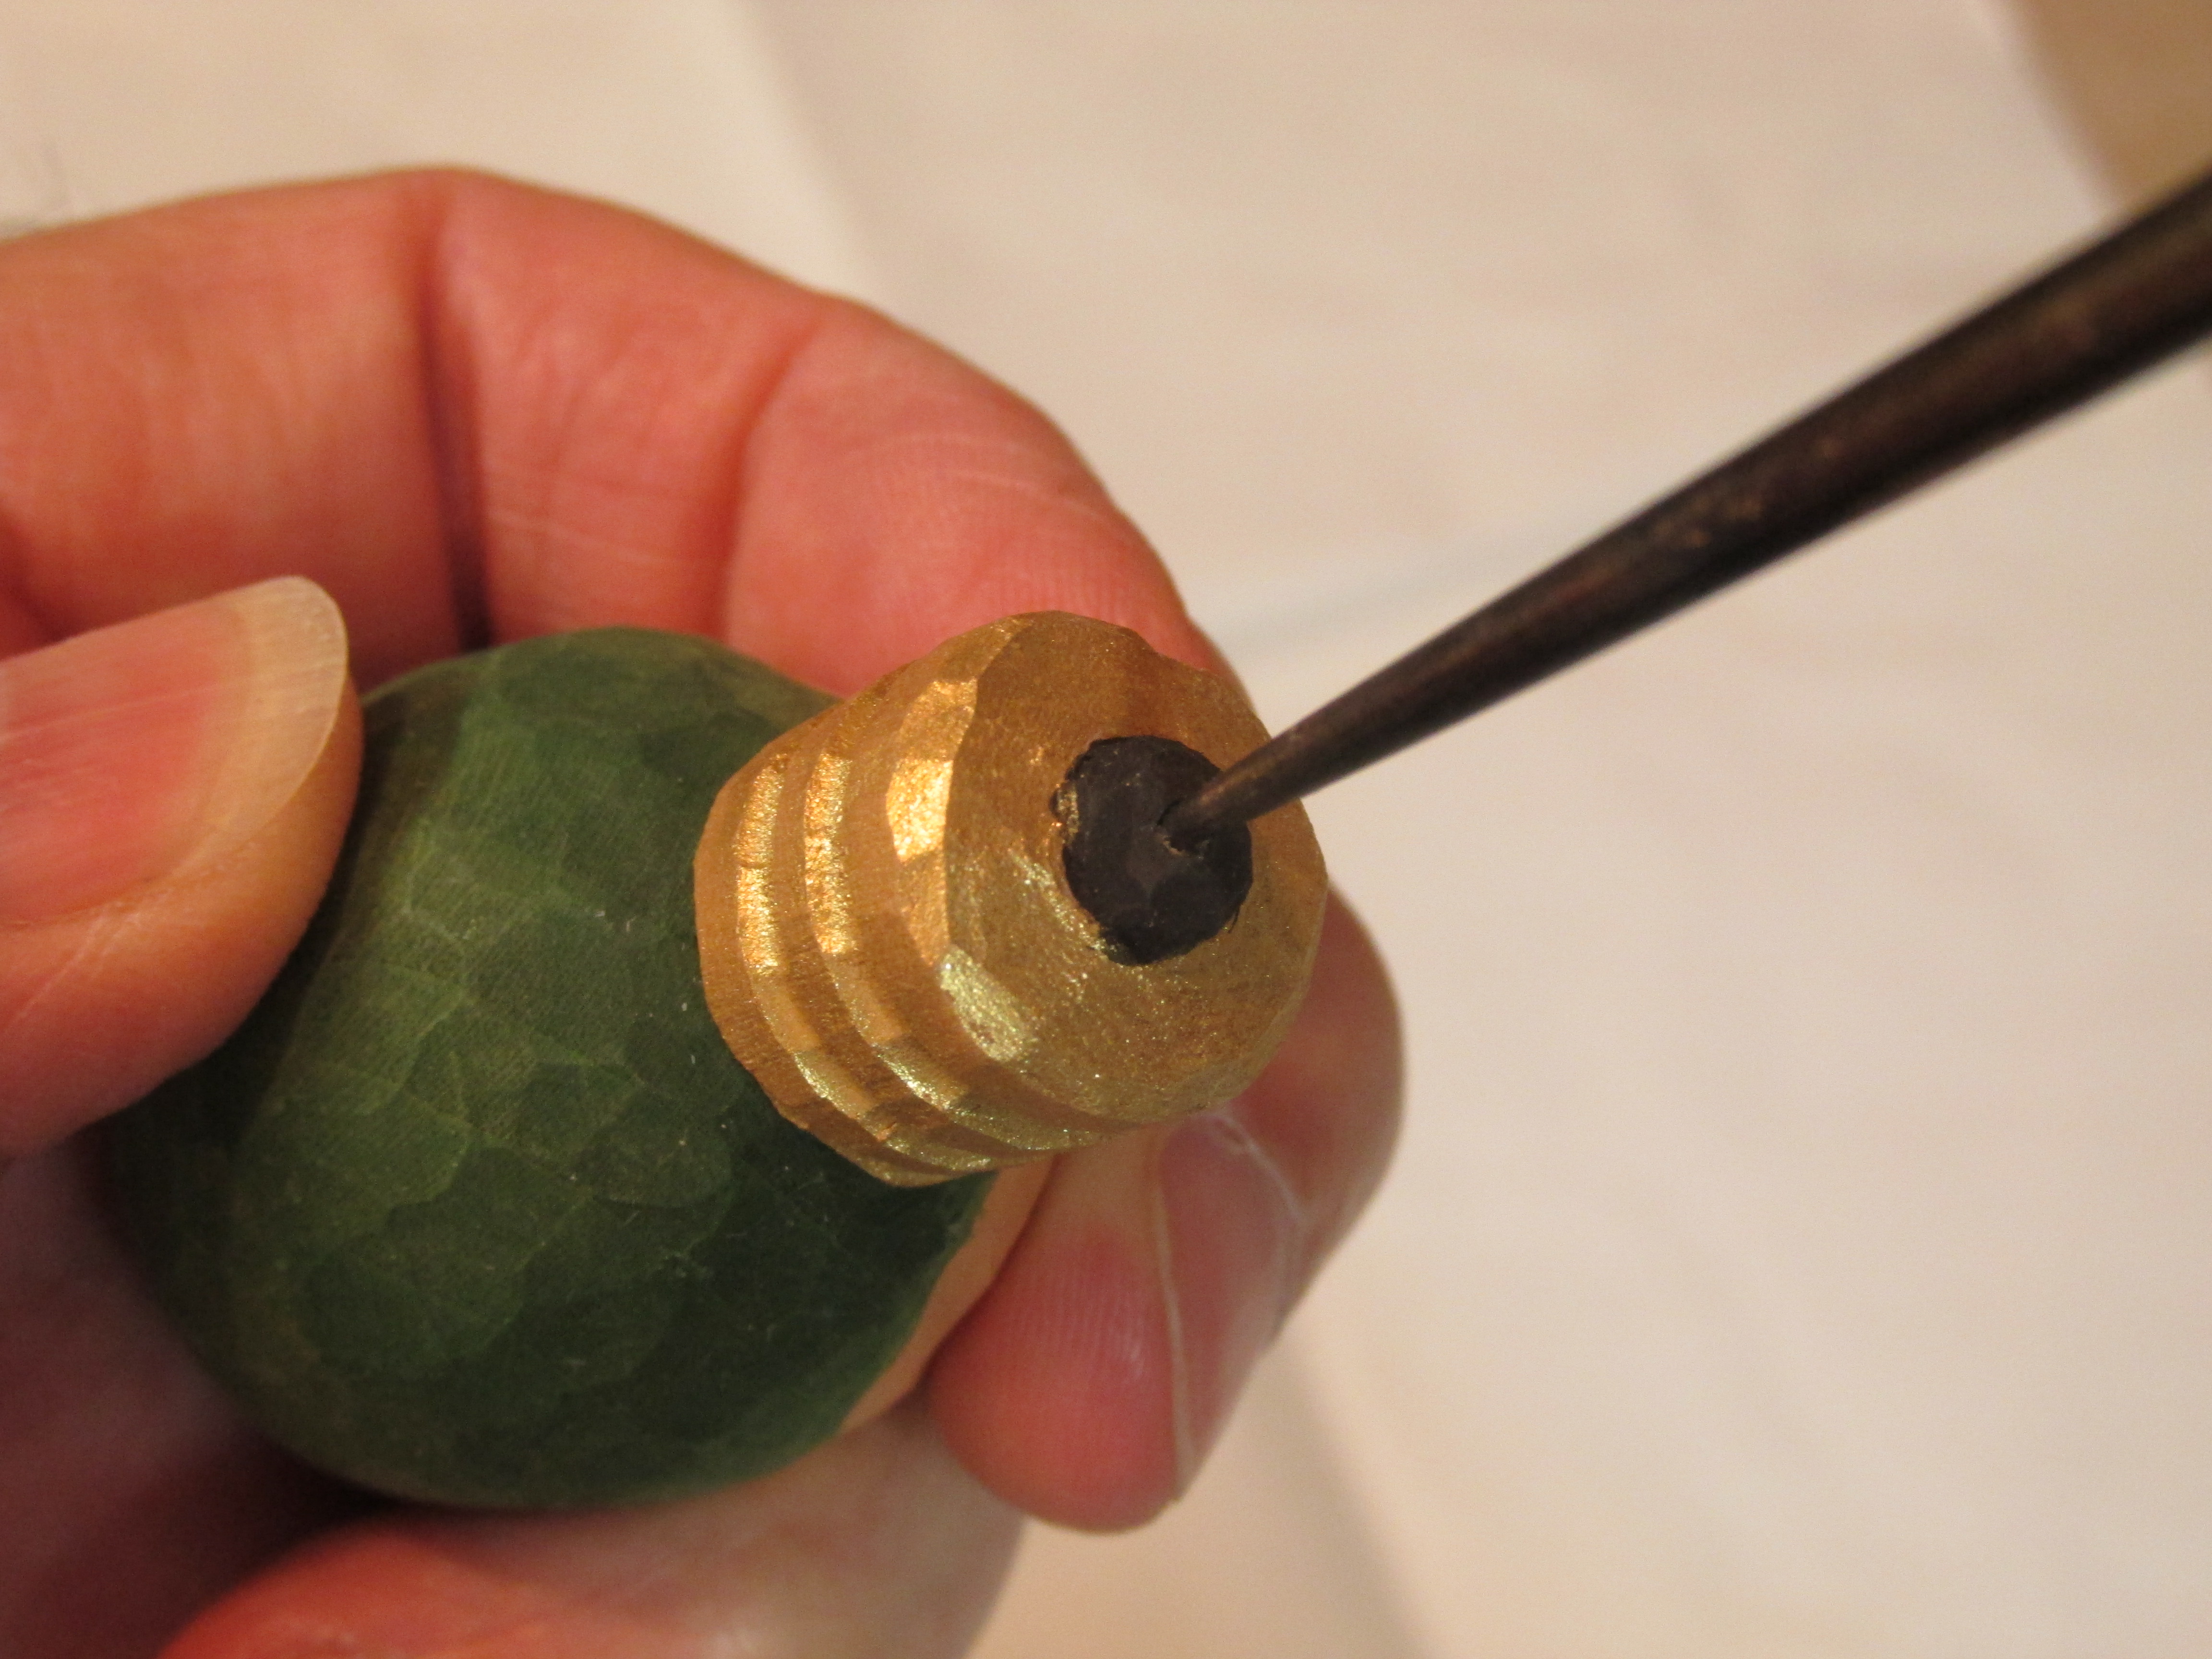
After painting, use a small awl or large needle to make a pilot hole in the center of the contact point.
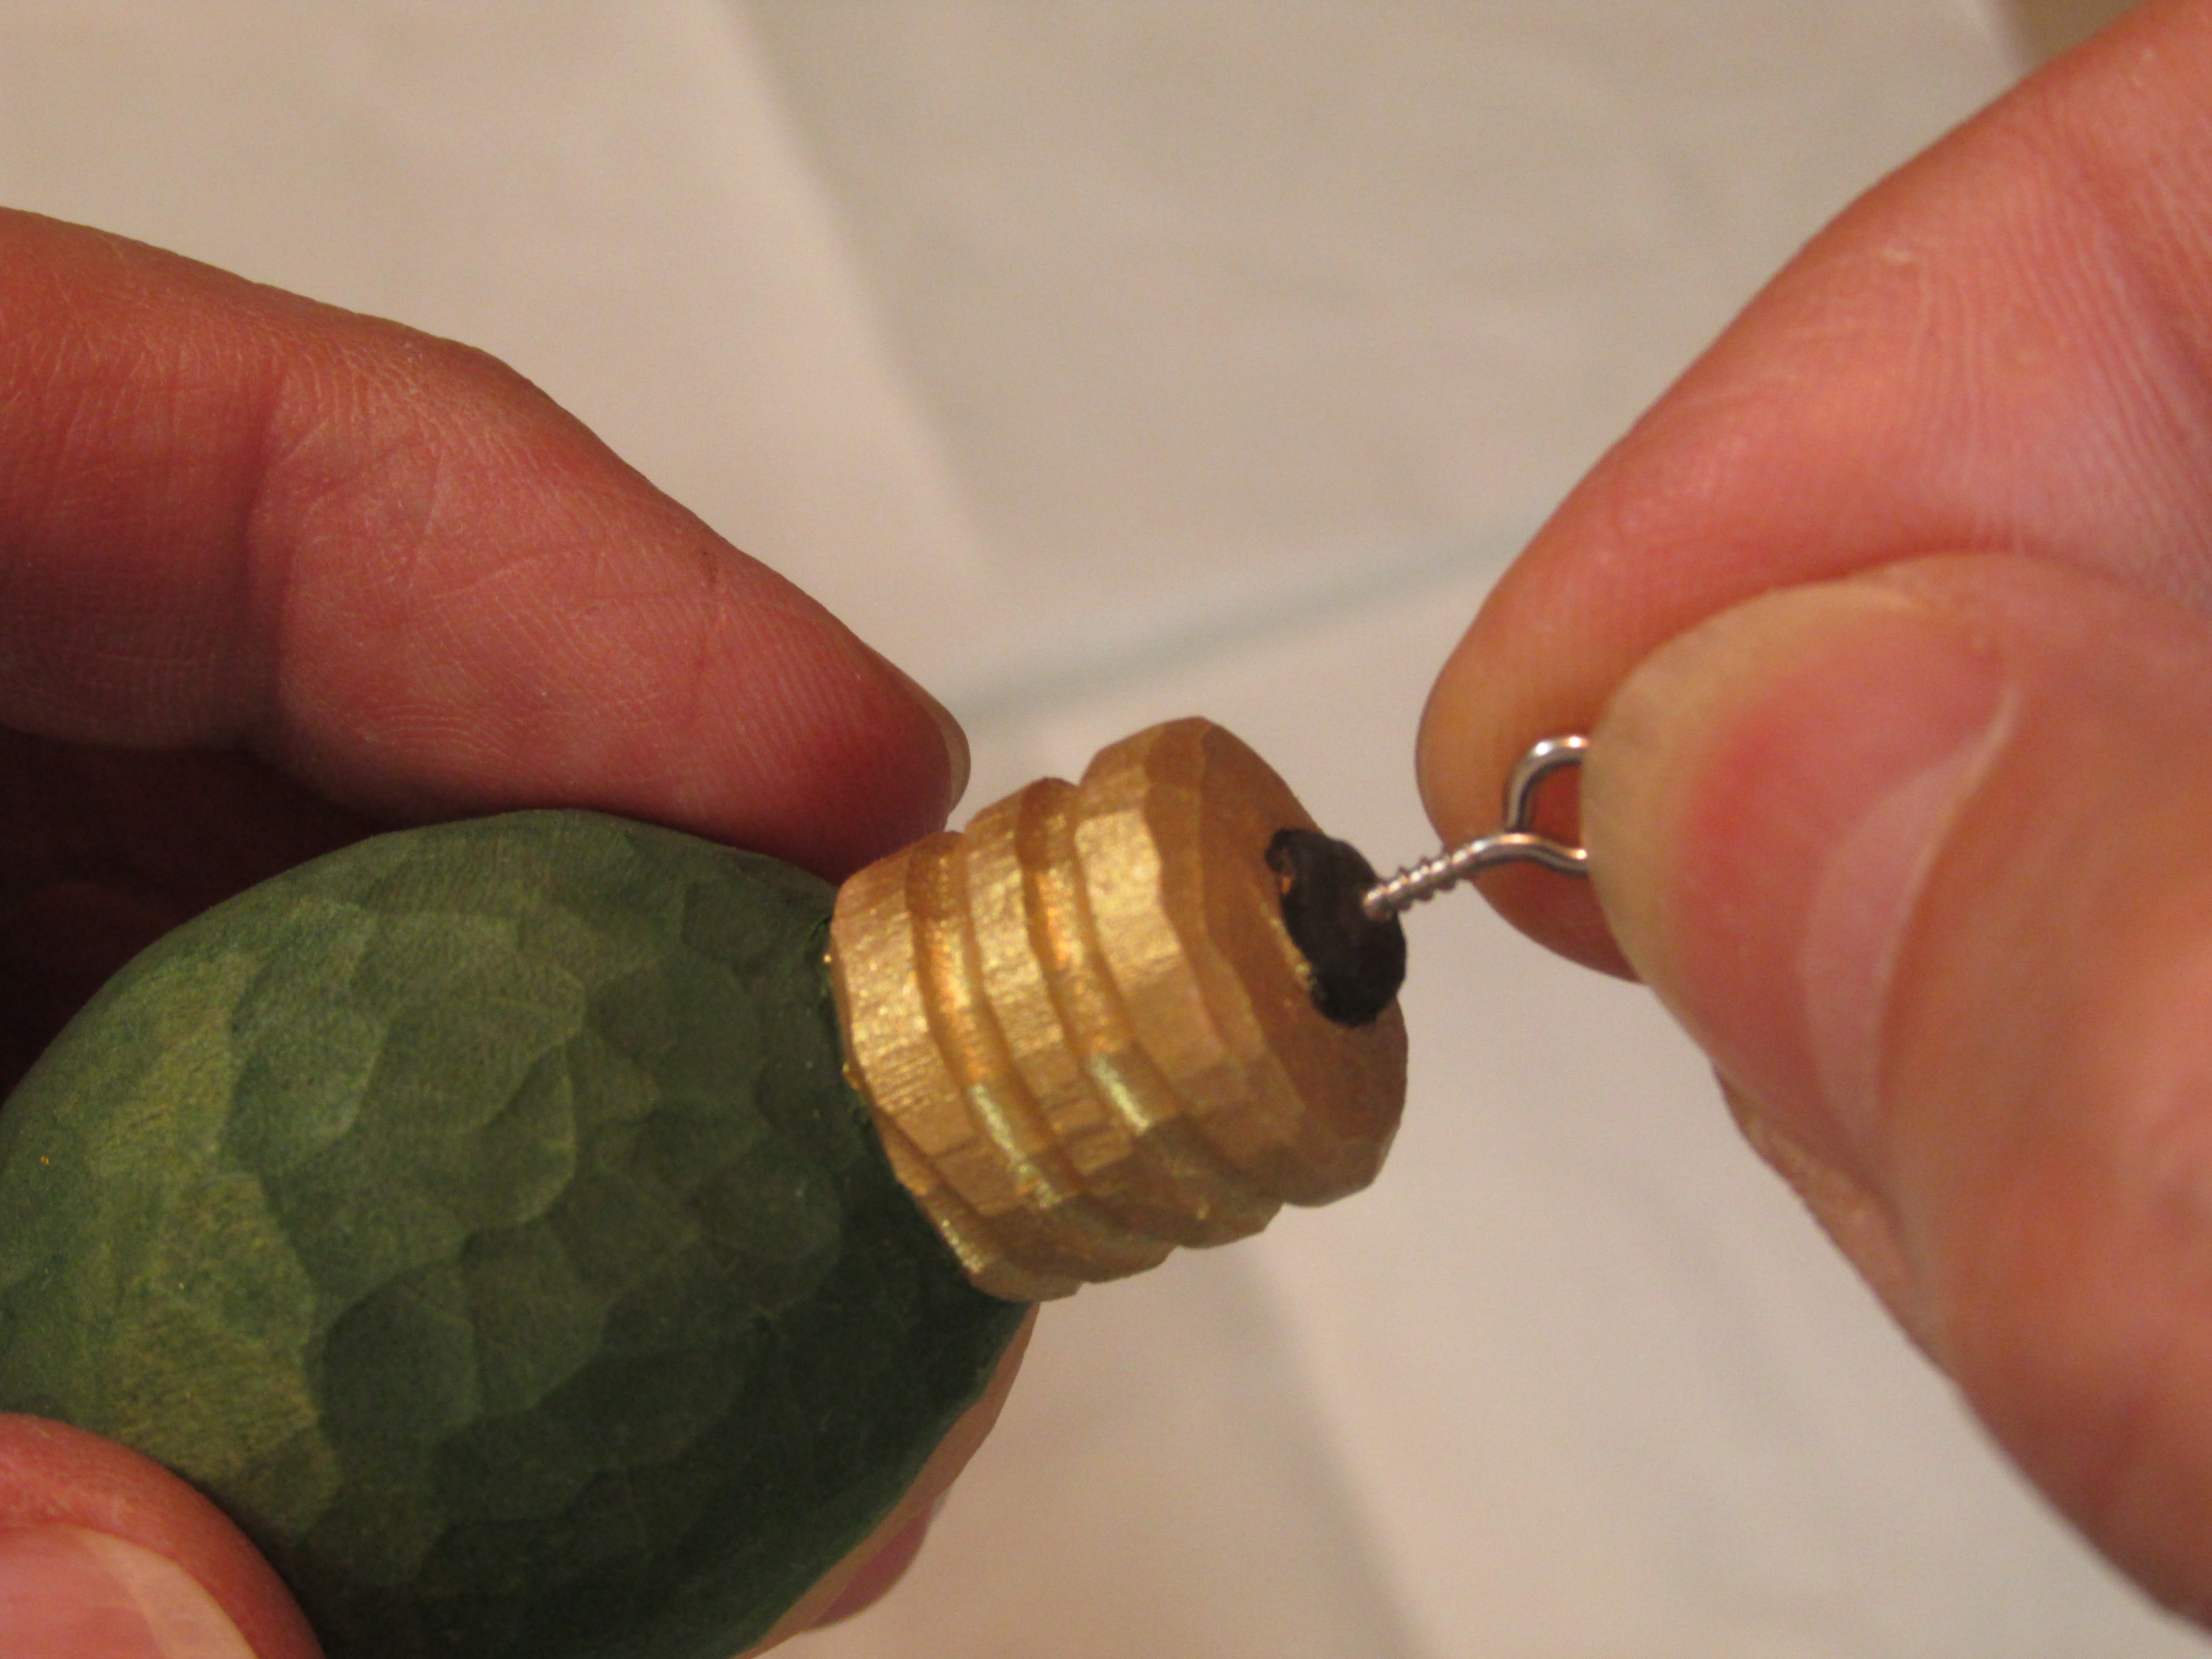
Add a small screw eye to allow hanging.


Click here to view more Dim Bulbs in my Flicker account.
I hope this provides enough detail to get your creative juices flowing. Happy carving.

Amazing! Its in fact amazing piece of writing, I have got much clear
idea about from this article.
Thanks for the feedback.